Tiropitakia (Mini Greek Feta Cheese Pies)
on Aug 19, 2022
This post may contain affiliate links. Please read my disclosure for more info.
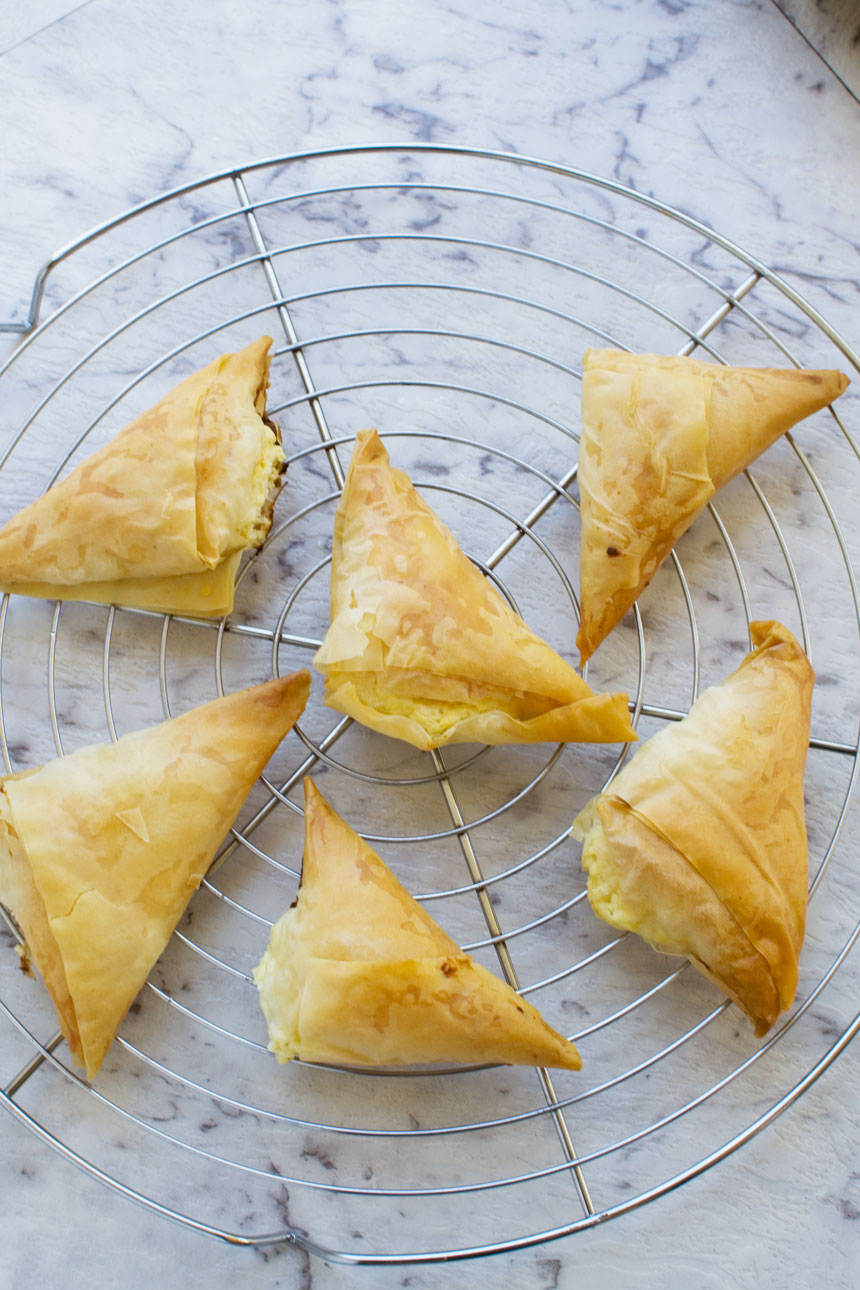
Need easy party food or appetizer ideas? These classic ‘tiropitakia’ or mini Greek cheese pies might be just what you’re looking for – a simple, very cheesy (of course) feta cheese filling wrapped in filo pastry and baked into irresistible crispy triangles. Made with just 6 main ingredients, they’re total crowd pleasers!

What are tiropitakia?
Tiropitakia (pronounced tir-op-it-AK-ia) literally means ‘little cheese pies’ in Greek.
Cheese pies (tiropita) are delicious cheese-filled pastries that are a popular ‘street food’ in Greece. You can grab one fresh from a bakery for breakfast or an any-time snack. But you’ll also find them at parties and celebrations of every kind in Greece.
Cheese pies come in many different varieties – made with different pastries and different cheeses, and even baked into different shapes (all delicious!). For instance, tiropitas that are curled around into a snail shape are very common even outside of Greece – have you seen them?
Why you’ll love them
Tiropitakia are something that everyone can have their own version of – including you! 😉
I think you’ll really love this easy version. A simple feta cheese mixture is folded into small phyllo (often spelt filo) pastry triangles. The triangles are baked until the pastry is crisp and the cheesy filling is soft and oozy. But you can (and should!) tweak the recipe to make it your own.
I hope that these remind you of your holidays in Greece… or make you want to book a holiday to Greece. They’re incredibly simple to make. Kids tend to like them, too.
Here’s what else is so great about them.
- Perfect finger food for parties, snacks, picnics and more.
- Super easy to make with just 6 main ingredients.
- Perfect for making ahead and freezing.
- Such a versatile recipe! It’s easy to tweak the cheese filling with different cheeses, flavors and herbs (read on for details) to make it exactly how you like it!
There won’t be any of these left at the party!
About the ingredients
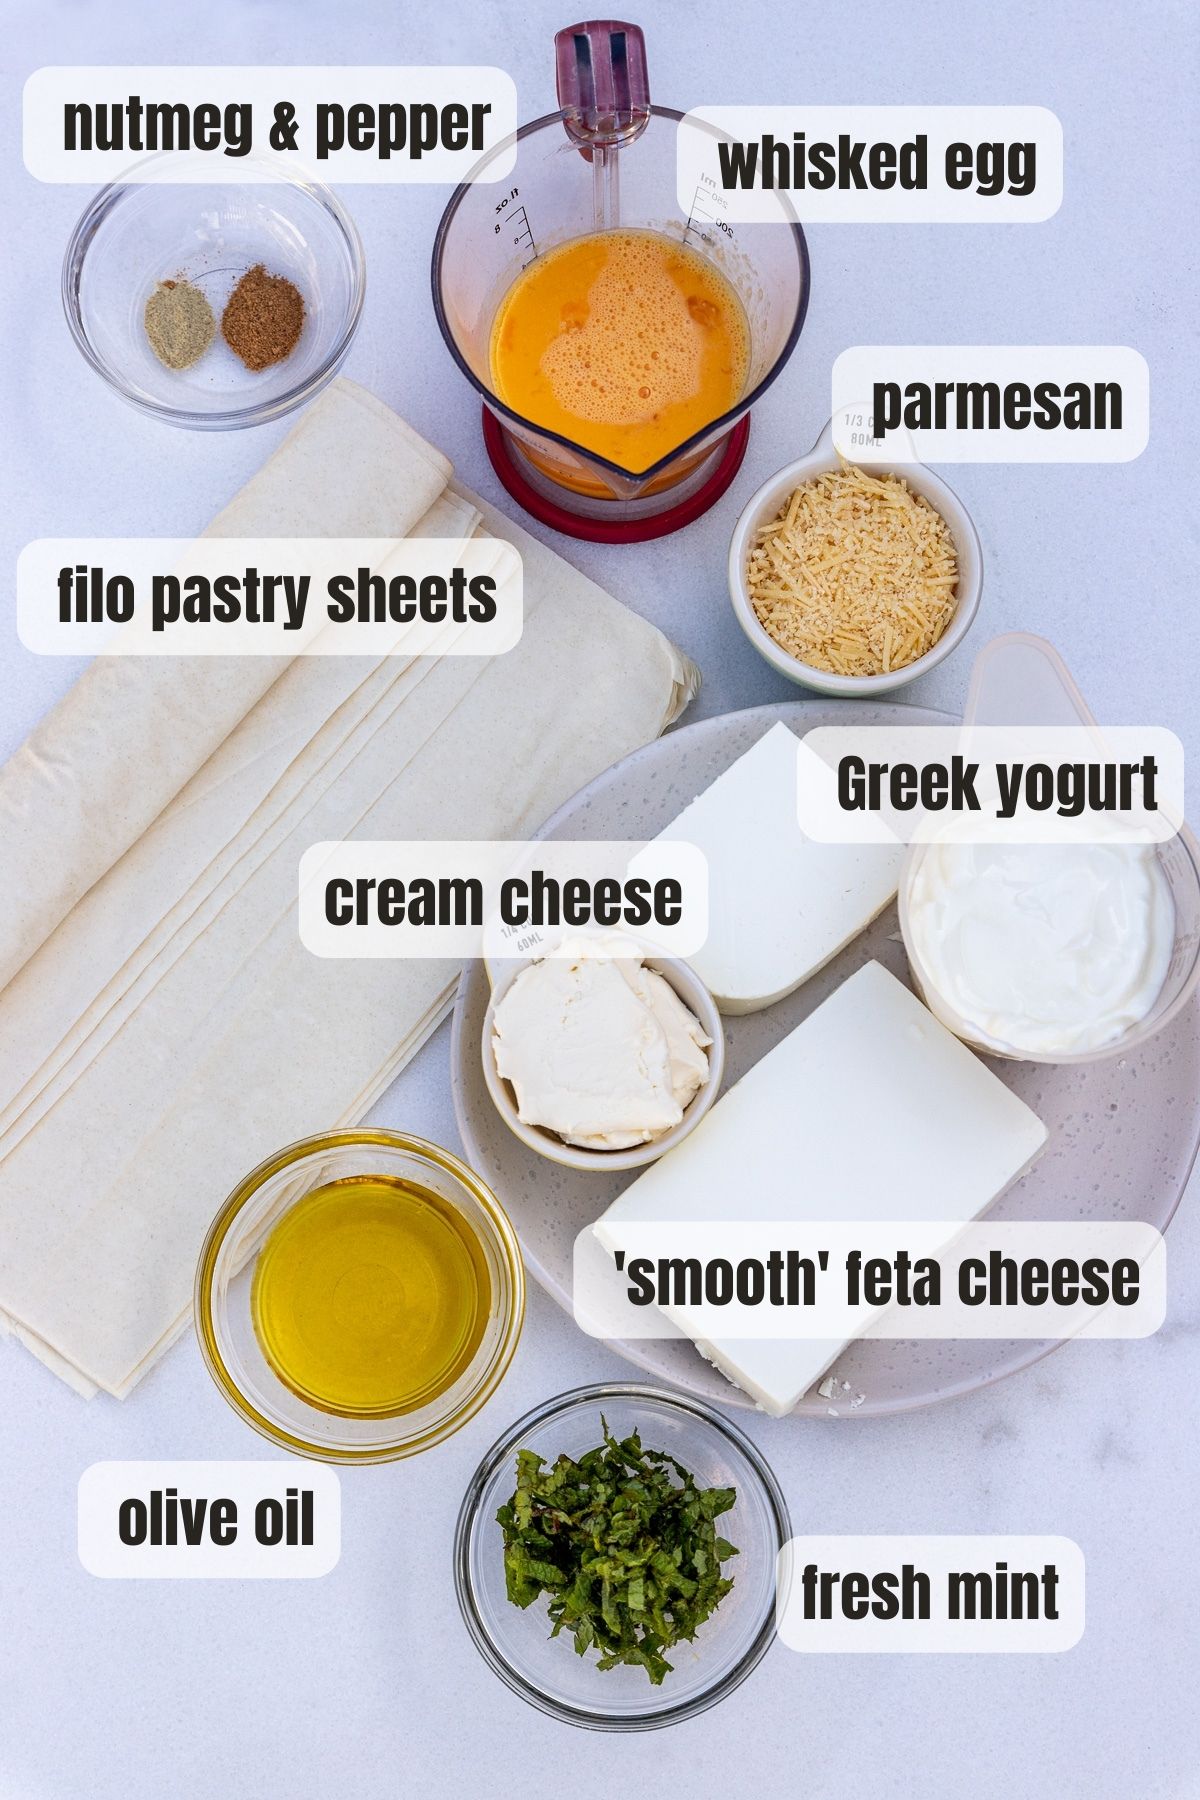
For the cheese pie filling, you’ll need:
Feta cheese: You can use any kind. However, since the tangy feta cheese is the star of the show in this recipe, I prefer either an authentic Greek feta or a softer type like Danish, French, Persian or ‘smooth’ feta.
If you’re in Greece, a soft Greek cheese called anthotiro is traditional in cheese pies. If you can find this (perhaps from a Mediterranean style deli?) please do try it in this recipe. But you can play around with types of cheeses! Any kind of tangy soft-ish cheese would work really well, including goat cheese, Mexican queso or even English Wensleydale.
Greek yogurt: This helps to keep the filling moist and soft. I like authentic Greek yogurt that’s made with just milk and yogurt cultures. As an alternative, use sour cream, crème fraîche, cottage cheese or ricotta cheese.
Cream cheese: For extra creaminess. Use plain or flavored.
A whisked egg: Just the one since you want the egg to act as a binder, not to make the filling taste ‘eggy’.
Seasoning: Ground black pepper and a hint of nutmeg, which goes really well with the cheese.
Parmesan: For extra strong cheesy flavor in your tiropitakias! If you like, you can substitute with a different type of cheese, such as a Swiss cheese or a strong cheddar.
You can also add a little chopped fresh mint or dill, or even dried oregano for extra flavor.
For the cheese pie crust:
Filo pastry: I use either fresh or frozen, but always store bought.
Filo pastry size: The filo pastry I use is about 16.5 inches long and 10.5 inches wide. I place it with the longest edge towards me and cut 5 strips out of it to make 5 miniature pies. It doesn’t matter if your pastry sheets are a different size. Just make sure each strip is 3-4 inches wide.
Olive oil: For brushing over the unbaked filo pastry and assembled pies. You’ll need around a tablespoon for each sheet of feta (5 pies). Feel free to use melted butter instead.
Optional: A few sesame seeds to sprinkle over before baking.
How to make tiropitakia
You might think it’s fiddly and complicated to make these little Greek pies. But no, I promise it’s super easy, and the presentation doesn’t have to be perfect. I actually think they look more delicious when a bit of the filling oozes out during baking!
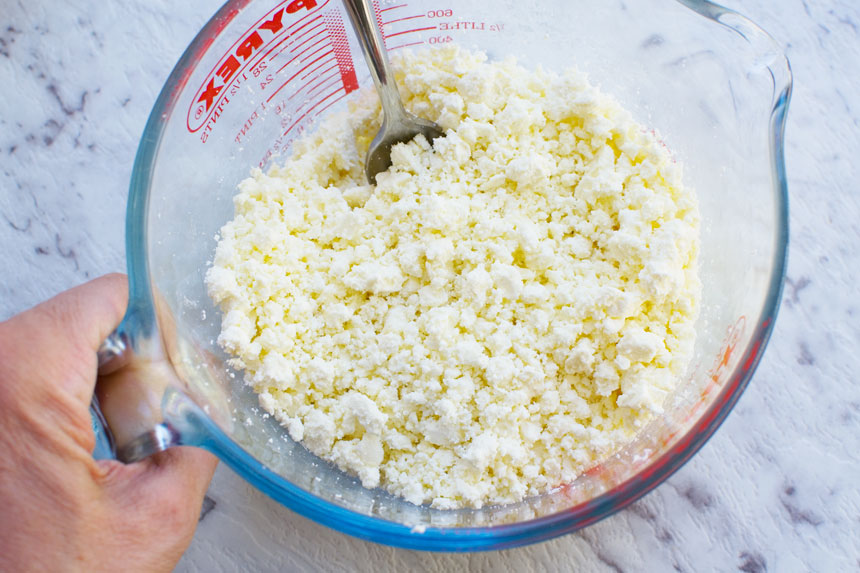
Step 1: Mash the feta with a fork.
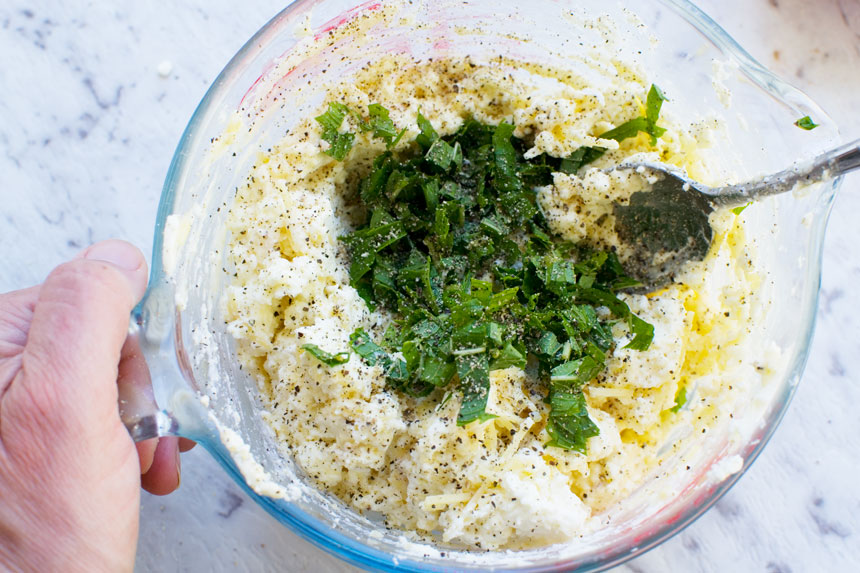
Step 2: Mix in all of the other filling ingredients. You’ll see that this time I decided to add some chopped mint.
Step 3: Now prepare to construct your filo triangles! Start by laying out one sheet of filo dough. Brush on around a tablespoon of olive oil with a pastry brush.
Step 4: Lay another sheet of pastry over the top. It doesn’t have to be perfectly neat. Cut into 3-4 inch (8-10cm) wide strips with a sharp knife.
Step 5: Put around a heaped tablespoon of cheese mixture in the centre of one end of the first pastry strip. Fold the corner over the mixture, and continue folding until you have a little pastry triangle!
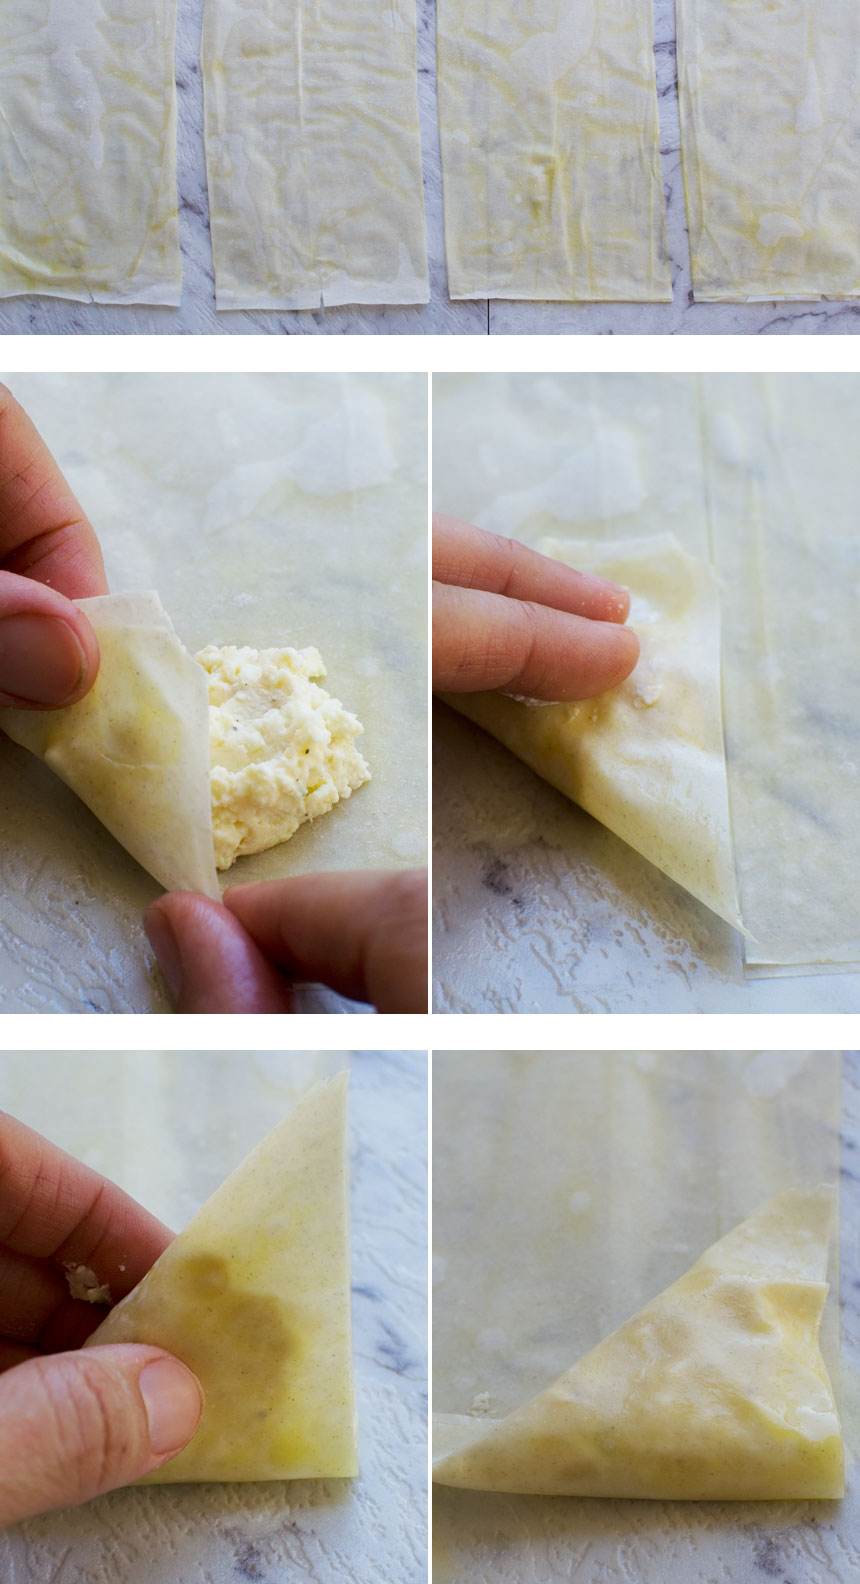
Step 6: Bake for 20 to 25 minutes or until golden brown and crispy.
Helen’s Top Tips
- Drape a damp tea towel over the filo pastry sheets until you’re ready to use them. This will stop them drying out.
- Making a mess? No worries! Bits of cheese might fall out when you first start folding and the pastry might tear. But by the time you’ve folded the whole strip into a triangle, all the mixture will be magically inside!
- When you place the folded triangles onto the baking tray, press down lightly so that the filling spreads out evenly inside the pie.
- Don’t worry if tiny bits of cheese mixture ooze out of some of the pastry triangles when they’re cooking. I think it makes them look and taste even more delicious!
Variations
This recipe is pretty versatile! Sometimes I use ricotta cheese instead of Greek yogurt. Sometimes I add a little chopped fresh mint, dill, or dried oregano. Other times I add different cheeses such as gruyere or tasty cheddar into the mix for extra tang.
Here are some other ways you can make these bite-sized cheese pies your own:
- Add a little wilted chopped (and squeezed!) spinach.
- Add chopped sun dried tomatoes or chopped olives.
- Grate a little lemon zest into the cheese mixture.
- Use flavored cream cheese such as garlic and herb.
- For a fun twist, add some mashed sweet potato or butternut squash.
- Try them with shortcrust pastry (for ‘tiropita kourou’) or puff pastry instead of filo. You’ll find cheese pies made with all kinds of pastry in Greece!
How to serve
Whether you’re making your tiropitakia for a party, or just to have in the freezer for quick appetizers or snacks, they’re best served straight out of the oven.
They’re delicious handed around just as they are. But you could also serve them with a dip. Great options could be a simple marinara sauce like the one I make for this Greek baked eggplant recipe. Or how about a 10-minute homemade Greek tsatziki sauce?
Mini Greek cheese pies like these would also be fantastic served as part of a Greek meze platter, right? Serve with olives, pita chips or bread, Greek zucchini fries, these quick and easy gigantes (Greek ‘big’ beans!) and dips.
Or simply serve them for lunch together with some of this tasty Greek ‘fakes soupa’ (lentil soup).
For more options, see this great list of Greek appetizer ideas.

Recipe FAQ
Yes! Freeze the raw phyllo triangles in a single layer on baking sheets, then pop them into freezer bags. You can freeze them for up to 3 months. Just brush the tops with olive oil and cook straight from frozen, adding about 10 minutes on to the cooking time. They’re done when the pastry is medium brown and crisp.
You can keep any kind of Greek cheese pies covered in the fridge for 2 to 3 days. Reheat for around 10 minutes at 355F/180C until hot and crisp again. Alternatively, you can reheat them in an air fryer for about 5 minutes.
Yes, absolutely! Tiropitas are made with different kinds of pastry, not just filo. To make tiropitakia with shortcrust pastry (tiropitakia kourou) or puff pastry, you’ll only need one pastry layer. Simply cut out squares of pastry and fold them over and press down the edges with a fork to enclose the filling.
Just in case you were wondering! They are both popular savory Greek pastries, but a tiropita is filled with a cheese mixture whereas a spanakopita includes spinach as well. Sometimes a spanakopita doesn’t even contain any cheese.
Got leftover filo pastry? You’ll love these crispy mushroom mini pies, this spinach and feta filo pie (spanakopita), these Greek filo parcels with tzatziki and these amazing feta filo pies with honey. Why not keep a mixture of these in the freezer for ‘party emergencies’?!
More easy party appetizers
- Have you tried these crispy halloumi chips or fried halloumi bites yet? Make them once and they’ll beome a firm family favorite!
- A bowl of this really easy 10 minute tomato salsa and a batch of these Greek baked pita chips is all you need to get the party started!
- These 6-ingredient mini quiche lorraine are always one of the first things to go at the party.
- Why not serve little squares of this traditional 5-ingredient Spanish omelette on cocktail sticks?
- This 5-minute roasted red pepper and feta dip is so much nicer than supermarket versions.
Or see all my party food.

Tiropitakia (Mini Greek Feta Cheese Pies)
Equipment
Ingredients
- 10.5 ounces feta cheese, 'Smooth' feta or Danish, French or Persian feta is a good option, but any feta works. Greek cheese 'anthotiro' is the perfect choice if you can find it.
- ½ cup Greek yogurt, Substitute with ricotta cheese, more cream cheese, cottage cheese or even sour cream.
- ½ cup cream cheese
- ⅓ cup parmesan cheese, Grated, about a large handful. Substitute with any grated cheese (strong flavored is best).
- 1 egg, Lightly whisked
- ¼ teaspoon nutmeg
- ¼ teaspoon black pepper
- 2 tablespoons fresh mint, chopped, or dill, or 2 teaspoons dried oregano (optional)
- 9 ounces filo pastry, About 12 large sheets of filo pastry or ⅔ of a 13 ounce/375 gram box. Of course this will vary depending on the brand.
- ⅓ cup olive oil
- sesame seeds, Optional, for sprinkling over just before baking.
Instructions
- Mash the feta in a medium bowl, then add the yogurt (or substitute), cream cheese, parmesan (or other cheese), egg, nutmeg, herbs (if using) and black pepper. Mix well.10.5 ounces feta cheese, ½ cup Greek yogurt, ⅓ cup parmesan cheese, 1 egg, ¼ teaspoon nutmeg, ¼ teaspoon black pepper, 2 tablespoons fresh mint, ½ cup cream cheese
- Preheat the oven to 355F/180C. Then lay a sheet of filo pastry on a clean work surface or large chopping board widthways with the longest edge towards you. Brush all over with olive oil (about a tablespoon for a large sheet of pastry).9 ounces filo pastry, ⅓ cup olive oil
- Lay another sheet of pastry on top, then cut the pastry sheets into equal 3-4 inch (8-10 cm) wide strips (see photos in post or video).
- Put about a heaped tablespoon of mixture in the middle of one end of the first strip. Fold the pastry over it diagonally, then keep folding until you have a small pastry triangle and all the filling is enclosed. Place the triangle on a baking sheet.
- Repeat with the remaining pastry strips and pastry sheets until you've used up all the filling. You should have 25 to 30 cheese triangles.
- Brush the tops with a little extra olive oil. If you like, sprinkle over a few sesame seeds, or leave them plain. Bake for 20-25 minutes until the cheese pies are golden brown and crispy. Let cool a little, then if possible serve quickly while they are still warm and crisp.



The correct term for this cheese triangles is ” Tiropitakia ” because they are small. The term ” Tiropita ” used when we do the pie in the pan . Actually it means Chesse pie and little cheese pies. This are the little cheese pies. Also a really good feta cheese you can find it at Bj’s if you live in state of NY imported from Greece which means that is original . Olymbos feta cheese is the brand. I live in Rochester NY . In the city of NY you can go to the Greek supermarket and there find original Greek feta cheese as well. I insist because the flavor of the cheese makes the difference. Tiropita we call anything that is covered with fillo dough and includes feta cheese or mix 3 or 4 different types of cheese, eggs at list 4 or 5 organic is better, pepper and yogurt. This is the basic. I am Greek fillo pies is my knowledge while I grow up with them ! A lot of different recipes. Also we fry them.
Hi Eleni! Thank you so much for the information. I always really appreciate hearing proper Greek feedback on my recipes! I also really like the idea of mixing several types of cheese in a cheese pie. I’m in Australia. We can get Greek cheeses here but you have to really look for them! We can get authentic Greek feta though which is great! Thanks again and Happy Thanksgiving!
These are beautiful. It’s been ages since I’ve used phyllo dough. Why?? I have no idea!
Hi! Happy New Year! Yes, it’s one of those things that you always think will be difficult to use, but it isn’t really!