Easy Biscoff Cheesecake (Baked)
on Feb 10, 2026
This post may contain affiliate links. Please read my disclosure for more info.
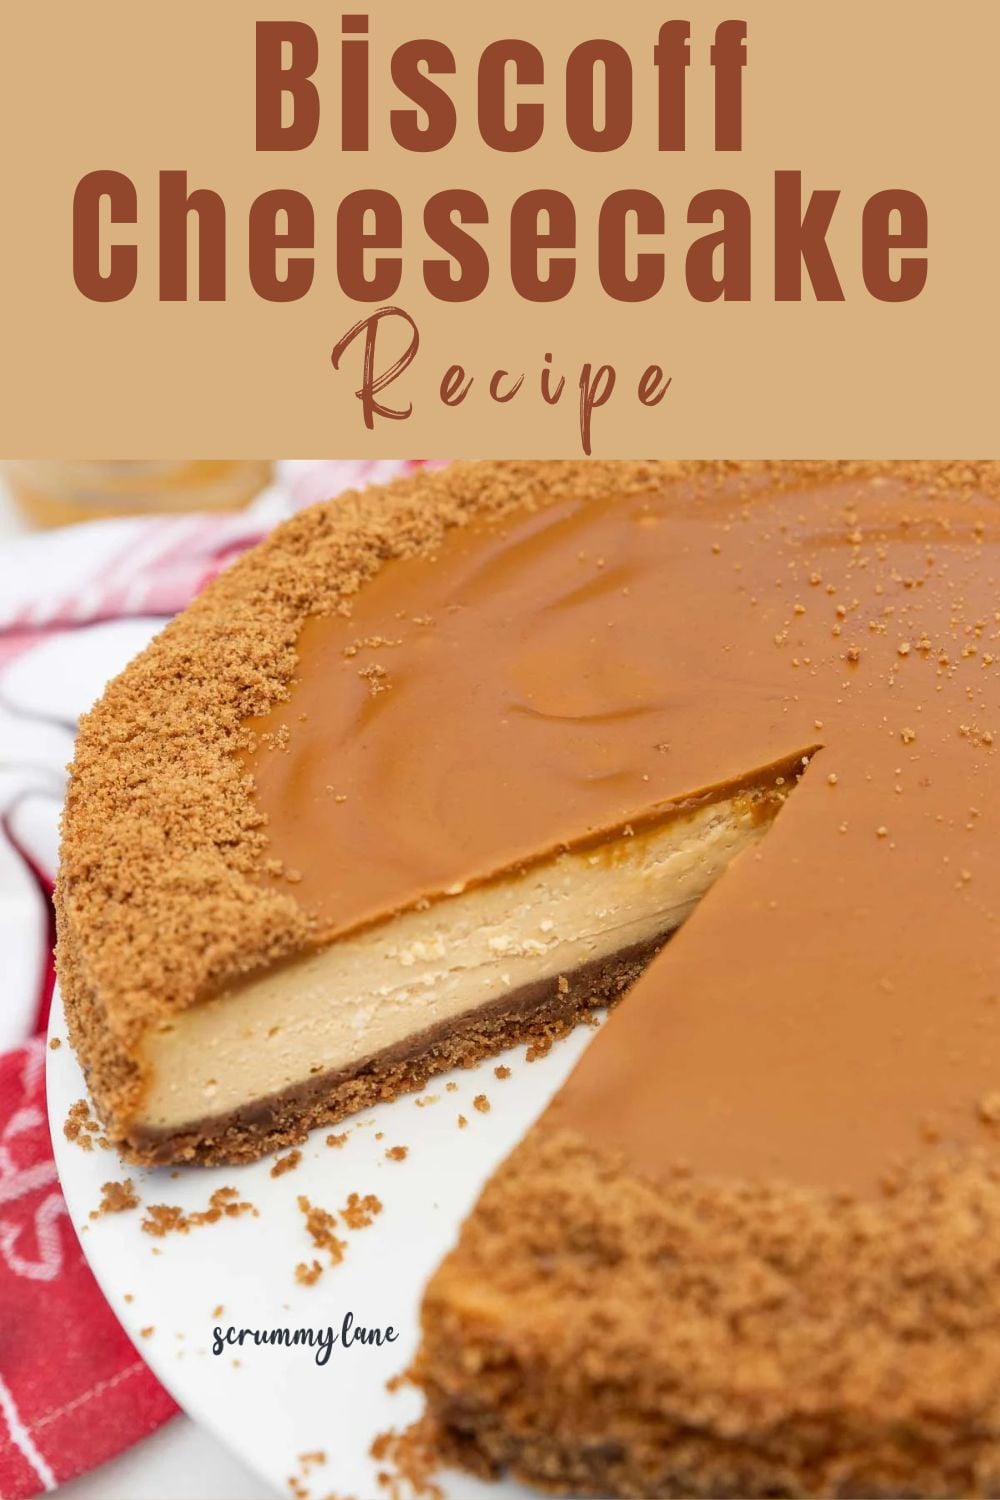
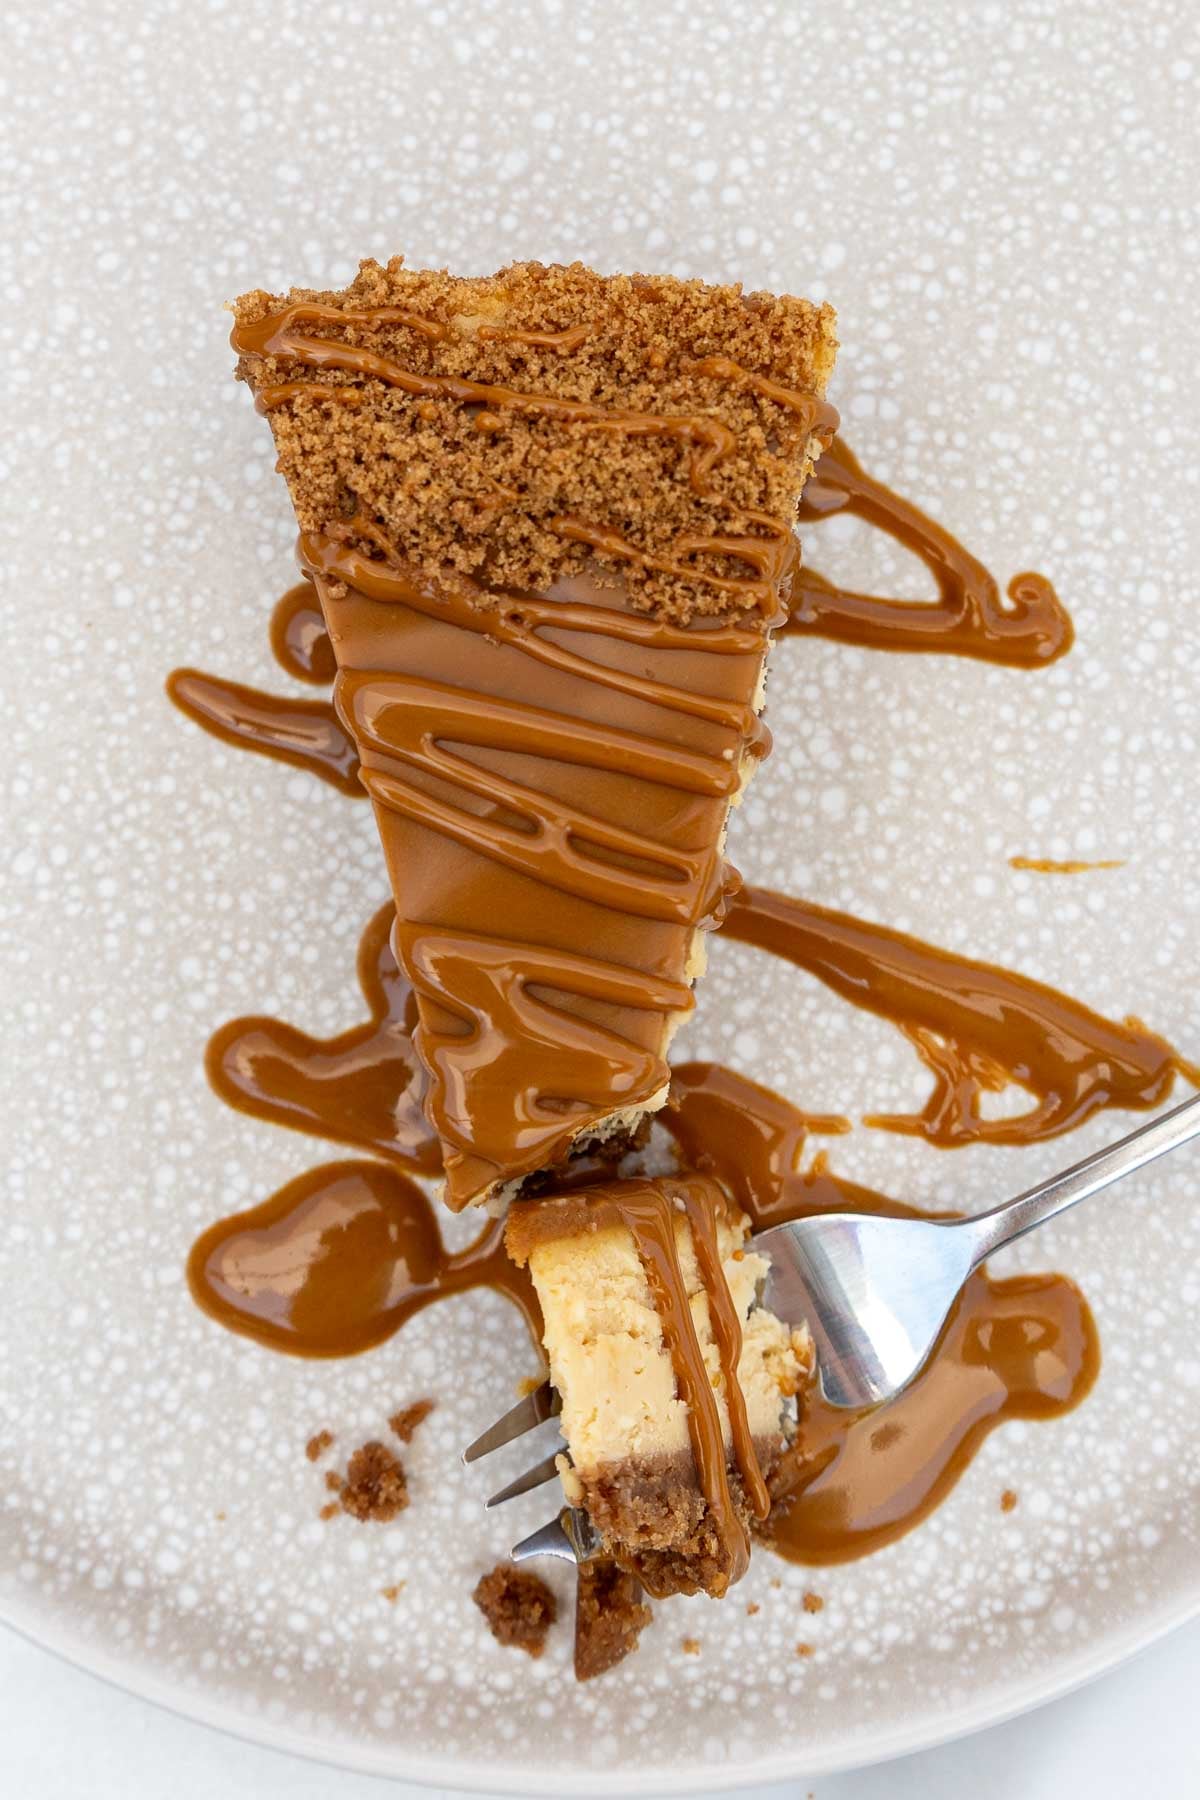
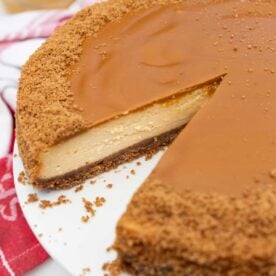
You’ll want to keep eating just one more spoonful of this baked Biscoff cheesecake! It’s something about the mildly spiced, not-too-sweet butterscotch flavor in the crunchy, buttery base, creamy cheesecake filling and Biscoff spread topping. The best part? You’ll need just 8 simple ingredients to make it.
An easy & impressive but not-too-sweet Biscoff cheesecake
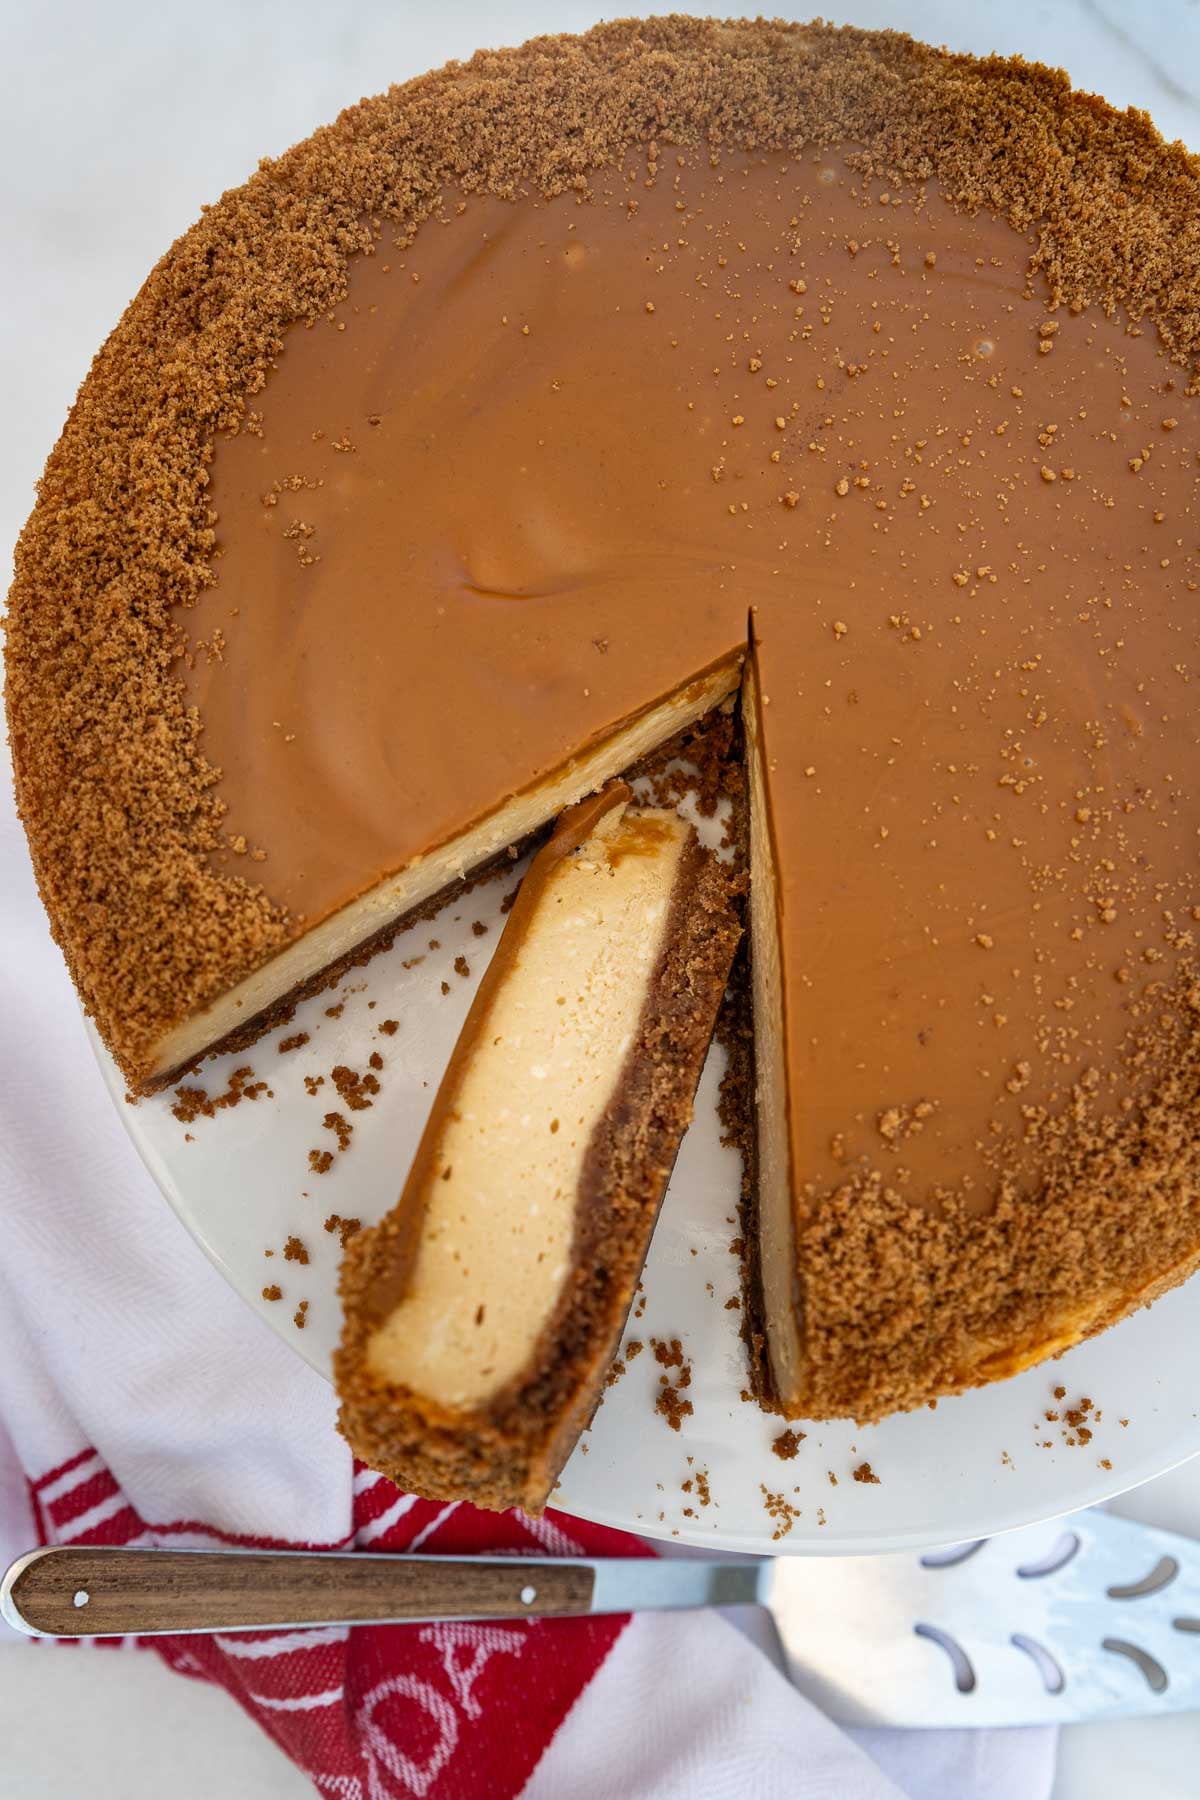
This easy Biscoff cheesecake has it all. It’s so simple to make with just a few ingredients, but it’s also rather unique. It has the smooth, velvety texture of a New York cheesecake that everyone loves, but it’s also packed with interesting butterscotch flavor in the crust, filling, and topping. You could say it’s a ‘triple Biscoff cheesecake’!
You might expect this dessert to be rather sweet. But it actually isn’t! I don’t think the cheesecake filling needs any extra sugar so I use my favorite way of lightly sweetening a cheesecake – stirring melted white chocolate into the mixture instead.
This is a dessert that’s both surprisingly easy to make, and sure to wow your dinner guests!
📌Recipe snapshot
- Prep: 30 minutes
- Cook time: 40 to 45 minutes
- Chilling time: At least 4 hours, or overnight
- Serves: 8 to 10 (you only need a small piece!)
- Key ingredients: Biscoff cookies, butter, Biscoff spread, cream cheese, heavy cream, eggs, white chocolate
- Why you’ll love it: Just a few ingredients, crowd-pleasing baked New York cheesecake style, mildly-spiced butterscotch flavor in every bite, just melted Biscoff spread to make the topping, looks impressive, not too sweet, perfect make-ahead dessert
About the ingredients
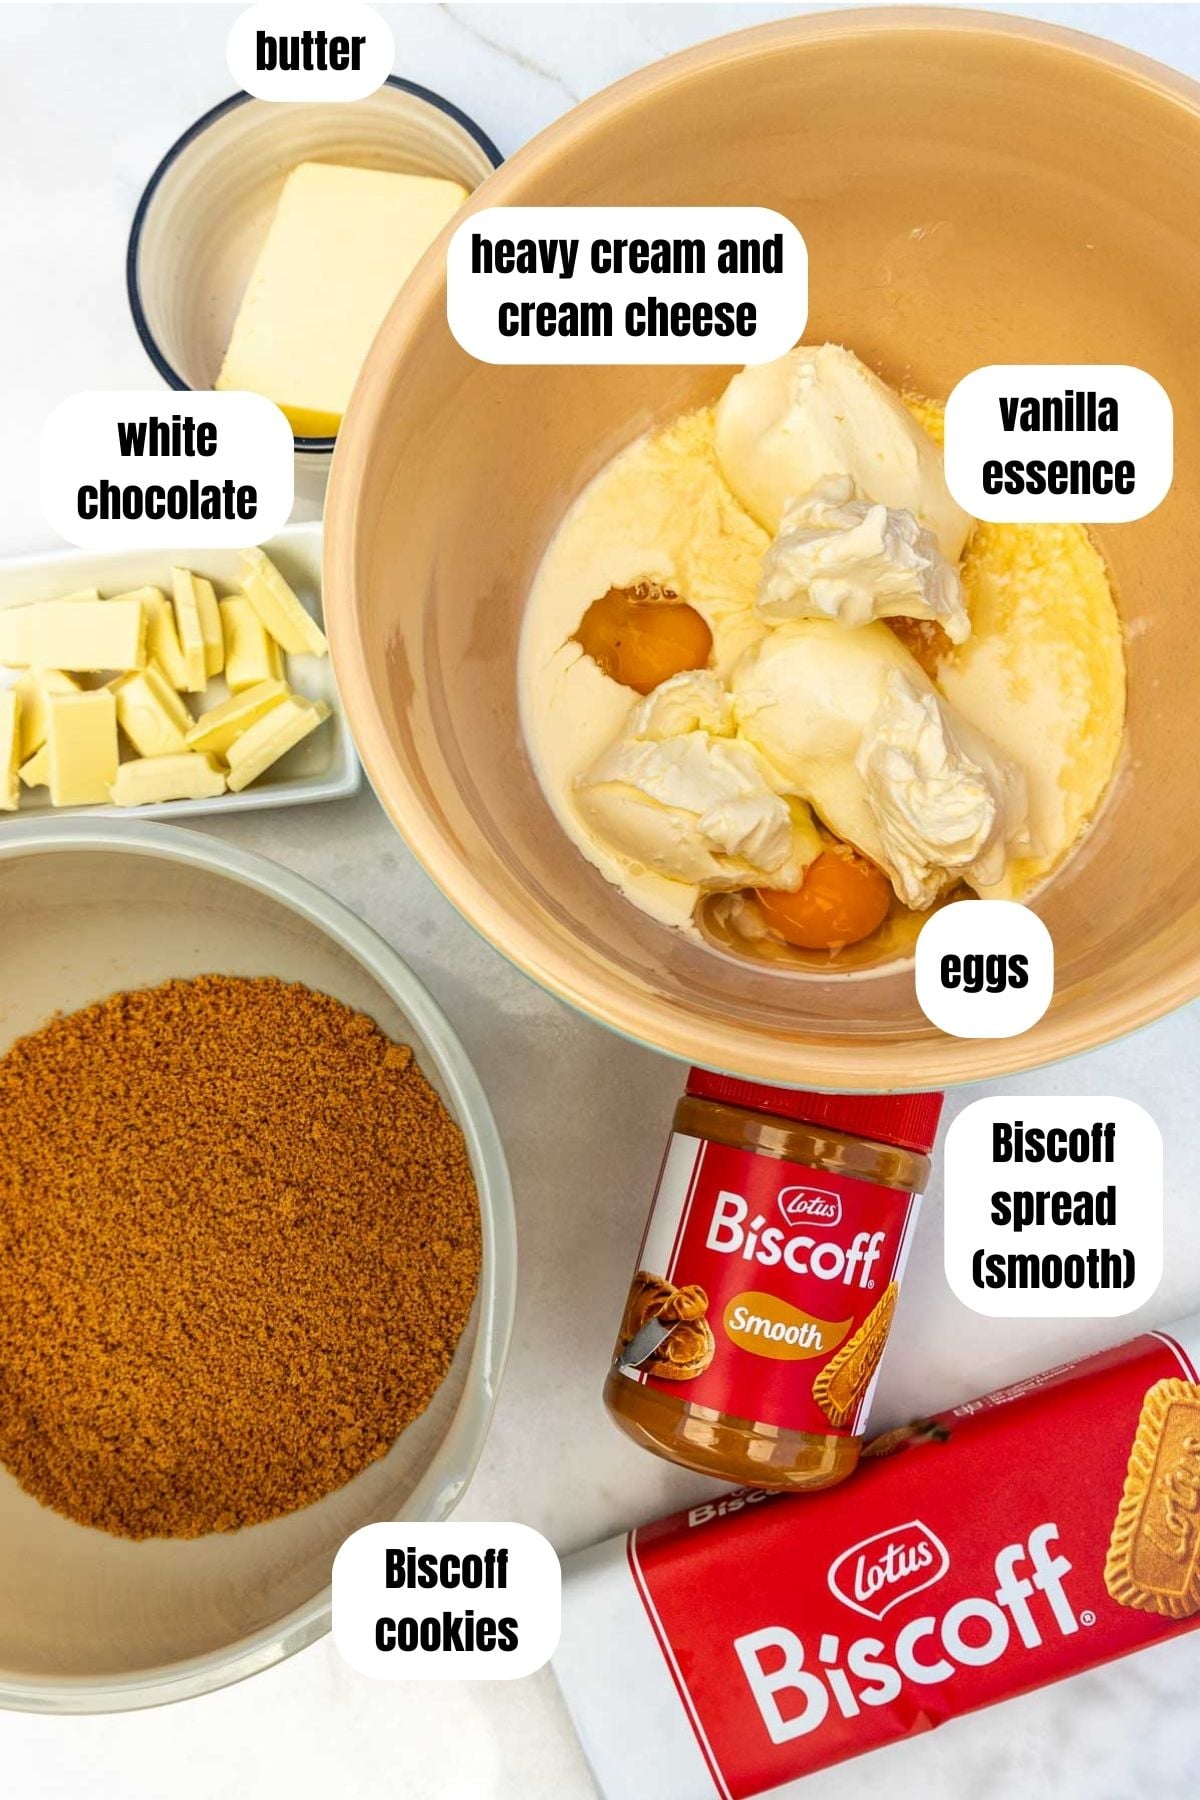
- Biscoff cookies: Lotus Biscoff from Belgium is the official brand. However, you might see different brands called Speculoos or Speculaas, or caramelized, spiced or cinnamon cookies/biscuits. If you’re struggling to find them, try a European style supermarket such as Aldi. If you really can’t find any of these cookies, just use Graham crackers and add half to one teaspoon of cinnamon and a large pinch of nutmeg or allspice.
- Butter: You’ll use melted butter to bind together the cookie crumbs for the crust. I quite like using salted butter as I think it really enhances the caramelized flavors in the cheesecake.
- Cream cheese: Don’t use reduced fat or ‘light’ cream cheese in a cheesecake. Take it out of the fridge for a while so that it’s easier to whisk together with the other ingredients.
- Heavy cream: This may be called thickened cream or double cream where you live. As with the cream cheese, don’t use ‘light’ or reduced fat.
- Eggs: You’ll need 2 large eggs to make this recipe.
- Vanilla extract: Just a teaspoon will add a subtle depth of flavor to complement the caramelized, spiced flavor of the Biscoff cookies and spread. If you skip this, your cheesecake will still be very delicious without it!
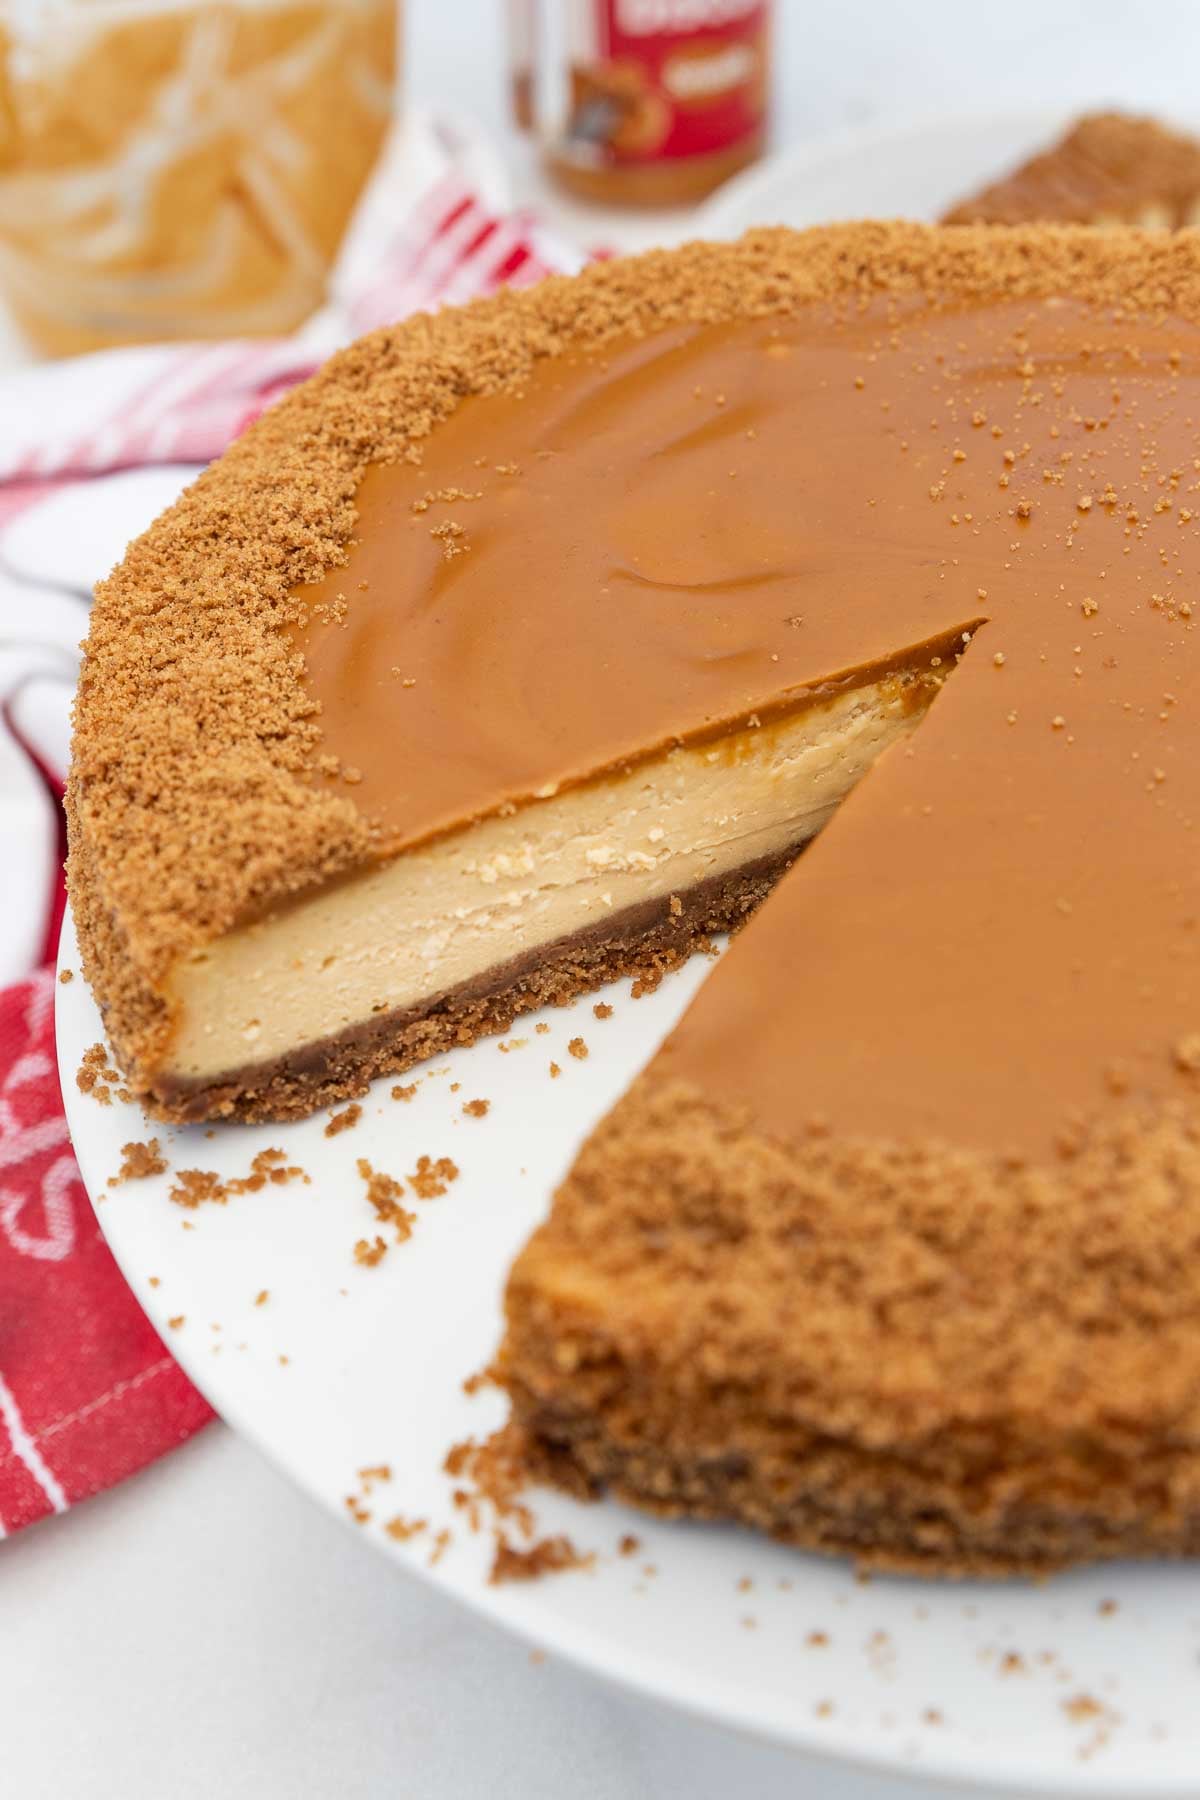
- Smooth cookie butter (Biscoff spread): You’ll need quite a lot of this, both to whisk into the creamy cheesecake filling, and for the delicious topping. The ‘clever’ thing about this Biscoff cheesecake recipe is that the topping is just melted Biscoff spread – nothing else. When you put the cheesecake in the fridge to chill, the topping sets again as a perfectly smooth and glossy butterscotch-flavored layer!
- White chocolate (melted): This is my ‘hidden secret’ ingredient in the filling. I love it for the creamy, sweet vanilla flavor, but also because it works as a perfect replacement for sugar. Since there is more sweetness in the crust and topping, I don’t feel the need to add any more sugar to this layer. I’ve used this ‘trick’ in other cheesecakes on Scrummy Lane, too – this Wagamama copycat ginger white chocolate cheesecake and this summery white chocolate cheesecake (in case you want to try those too!).
How to make an easy baked Biscoff cheesecake
I hope you’ll be pleasantly surprised how easy this recipe for Biscoff cheesecake is.
Here’s how to make it in a few simple steps:
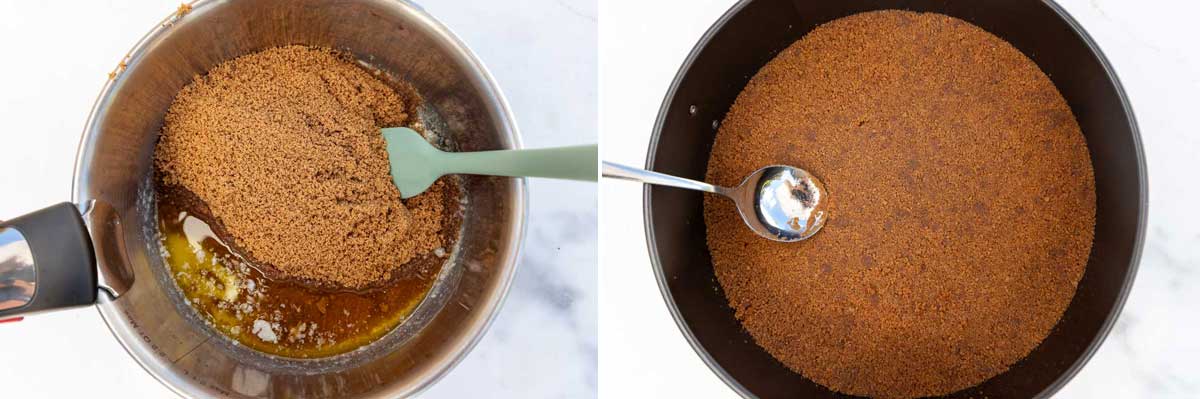
Start by making the crust with just Biscoff cookie crumbs and melted butter. To crush the cookies, either pulse them in a food processor, or pop them into a large plastic bag and bash them with a rolling pin.
Melt the butter in a large saucepan (or in a bowl in the microwave), and stir in the cookie crumbs. Then empty the crumbs into a 9-inch springform pan and smooth down with the back of a metal spoon. Chill it in the fridge while you make the filling.
Now preheat the oven to 300F/150C (265F/130C fan oven) while you make the filling.
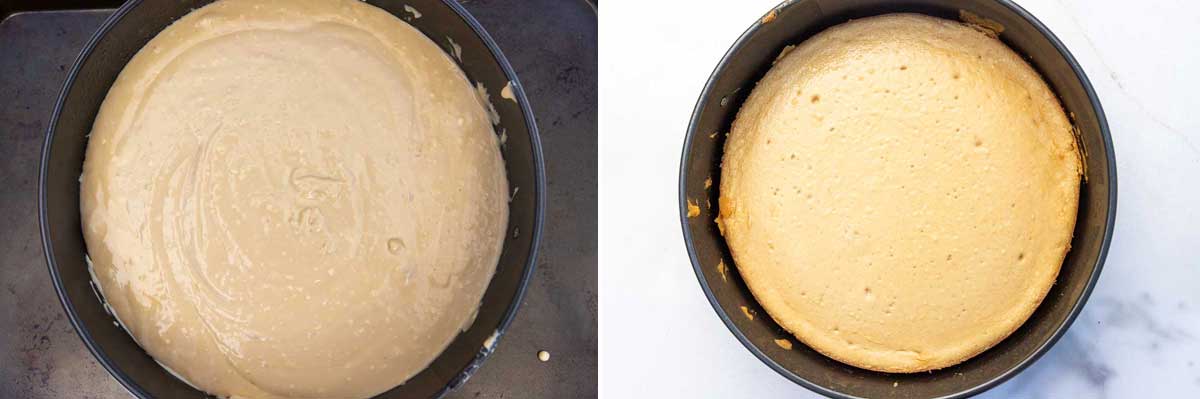
To make the cheesecake filling, feel free to simply whisk everything together! I find that you get a smoother result by whisking together the cream cheese, eggs and vanilla together first, then adding the heavy cream followed by the melted biscoff and white chocolate. However, if you don’t mind a slightly denser texture, you can just whisk everything together at once.

Once you have a perfectly smooth filling, pour it over the cookie crust and smooth it with a spatula so that it’s level. Bake for 40 to 50 minutes, or until the edges are set but the middle is still very slightly wobbly (it will firm up as it sets).
Turn off the oven, slightly open the door, and let the cheesecake cool inside the oven for 1 hour.
Let cool completely. Then cover with plastic wrap and chill in the fridge for 4 hours to overnight. Then remove the sides of the pan.
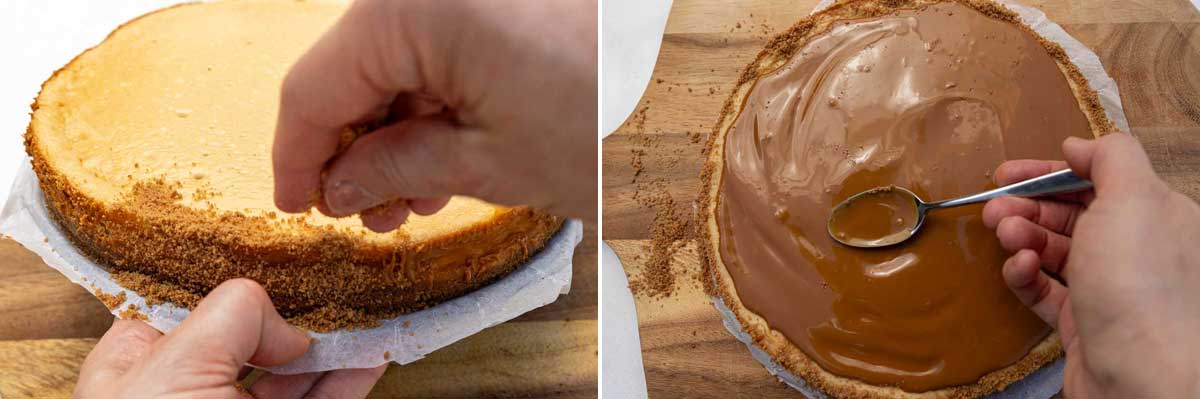
If you like, brush a little extra warm biscoff spread around the side of the cheesecake. Carefully lift the pan and sprinkle extra cookie crumbs all around the sticky sides.
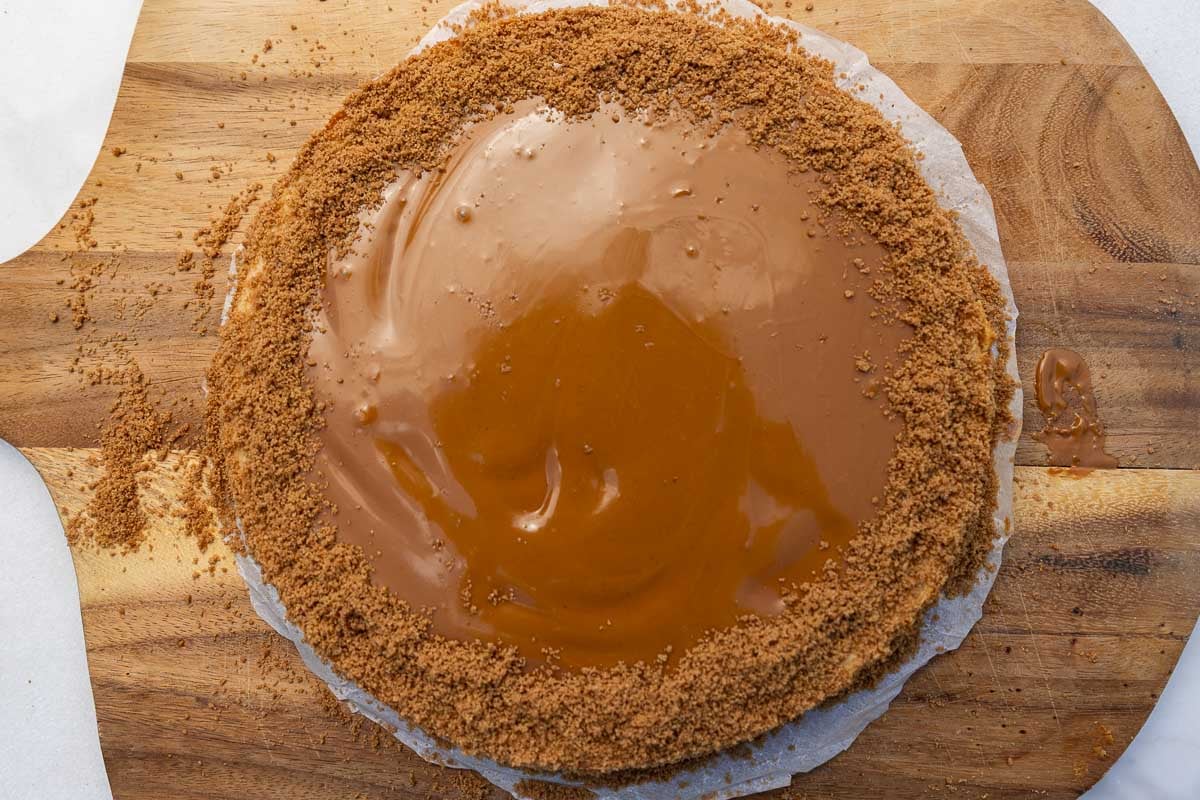
Now make the easy topping. All you have to do is warm about half a cup more Biscoff spread in the microwave until pourable. Then pour it all over the top of the chilled cheesecake. Spread it quickly almost to the edge before it starts to set. Then sprinkle more crumbs around the edge of the top.
It’s probably easier to ‘see’ what I mean! Just see the photos of the finished cheesecake below!
Pop the finished cheesecake back into the fridge to let the biscoff spread set again on top – around 2 to 3 hours. Slice and enjoy!
Helen’s Top Tips
- I recommend spraying the pan all over lightly with oil, then lining the base with baking paper. Place the base of the pan on baking paper and draw around it before cutting it out. Then push it into the bottom of the cheesecake pan. This just helps to get the pieces out of the pan cleanly without them sticking.
- Crush a few extra cookies to sprinkle around the sides and top edge of the cheesecake for decoration.
- Make sure that the cream cheese, eggs and cream are at room temperature for easier whisking and the smoothest filling.
- Use the largest mixing bowl you have to whisk together the cheesecake filling so that it doesn’t splatter all over your kitchen (I learnt this the hard way!).
- If you like, sprinkle a pinch of sea salt over the topping before serving. Alternatively, stir half a teaspoon into the melted spread. It complements the Biscoff flavors perfectly!
- For clean slices, warm a sharp knife under a hot tap and quickly wipe it dry. Wipe the knife clean and re-warm between slices.
How to serve
This Biscoff cheesecake is perfect served by itself. My favorite way to serve it, however, is with a little more warmed Biscoff spread drizzled over the top like a sauce.
And for those who think cheesecake should always be served with a jug of pouring cream or ice cream on the side, then go ahead – I won’t judge!
Recipe FAQs
It actually lasts really well in the fridge. If stored properly, covered tightly or in an airtight container, it will be fine for 4 to 5 days.
Yes, it will freeze well for up to one month. Freeze it uncovered first for 1 to 2 hours, then wrap tightly in layers of plastic wrap (cling film) and foil. Label and freeze. Unwrap and place in an airtight container to thaw overnight in the fridge.
Yes, in fact that is the best thing to do. The cheesecake is best served after chilling for at least four hours but, even better, overnight. Arguably, the flavors are better the day after, too.
More make ahead desserts
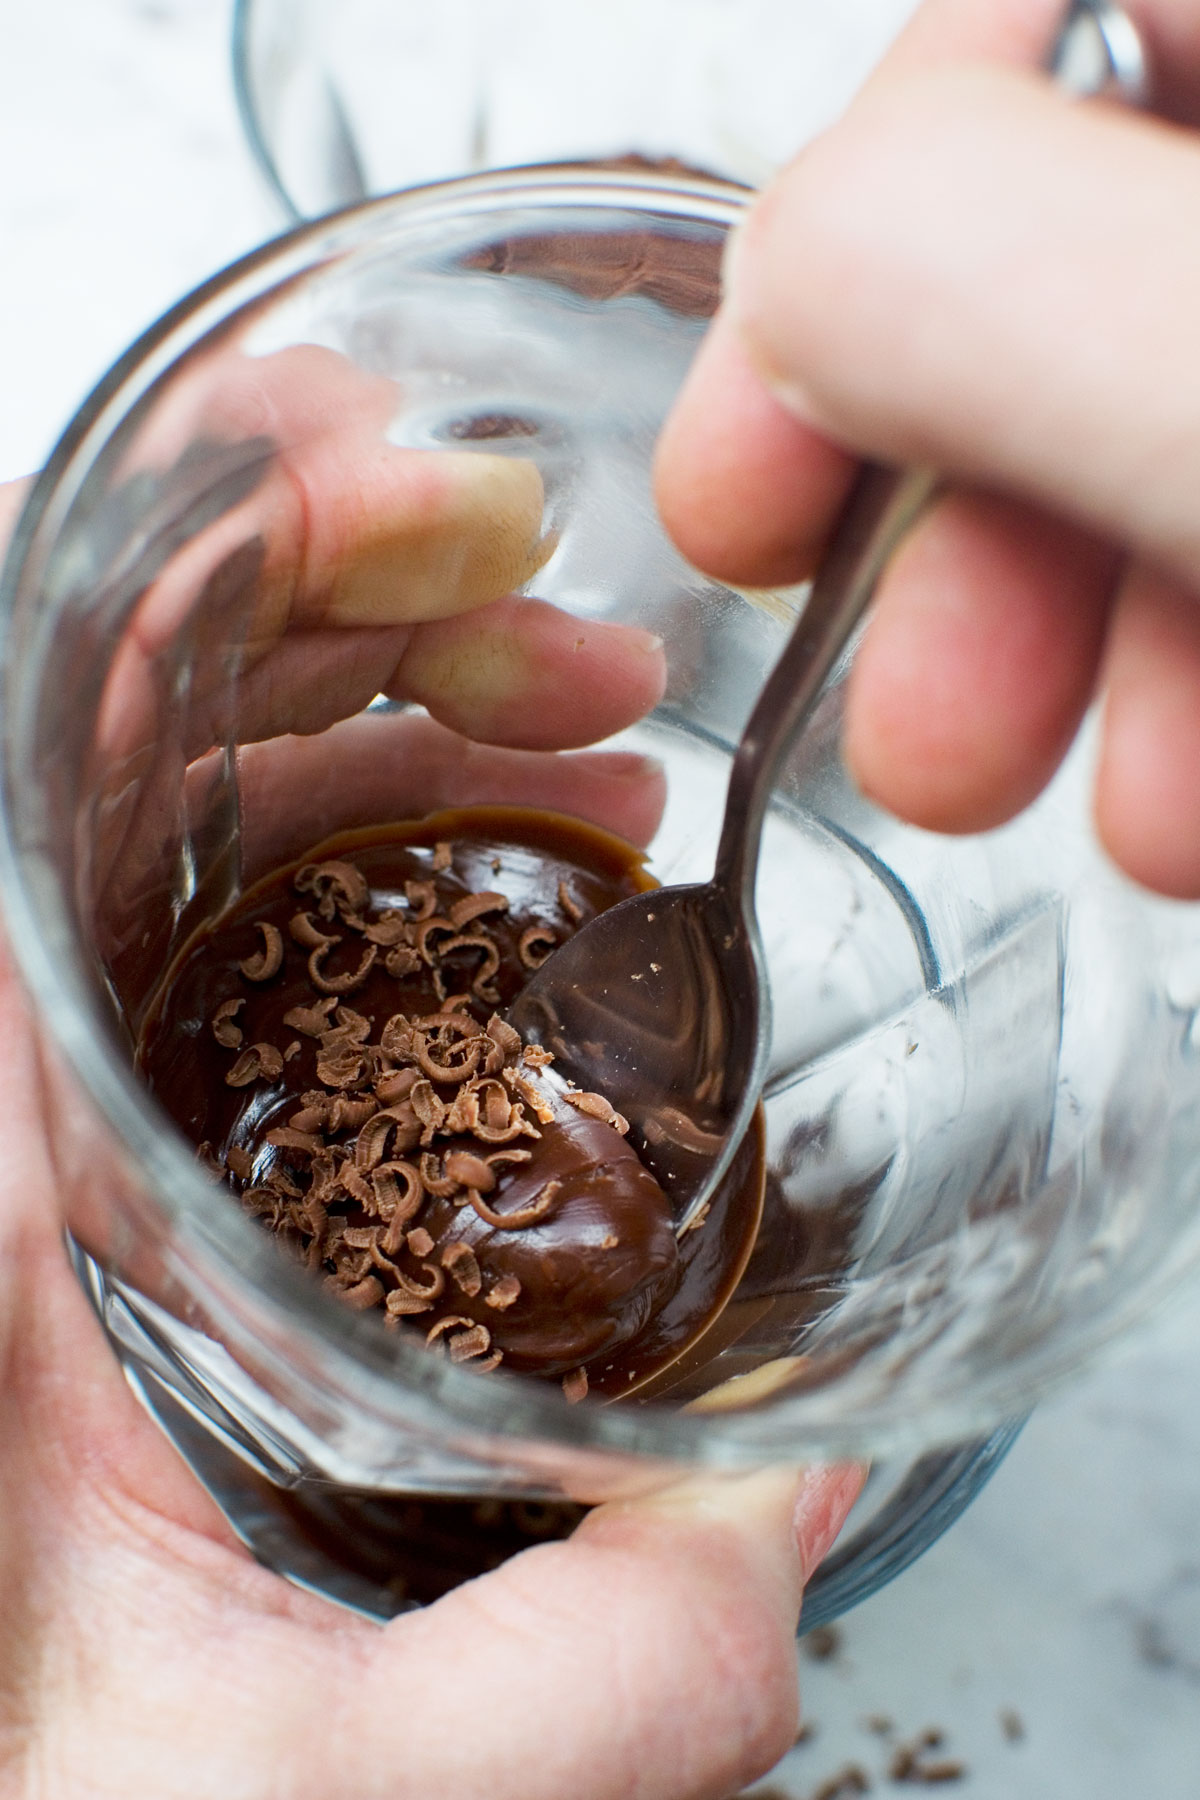
- These classy-but-easy chocolate pots take just 5 minutes to make. Yes, just 5 minutes.
- This amazing Italian chocolate cake (called torta tenerina) is a real crowd pleaser, and just a little bit different.
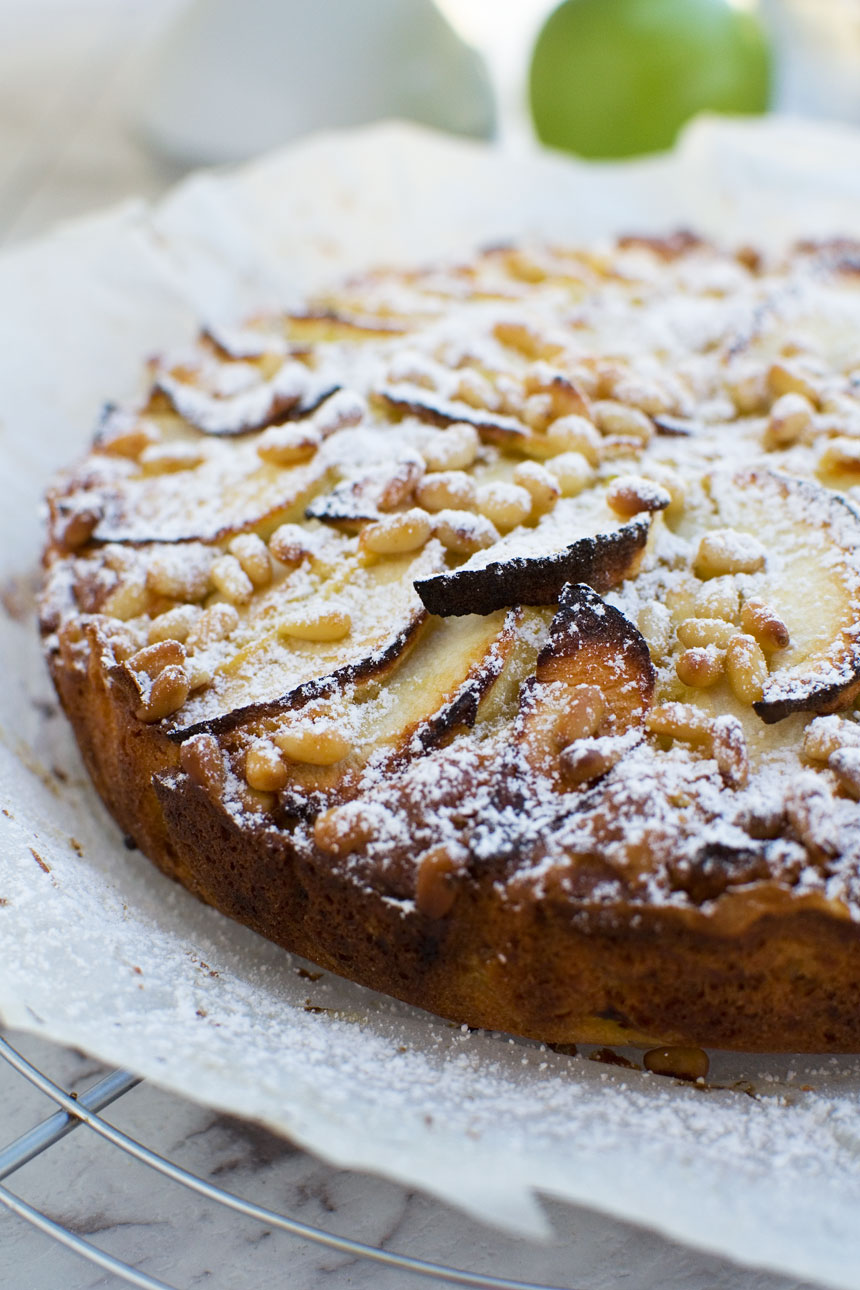
- Apple desserts tend to make everyone happy, too. This Italian apple cake has so many 5 star reviews.
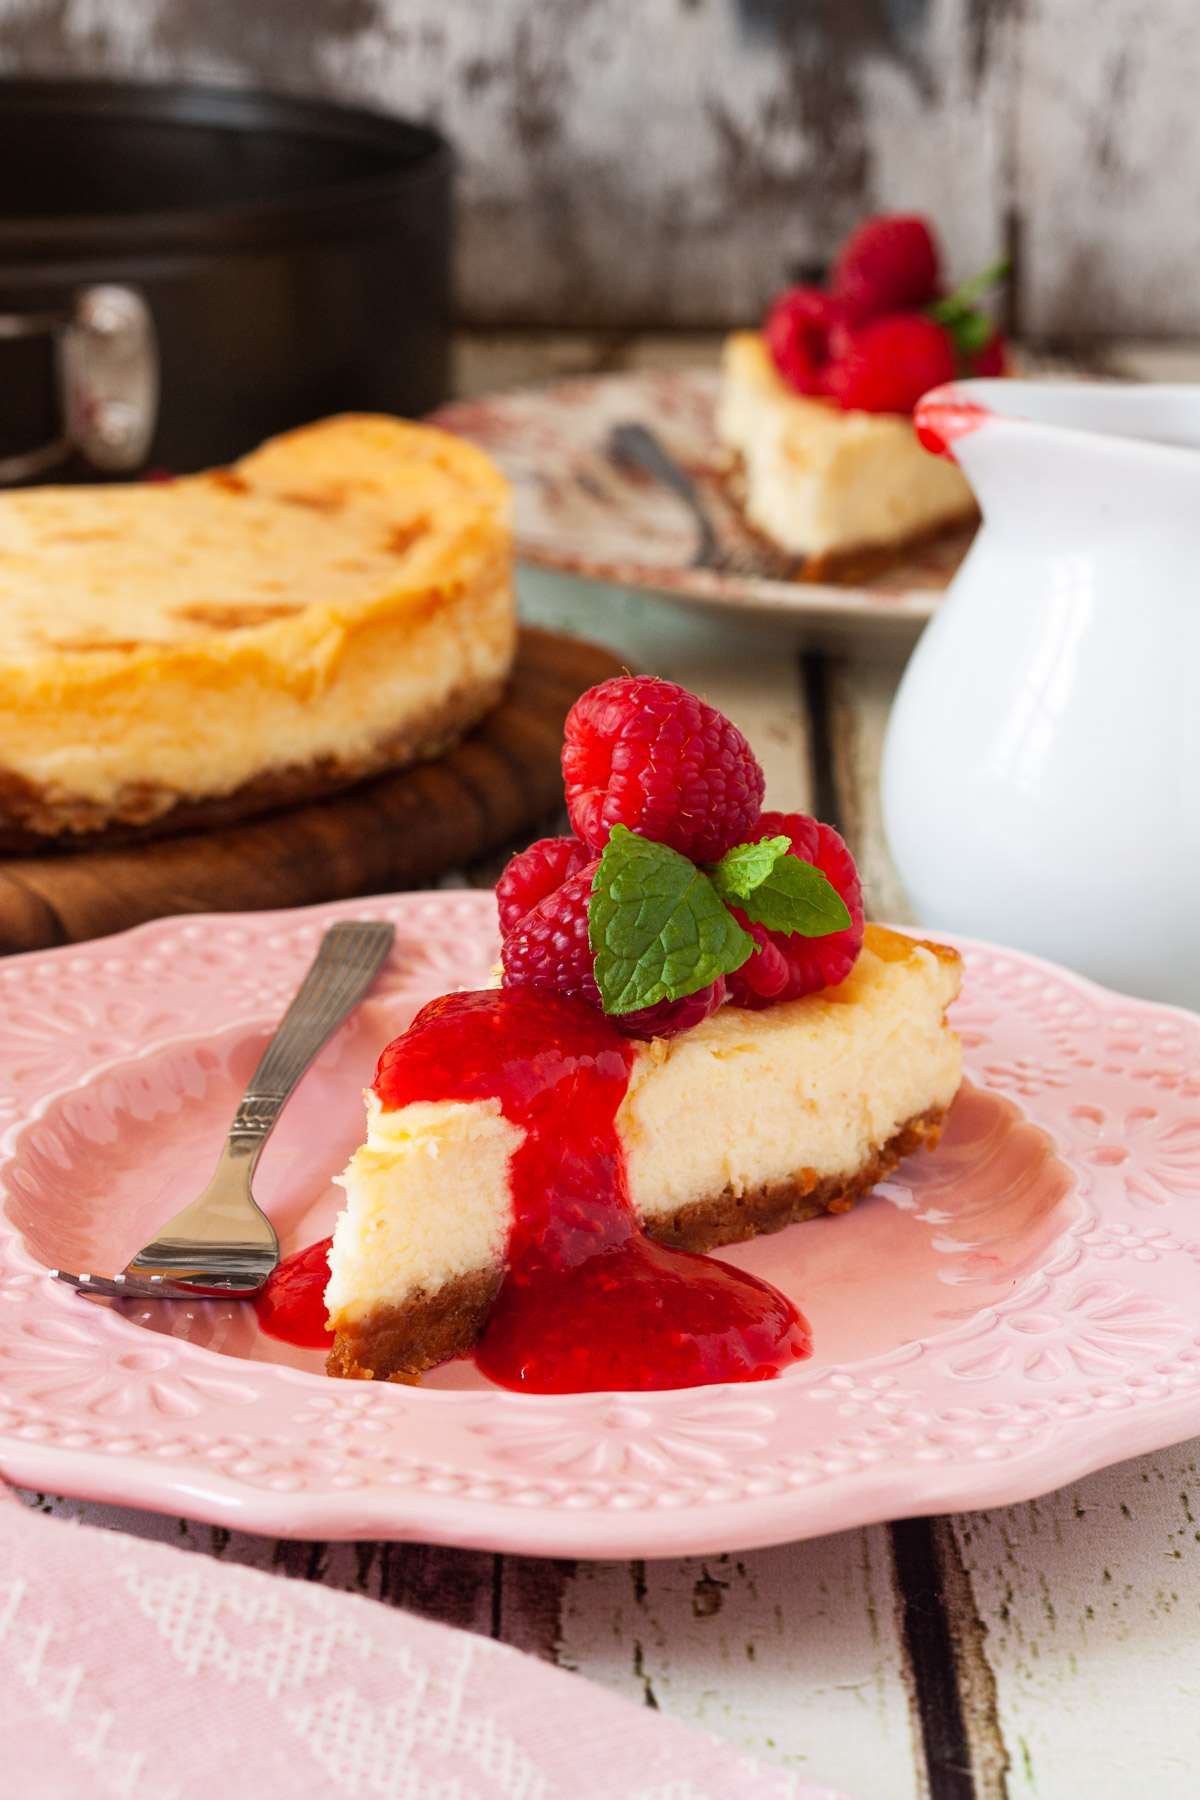
- Just love cheesecake? Try this white chocolate cheesecake instead. Don’t skip the simple raspberry sauce.

Easy Biscoff Cheesecake (Baked)
Equipment
Ingredients
For the cookie crust and decoration
- 10.5 ounces Biscoff cookies, (about 9 ounces/250 grams for the crust, and the rest for decorating at the end)
- 6 tablespoons butter, (salted is nice, but unsalted is OK, too)
For the cheesecake filling and topping
- 2 cups cream cheese, softened (2 cups is about 16 ounces/450 grams)
- ⅔ cup heavy cream, (double cream)
- 2 large eggs
- 1 teaspoon vanilla essence, (optional)
- 1 cup Biscoff spread (cookie butter), smooth (divided, just under half a cup for the filling, just over half a cup for the topping)
- 3½ ounces white chocolate, melted in a glass jug or bowl in the microwave in 2 or 3 30-second bursts
- extra Biscoff spread (2 to 3 tablespoons), for serving, if you like
Instructions
- Spray the inside of a 9-inch springform pan (round pan with removable sides) lightly all over with oil, then line the base with baking paper. I usually place the base on the paper, draw around it and cut it out, then press it into the bottom of the fully assembled pan.
- Crush the Biscoff cookies either by pulsing them in a food processor (fastest!) or by piling them into a ziploc bag and hitting them with a rolling pin until you have fine crumbs.10.5 ounces Biscoff cookies
- Melt the butter in a saucepan on a low heat, or in the microwave in a large bowl (cover the bowl to prevent splattering). Then stir in around 2 cups (9 ounces/250g) of the Biscoff cookie crumbs (save the rest for decorating).6 tablespoons butter
- Empty the cookie mixture into the lined baking pan. Push it down and to the edges with the back of a metal spoon. Then pop it into the fridge just while you make the cheesecake filling.
- Preheat the oven to 300F/150C (or 265F/130C fan oven). To make the filling, in a very large mixing bowl beat the softened cream cheese with the eggs and vanilla until smooth with a handheld whisk. Then beat in the cream, followed by just under half a cup of the Biscoff spread (around 7 tablespoons/3.5 ounces/100 grams), slightly warmed in the microwave so that it's easier to mix in. Finally, whisk in the melted white chocolate. Alternatively, you can simply whisk everything together all in one go!2 cups cream cheese, ⅔ cup heavy cream, 2 large eggs, 1 teaspoon vanilla essence, 0.4 cup Biscoff spread (cookie butter), 3½ ounces white chocolate
- Scrape the filling onto the cookie base and spread it out evenly. Then bake for 40 to 50 minutes, or until the edges are set and the center is still slightly wobbly (it will set fully as it cools). Then turn off the oven, open the door slightly and let the cheesecake cool inside for about an hour.
- Let the cheesecake cool completely on a wire rack, then cover and chill for at least 4 hours, or preferably overnight.
- Now warm the rest of the Biscoff spread (just over half a cup or 150 grams) in the microwave until it's pourable – about 20 seconds, then check. Use a pastry brush to brush a little of the warm spread all around the side of the cheesecake. Then gently lift the cheesecake up and sprinkle some of the leftover crumbs to cover the sticky side.0.6 cup Biscoff spread (cookie butter)
- Pour the warmed Biscoff spread all over the cheesecake and quickly spread it nearly to the edge. Before it sets, sprinkle a roughly 1 inch border of cookie crumbs around the top edge of the cheesecake.
- Chill the cheesecake again until the topping has set (about 2 to 3 hours). To serve, remove the side of the cheesecake pan (I usually keep the base on for easier slicing). Slice with a hot knife, wiping between cuts. Serve with a bit more warm biscoff spread drizzled over the top of each slice, if you like.


Amazing. Everyone loved it and I have been asked to make it again for an event next week
Oh, I’m so happy to read this, Janet! That is a huge encouragement to me so thank you so much, and I hope you enjoy it the second time just as much 🙂
Vanilla essence is apparently unavailable for me. Do you advise simply leaving it out, or would vanilla extract work in its stead?
Hello Christine! No worries at all if you want or need to skip the vanilla. It’s a nice-to-have not an essential since the other flavors are so delicious. I hope you enjoy it! I’m really excited about this recipe! 🙂