Greek Bread (Easy No Knead Recipe)

on Mar 23, 2024
This post may contain affiliate links. Please read my disclosure for more info.
You won’t believe how easy it is to re-create the delicious Greek bread you’ve fallen in love with on trips to Greece or in restaurants. Simply stir together the simple dough ingredients (no kneading!), adding one ‘secret’ ingredient, and you’ll have a crunchy on the outside and soft, almost cake-like on the inside loaf in no time.
Serve warm with olive oil for dipping as an appetizer to wow your guests, or on the side with all your favorite Greek dishes, from Greek salad to moussaka and more. Never made bread before? This is perfect for beginners!

Why you’ll love it
I am SO excited about sharing this really easy recipe for Greek bread with you!
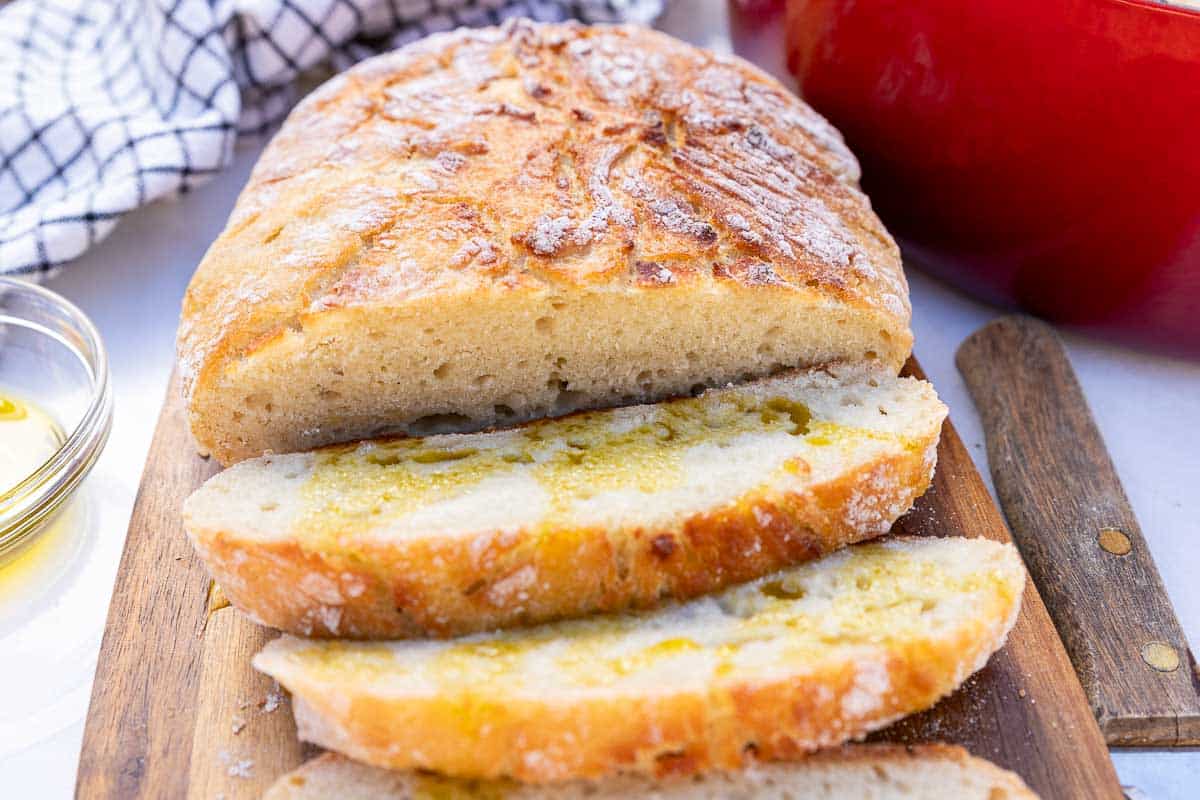
When I lived in Greece I ate this type of traditional ‘village bread’ almost daily. There’s something just a little bit different about it compared to a typical rustic loaf. It’s lightly crunchy (but not chewy) on the outside, and delightfully soft, almost cake-like inside.
You might also notice a slight yellow tinge to the crumb. For many years, I didn’t know why that was and never thought to ask! It turns out it’s down to one ‘secret’ ingredient in the dough… semolina flour!
Apart from what I’ve mentioned above, I also love that:
- The dough for Greek bread takes literally 5 minutes to make.
- It’s a no knead bread recipe. Just stir the ingredients together, cover and let rise.
- Fast to make (compared to many other bread recipes). All you have to do is leave the dough to rise in a warm place for 2 to 3 hours (to be honest it’s usually just 2 hours in our house!).
- Fast to bake. Quickly (and very roughly) shape the dough, then pop it into a dutch oven or other large oven-safe pot with a lid. In around 40 minutes you’ll have the most delicious crusty-but-soft homemade loaf ever!
- Crunchy, golden crumb. You’ll have to try it for yourself to believe it, but this bread has the most delicious lightly crunchy crust. The pot with lid acts like a steam oven, ensuring the beautiful crust, and even rising and browning.
Fun Fact
In Greece, Greek bread is known as ‘horiatiko psomi’, pronounced hor-ee-AT-ick-oh p-s-oh-MI. It simply means ‘village bread’.
About the ingredients
You’ll find a full list of ingredients with amounts in the recipe card below. But here’s a summary of what you need to know.
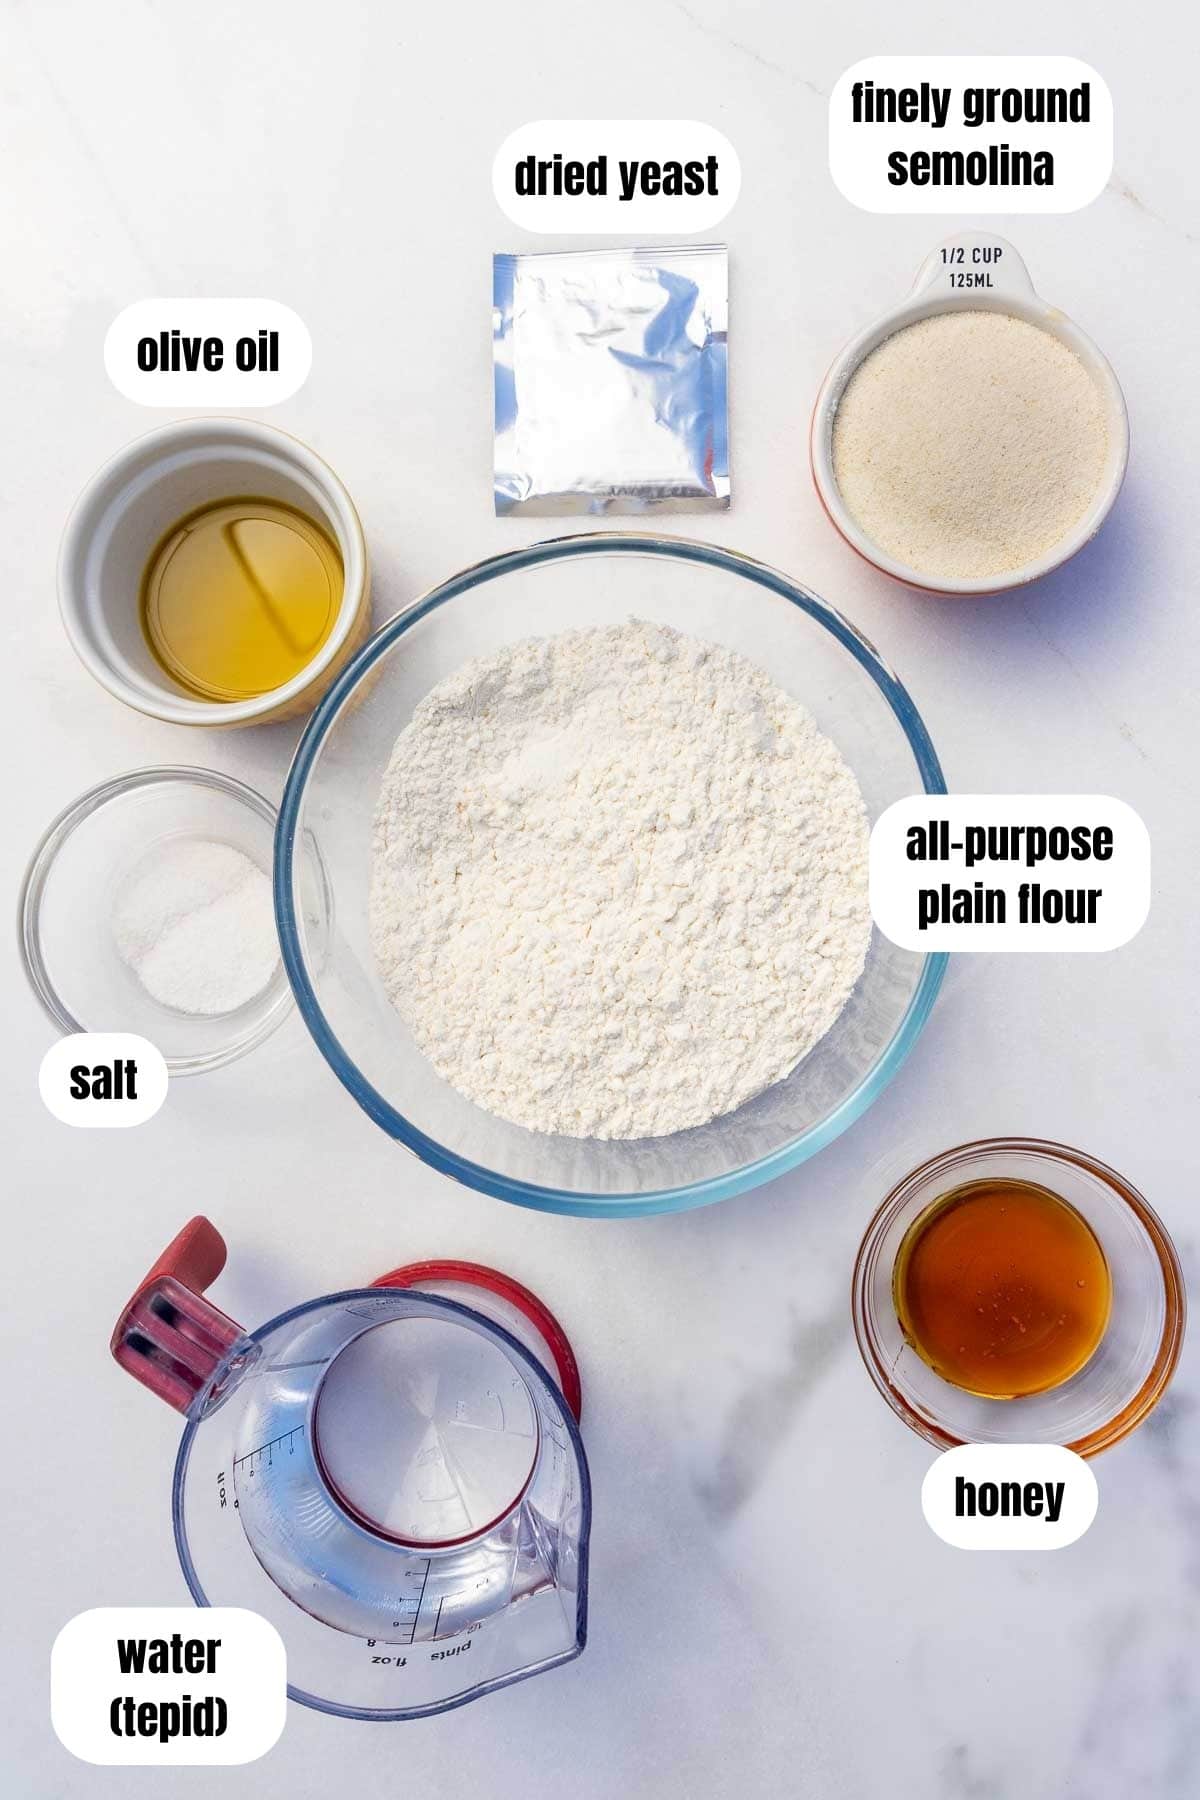
Dry yeast. Where I live this comes in roughly 2.5 teaspoon packages (0.25 ounces or 7 grams). Conveniently, I just empty the whole package into the mixing bowl to start the recipe off!
Olive oil. While this is not always an ingredient in Greek bread, I chose to add 2 tablespoons to my dough recipe. I think it helps to create an even softer texture and also subtly adds to the delicious flavor.
Honey. Once again, not all bread recipes include a sweetener, but I love the subtle hint of sweetness that honey adds to the finished bread. If you don’t have honey, it’s fine to substitute with sugar.
Flour. Just all-purpose flour (plain flour) works fine. However, go ahead and use ‘bread’ or ‘strong’ flour if you like.
Finely ground semolina (sometimes called semolina flour). The secret ingredient! This is what gives the bread an almost cake-like quality. You’ll only add half a cup, but don’t skip it! I found it in my local supermarket in the international isle. Try the flour/baking aisle, or a bulk food store (where you can buy things from big bins!).
Salt. I add this mixed into the flour so that I don’t risk inhibiting the activity of the yeast.
Water. Just plain tap water is fine. The water should be tepid or lukewarm – not very warm or cold. When you dip your fingers into it, you shouldn’t really feel anything at all.
How to make Greek bread
Please refer to the printable recipe card below for full detailed instructions and ingredients amounts. The below is just a summary of what you need to know.
Empty the yeast into a large mixing bowl. Pour in the water and add the honey. Swirl around to mix and dissolve.
Add the rest of the dough ingredients (flour, semolina, olive oil).

Stir until you have a wet sticky dough. It won’t be as runny as cake batter but also not an actual ball of dough like pizza dough or pastry (see photo below!). A spatula or wooden spoon is great for this.
Then cover the whole bowl, and leave to rise in a warm(ish) place for 2 to 3 hours. I’m often in a rush, so 2 hours is all mine usually gets!

Once the dough has roughly doubled in size (it will also have air bubbles in it), pre-heat your oven. Put your oven proof pot inside to heat up (I use a cast iron dutch oven, which is perfect if you have one).
Then lay a large piece of baking paper on your work surface. Sprinkle it with more flour.
Scrape the dough onto the baking paper. Use a spatula or wooden spoon to roughly shape the dough into a rustic loaf shape by pulling the sides up and into the centre.

Then take the hot pot out of the oven (don’t forget oven mitts!). Lift the baking paper and dough up and put it inside the hot pot.
Put the lid on and bake for about 30 minutes.
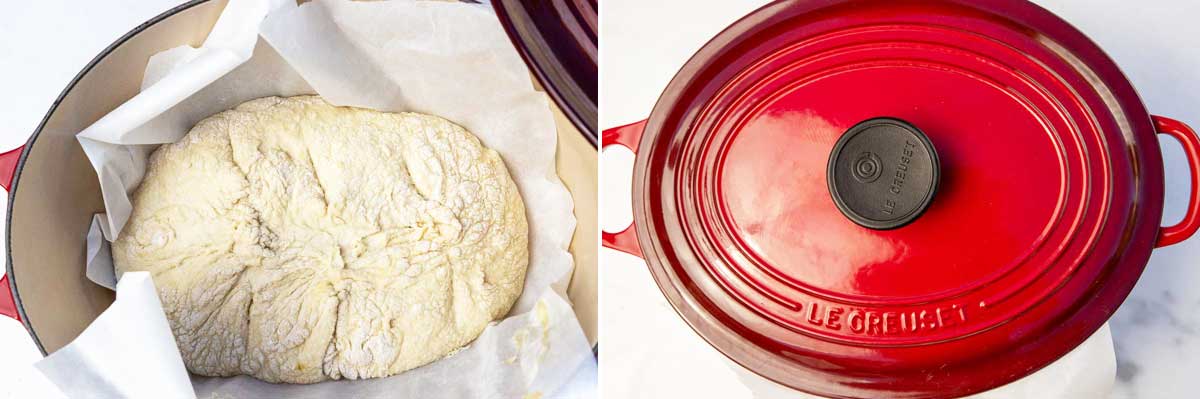
All that’s left to do is to take the lid off the pot and bake for another 10 minutes or so. The bread is ready when the top is a lovely golden brown.

Helen’s Top Tips
- Best place to let your dough rise. If it’s a warm day, I often leave my covered dough to rise either just on the counter top, or even outside in the shade. If it’s a cold day, you can heat up the oven for a few minutes, then immediately turn it off and place the covered bowl inside (it should be warm but not hot in there!).
- A top tip from seasoned bakers: After you’ve let the dough rise until doubled, let it ‘rest’ in the fridge for a few hours or even up to a few days. This is purely optional, but makes for improved flavor and texture!
- If your dough seems too wet and sticky to roughly shape into a loaf shape, simply add a tablespoon or two more flour.
- If you like you can slash the top of the uncooked loaf a few times with a knife across the width, or even with a cross (to add character!).
- Let the bread cool on a cooling rack for at least an hour before slicing (if you slice it sooner it can seem a little too doughy or even raw inside).
Serving ideas
- Especially when it’s fresh and still warm, one of my favorite ways to serve this bread is as an appetizer. Simply serve with a bowl of olive oil (or olive oil with a little balsamic vinegar or balsamic glaze mixed in) on the side. Feeling fancier? Make these super easy baked artichoke hearts to smear onto it. Your guests will not believe how delicious this is – and that you made it!
- Serve for dinner as the main carb, instead of your usual pasta, rice or potatoes. I think a slice or two would go particular well with a tuna salad, this delicious Greek baked eggplant, Greek ‘giant’ beans, chicken and chorizo with cherry tomatoes or Greek oven baked fish, or lamb chops marinated with this Greek style marinade. Or with virtually any Greek dish.
- Enjoy for lunch with homemade soup (try Greek lentil soup or a classic tomato soup).
- Use to make delicious sandwiches (my husband declared a chicken sandwich I made him using this Greek bread as the most delicious chicken sandwich he’d ever eaten!). If the bread is frozen just toast it straight out of the freezer for warm sandwiches. Try these tasty Italian toasted veggie sandwiches, for example.
Variations
- Top with sesame seeds. After you’ve placed the dough in the pot, brush lightly with water, then sprinkle with 2 tablespoons of sesame seeds.
- Mix chopped olives into the dough before you let it rise. I’d say half a cup to a cup – to taste.
- Mix 2 teaspoons of dried oregano into the dough before letting it rise.
- Try adding a quarter cup of chopped sundried tomatoes and a quarter cup of crumbled feta cheese or grated parmesan cheese into the dough.
How to store and/or freeze
Like any fresh bread, this Greek country bread is best eaten on the day it’s made. However, I have also enjoyed it the day after and it was virtually as good as the first day.
Once the bread has cooled completely, wrap it in paper (such as baking paper or a clean dry paper bag) and store it at room temperature.
After you’ve cut into it, I think it’s best to slice it up, pop it into a freezer bag and freeze it. That way, you can defrost individual slices or put them straight into the toaster to warm up. The bread will freeze well for up to 2 to 3 months without any loss of quality.
More easy bread recipes
- This shockingly easy Italian focaccia bread is another delicious no knead bread recipe you might like to try.
- If you’re really short on time, this 2-minute toasted bread with olive oil and salt is a tried and tested x100 dinner time life saver! Alternatively, go with these surprisingly classy cheesy parmesan toasts.
- Got an air fryer? Try crowd-pleasing air fried garlic bread!
Greek Bread (Easy No Knead Recipe)
Equipment
Ingredients
- 2½ teaspoons dried yeast, (where I live this is a 0.25/7 gram package)
- 1½ cups water, (tepid = when you push your finger into it you feel nothing)
- 1 tablespoon honey, (substitute with 1 teaspoon sugar)
- 2½ cups all-purpose flour, + a little extra in case you need it and for flouring the baking paper (or use 'strong'/bread flour)
- ½ cup finely ground semolina, (sometimes called semolina flour and found either in the baking aisle or international aisle at the supermarket)
- 2 teaspoons salt
- 2 tablespoons extra virgin olive oil
Instructions
- Start by adding the dried yeast into a large mixing bowl. Add the tepid (lukewarm) water and the honey. Stir well.2½ teaspoons dried yeast, 1½ cups water, 1 tablespoon honey
- Add the flour, semolina flour, salt and olive oil. Using a spatula or wooden spoon, stir until everything is combined well and you have a sticky dough. It should be firmer than cake batter but not an actual ball of dough. Add a tablespoon or two more of flour if you think it's too runny (check the photo above to see what my dough looked like).2½ cups all-purpose flour, ½ cup finely ground semolina, 2 teaspoons salt, 2 tablespoons extra virgin olive oil
- Cover the mixing bowl and place it in a warm place such as your kitchen (in summer), or in the shade outside. If it's cold in your kitchen, consider warming up the oven for a couple of minutes until slightly warm (but not very warm or hot), then switching it off again. Place the bowl with the dough inside. Let rise for 2 to 3 hours, or until the dough is roughly doubled in size.
- Now pre-heat the oven to 430F/220C (fan – 445F/230C if not a fan oven). Put your dutch oven or other oven-safe pot into the oven with the lid on so that it heats up as well.
- Lay a large piece of baking paper on your work surface. Sprinkle generously with flour.
- Scrape the sticky dough onto the edge of the baking paper. Using the spatula or wooden spoon, roll it more into the center of the paper so that it gets covered in flour. Then pull the dough up from the edges and into the middle a few times to shape it roughly into a rustic loaf shape.
- Now take the pre-heated pot out of the oven and take the lid off. Pick up the paper with the dough on it and put both into the pre-heated oven-safe pot. Put the lid back on, then bake the bread for around 30 minutes.
- Then, take the lid off the pot and bake for a further 10 minutes, or until the bread is a lovely golden colour on top.
- Take the bread out of the oven and let cool on a cooling rack for at least an hour before slicing. When completely cooled, store wrapped well in paper and at room temperature for 1 to 2 days, or slice into individual slices and freeze in a sealed freezer bag for 2 to 3 months.









Can you omit the honey and or sugar, or will it cause some sort issue with the baking process?
Hi, Mary. The sweetness helps the yeast get off to a quick start and honey adds a little color and flavour to the crust, but you can leave it out if you prefer. The dough may simply take slightly longer to rise.
I followed the recipe to the letter/gramme. I got a lot of pancake mix and at the end a big pancake, contained in my Dutch Oven.
Hi, Dave. It’s hard to know exactly what went wrong, but since you followed the recipe closely it does sound like you probably needed just a little more flour. The mixture is quite soft and sticky, but if I find it too difficult to handle I flour my hands and the surface of the bread just so that I can coax it into a loaf shape. I hope you give it another try!
This is the weirdest bread I’ve ever made! But so easy! I made half the quantity and reduced the initial bake with lid on from 30 minutes to 25 minutes to allow for the reduced amount. The hardest thing was trying to shape the sticky mess into some sort of ball to put it in the pot. But it’s certainly a tasty bread, perfect for dipping into tzatziki or mopping up the juices at the bottom of a bowl of Greek salad.
I couldn’t find semolina flour here in the UK, but in a health food store I got something just labelled ‘semolina’. It’s not as fine as normal flour but seemed to work OK.
Lol, I love that, Brian. The weirdest bread ever! But possibly also one of the yummiest loaves you’ll make yourself… It is quite sticky. I usually flour my hands and also sprinkle a little more over the surface of the dough just while I coax it into shape in the pot. I’m very glad you liked it, and that the semolina you found seemed to work. Thanks for the feedback! 🙂