Super Easy Caramel Slice (No Bake)
on May 31, 2022, Updated Nov 23, 2022
This post may contain affiliate links. Please read my disclosure for more info.
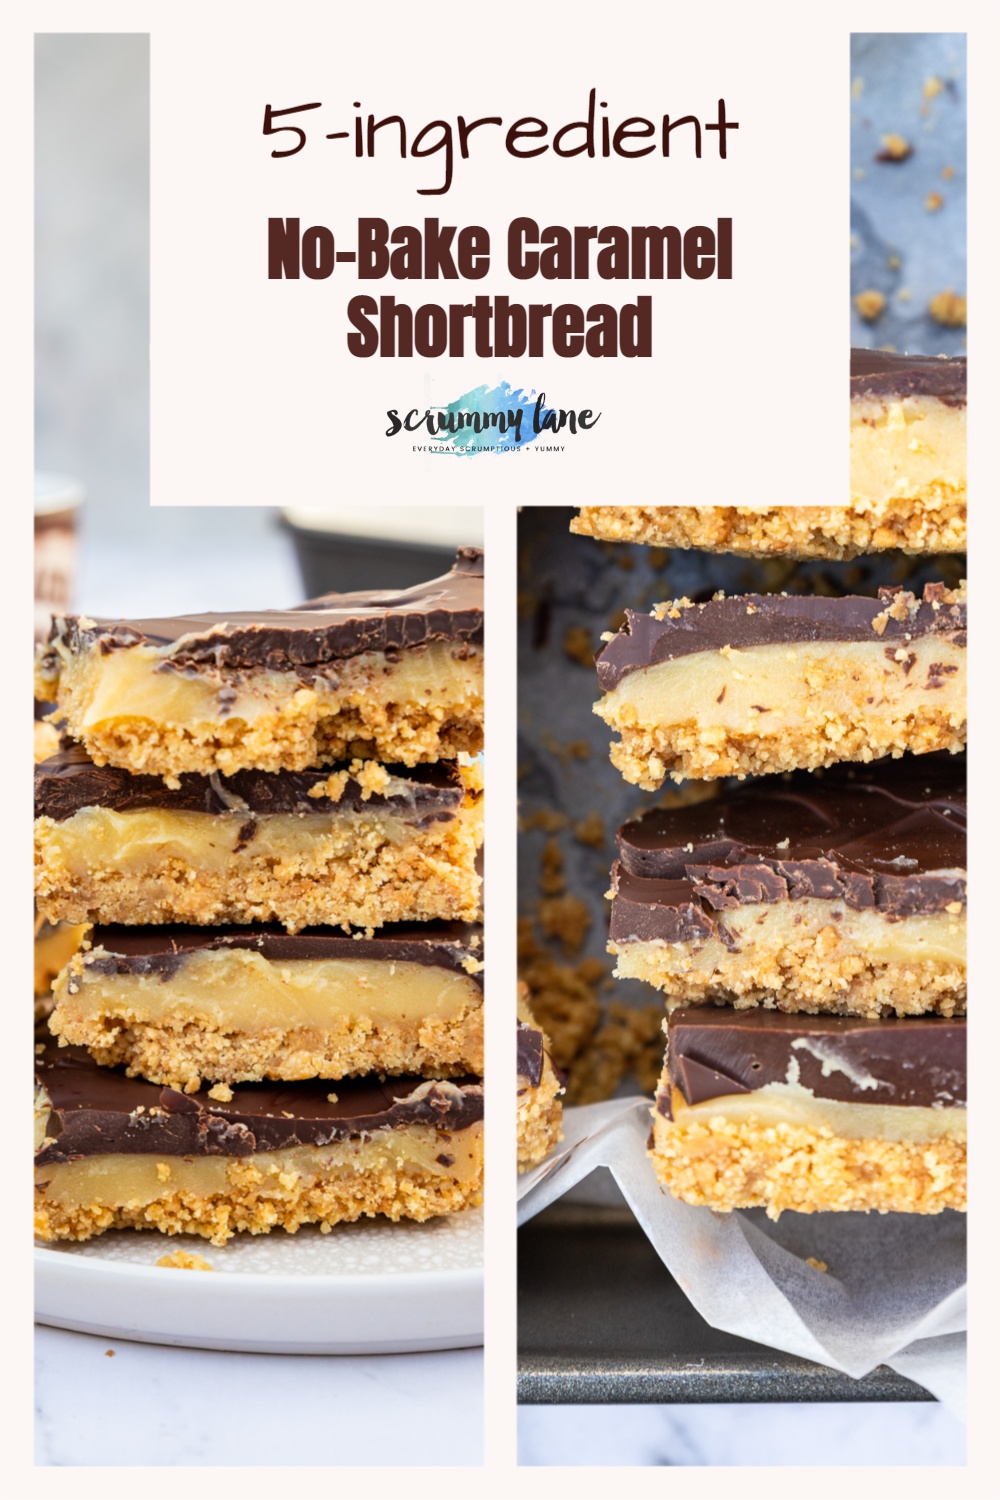
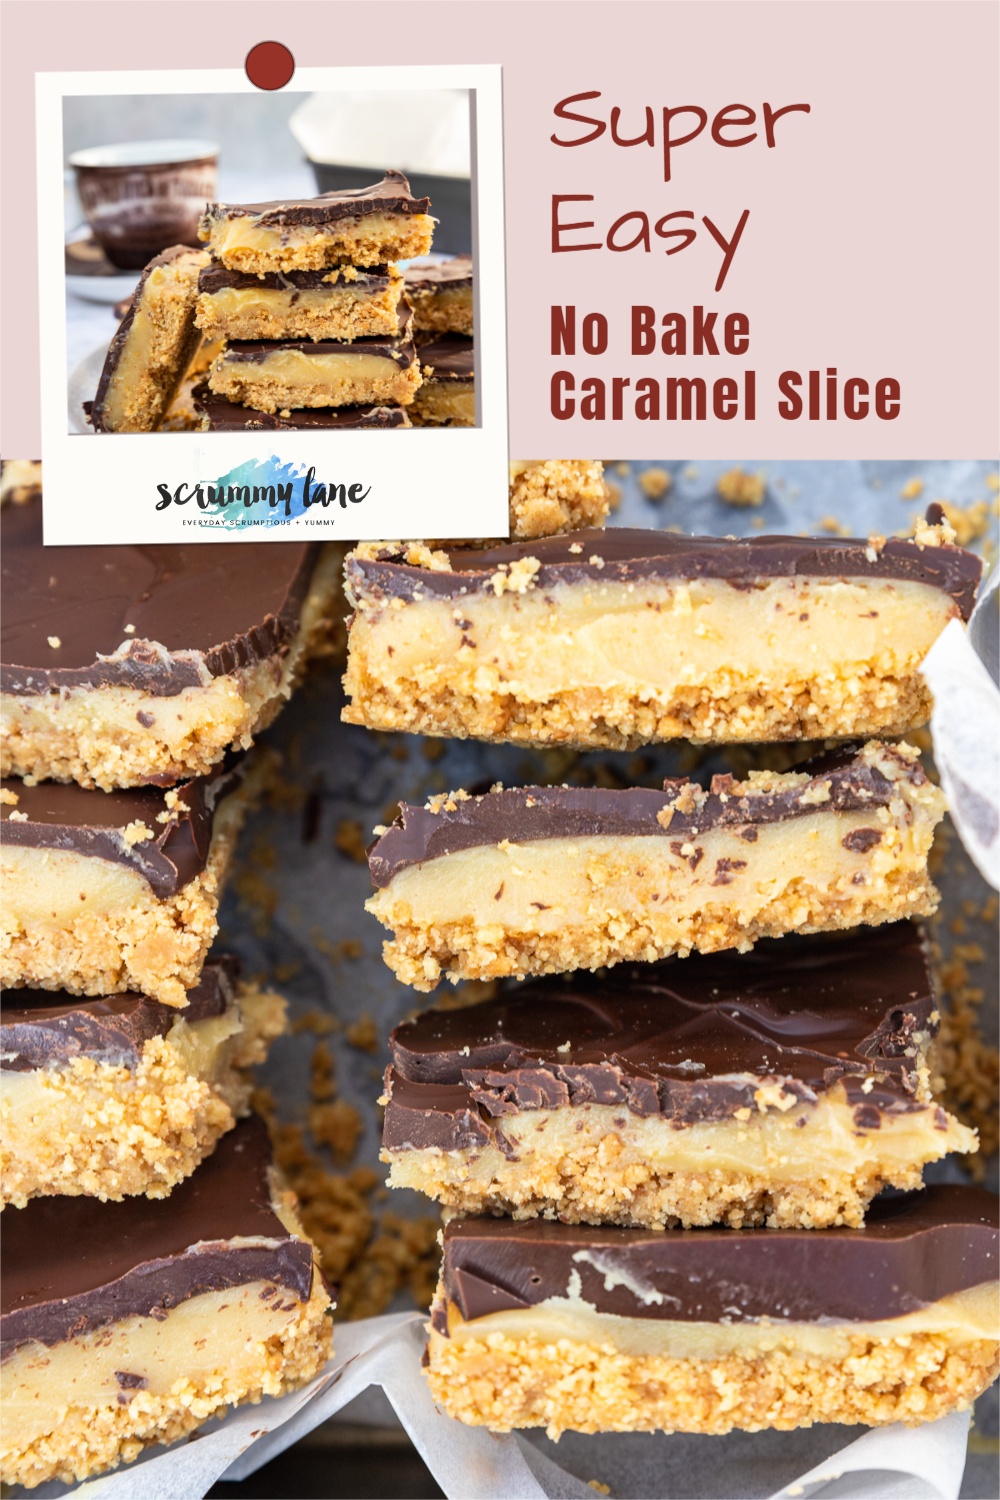
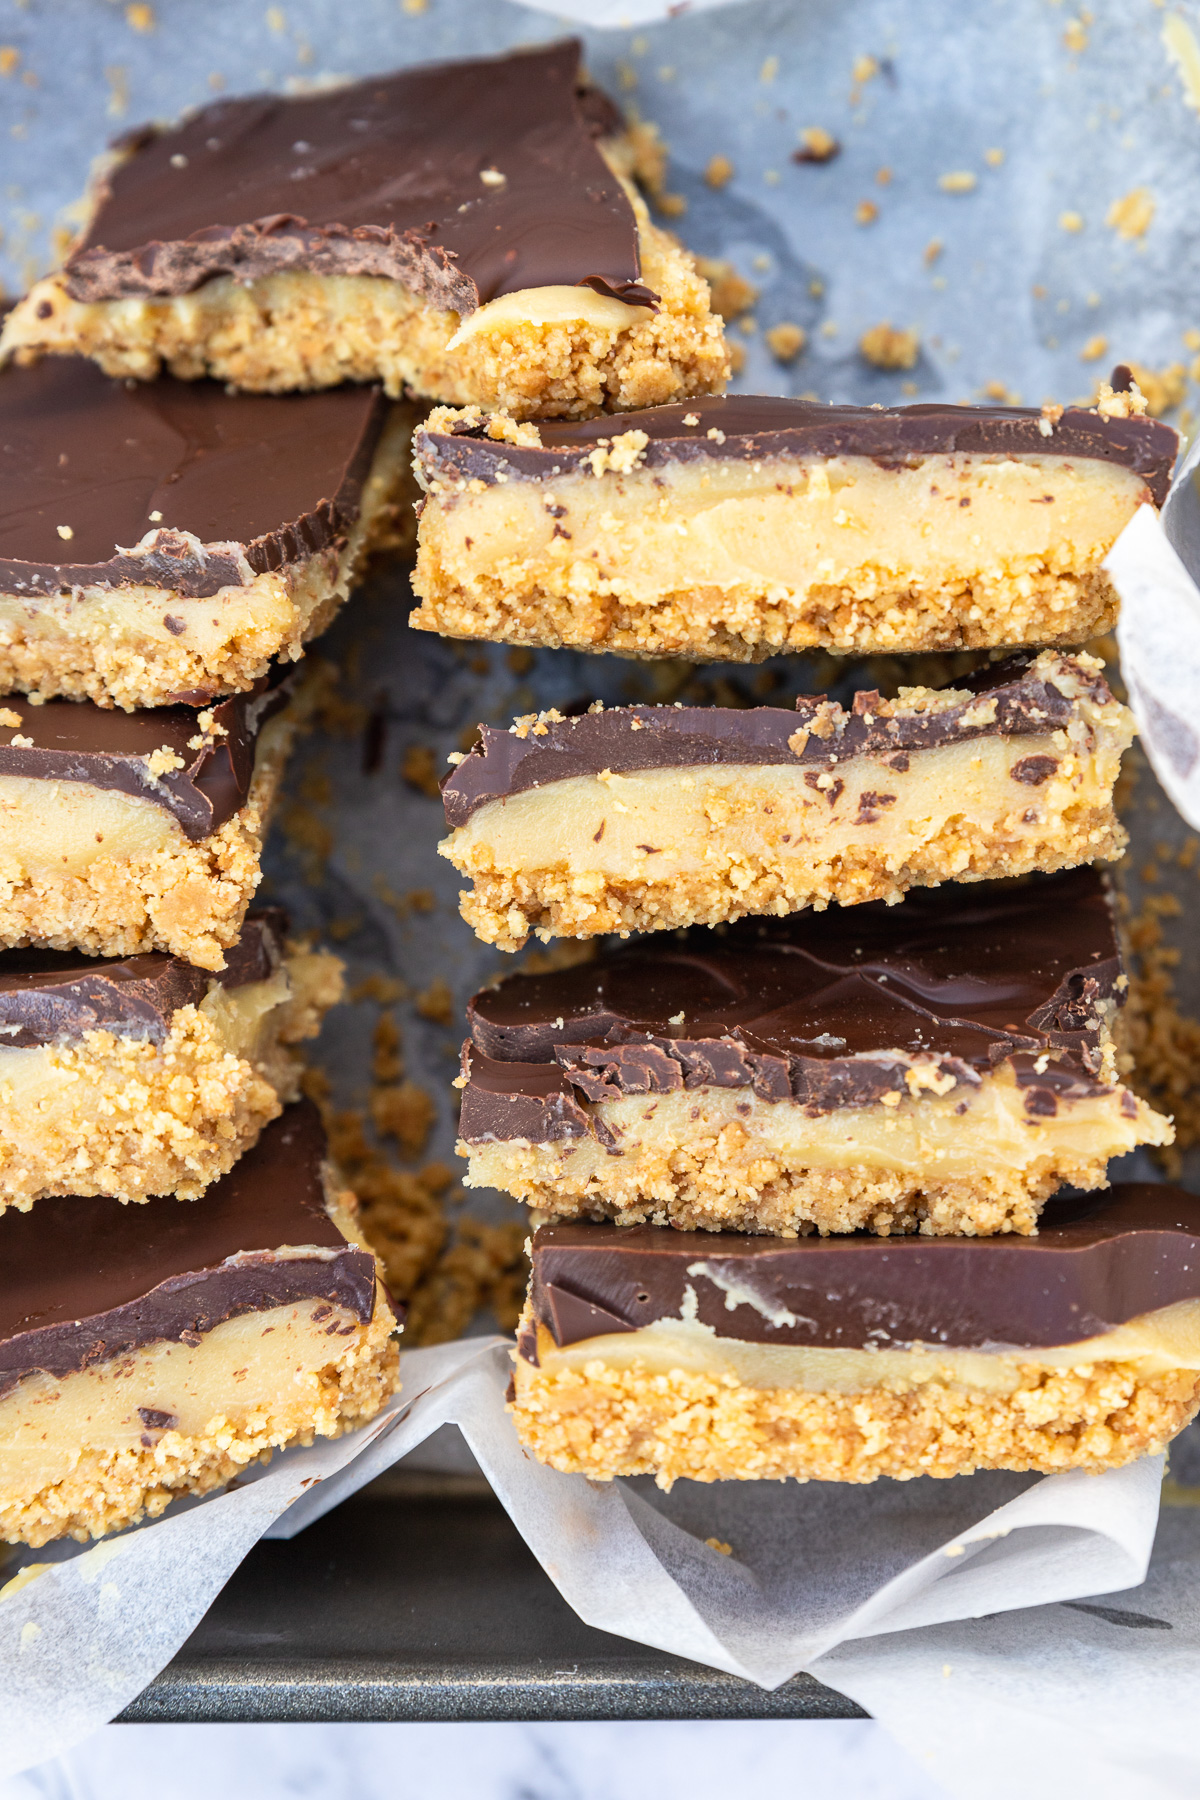
Caramel slice, Millionaire’s shortbread, caramel shortcake… whatever you call it, it’s a crowd pleaser with its crunchy biscuit base, buttery caramel filling and thick chocolate topping. You only need 20 minutes to make this no bake version with just 5 ingredients. Making the caramel layer is foolproof with no sticking or burning. Make some to pass around at your next picnic, party or BBQ!
The best (easy) caramel slice recipe
Growing up, I sampled LOTS of versions of this delicious, decadent slice. So I know what a good one tastes like ;-).
The ‘problem’ is, with its 3 delicious sweet layers, it can be labour-intensive to make. That issue is solved with this very easy recipe for caramel slice.
More reasons you’ll love it:
✓ It’s the easiest way to make caramel slice! Throw it together at the last minute with a handful of ingredients you probably already have in your pantry. It’s a great one for the kids to help with, too!
✓ It’s a no bake slice! Instead of a homemade shortbread base that you have to bake, you use a crushed biscuit base instead. You don’t have to bake the caramel either.
✓ The quick condensed milk caramel is foolproof. Just stir 3 simple ingredients together for 10 minutes and it’s done. No stress, no fuss, and definitely no thermometer. Most importantly, no caramel that’s too runny or burnt!
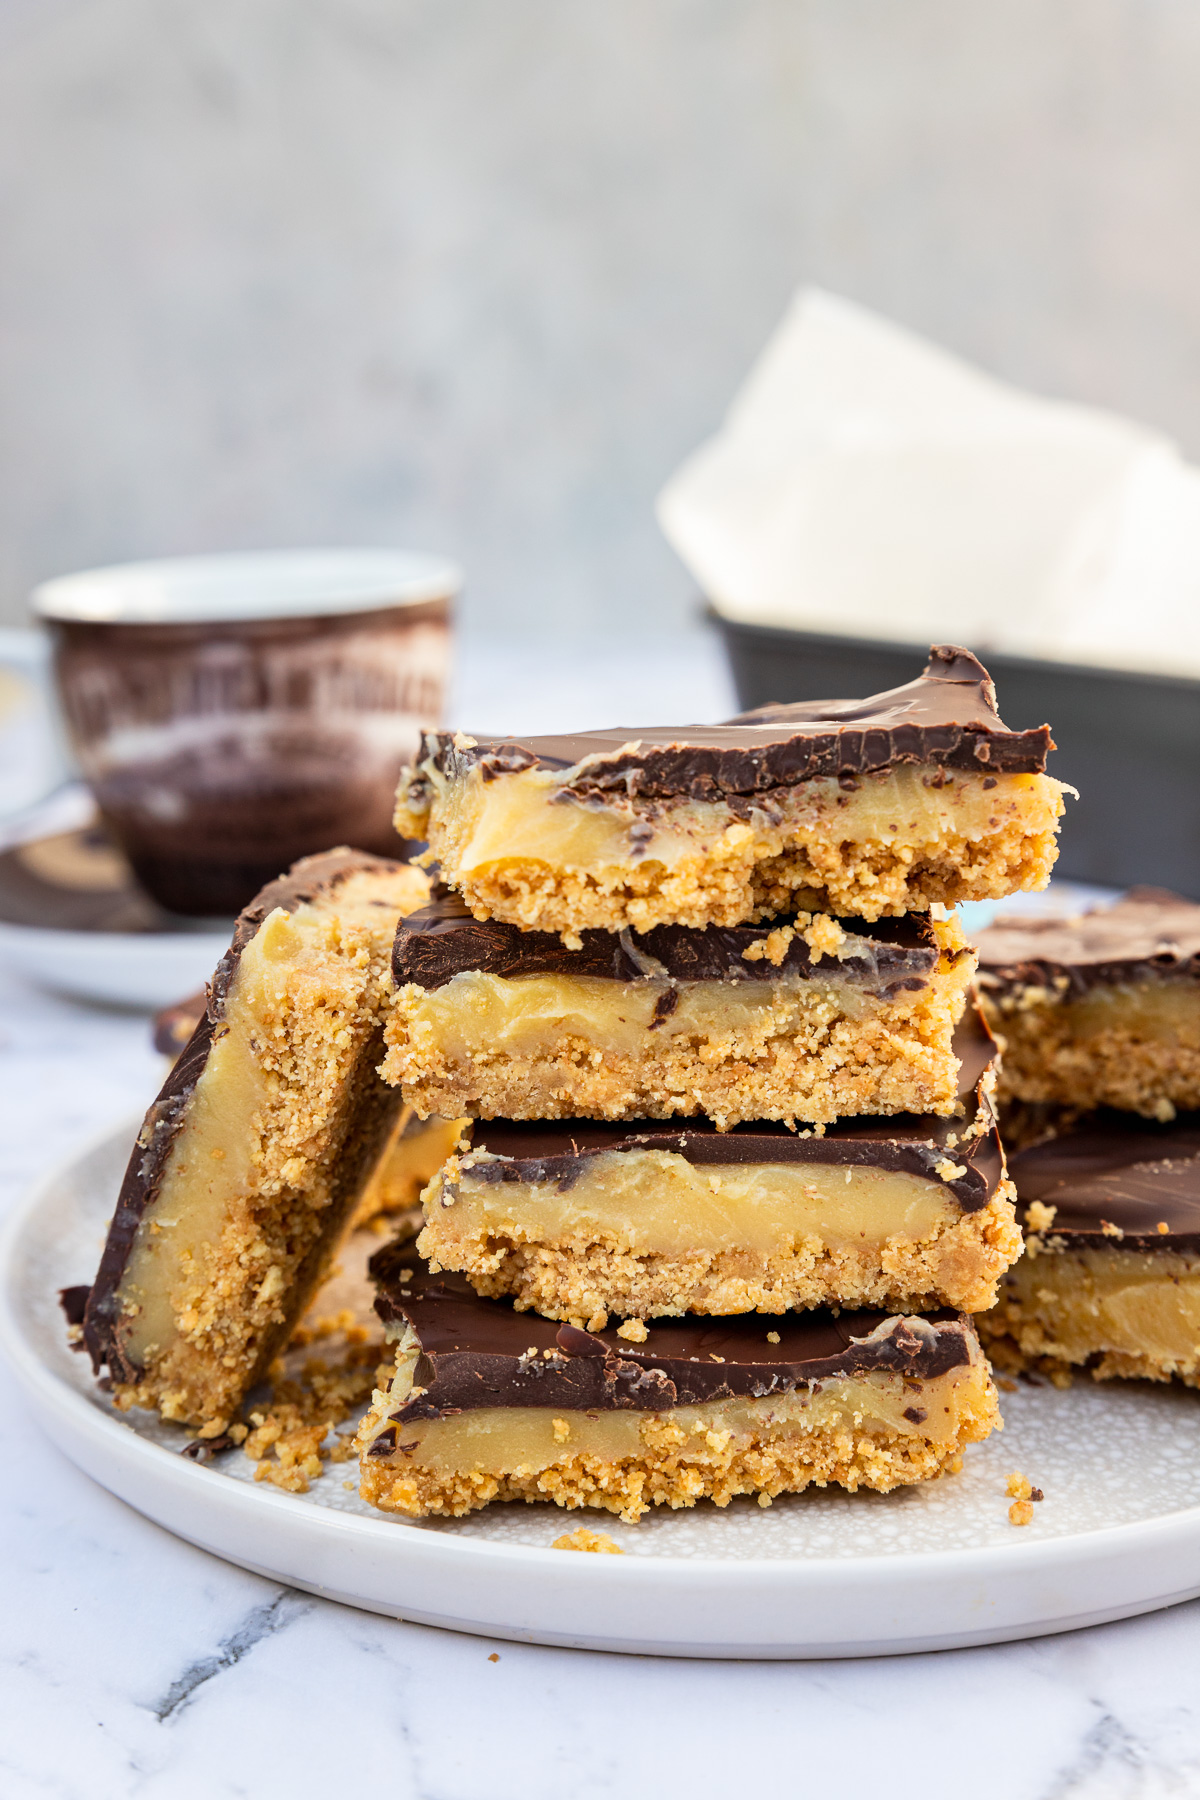
✓ There’s just the right amount of the 3 delicious layers – crunchy base, gooey caramel and chocolate on top. You know when you take that first bite and wish there was more or less of something? You won’t have that problem with this!
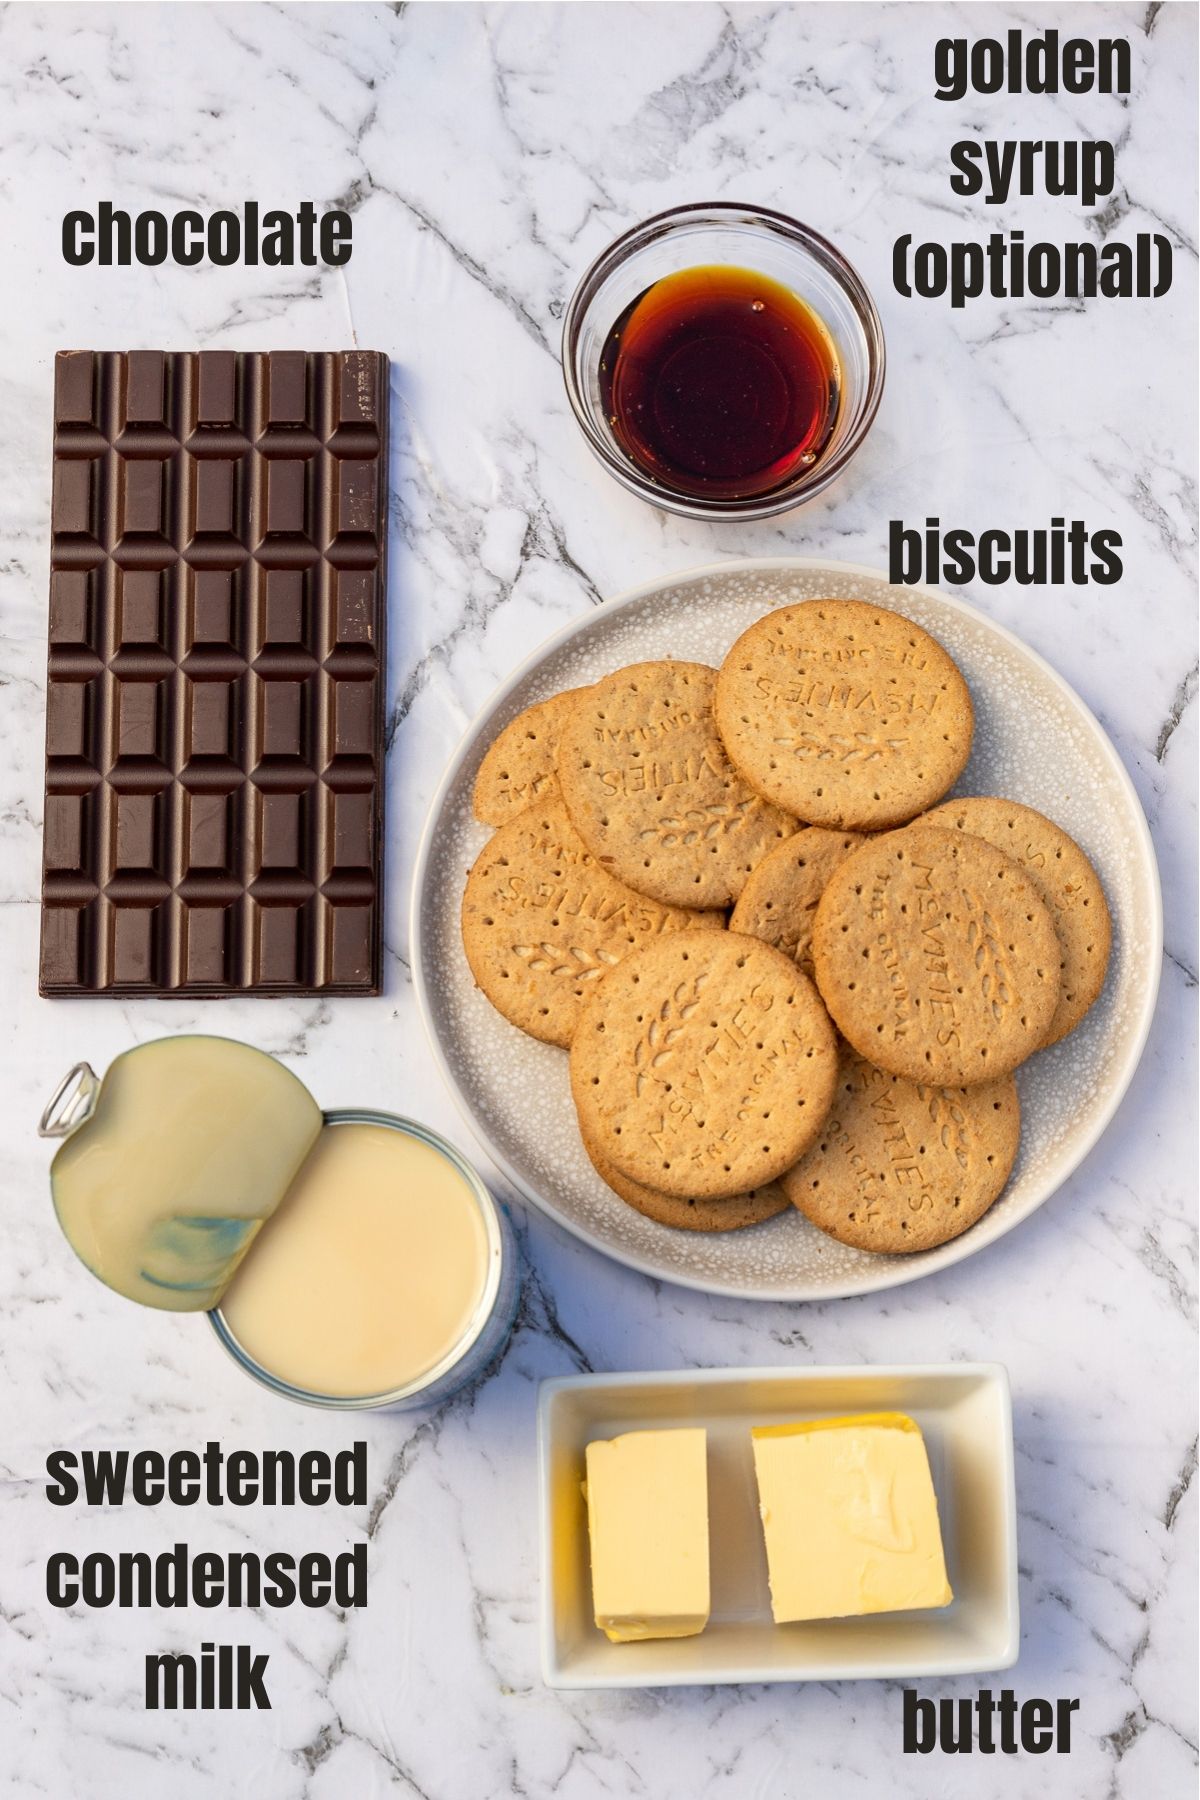
About the ingredients
Look how few ingredients you need!
For the biscuit base
Biscuits: The great thing is that you can use almost any biscuits you like to make the base. Since I’m in Australia, I tend to use plain sweet biscuits like Marie, Arrowroot, Scotch Fingers or Digestives. You could even try Anzac biscuits! In the UK, I’d try Rich Tea, Shortcake, Nice, Digestives or even Hobnobs. Use gluten free biscuits for a gluten free caramel slice, or how about ginger biscuits or Lotus Biscoff for something completely different?
Butter: I use unsalted, then add a small amount of salt to the caramel layer. But feel free to use salted butter instead if you’d prefer it to taste like a salted caramel slice. Mmm!
For the caramel
Sweetened condensed milk: Grab a tin of Nestle, or just a supermarket’s home brand. Either is fine. Just don’t grab evaporated milk by mistake. It’s not the same thing and won’t work in this recipe.
Butter: I prefer unsalted again, but salted works too.
Golden syrup: This is actually an optional ingredient, since it can be difficult to find in some places. Just a couple of tablespoons does give the caramel an extra depth of flavour (that’s hard to describe!), but you can easily replace it with another kind of syrup (corn, maple, honey, date). Or just skip it altogether!
+ a half teaspoon of salt!
Topping
Chocolate: I like to use a good quality dark chocolate for my caramel slice topping. You know, to balance out the intense sweetness just a tad. But of course you can use any chocolate – milk, white, caramel (Caramilk!), Mint, or any other kind you can think of.
Oil: This might surprise you, but (when I remember!) I mix around a tablespoon of oil into the chocolate after it’s melted. Why? It’ll stop it from setting quite as hard in the fridge. Then when you cut into it it won’t crack. Vegetable or light olive oil is fine. Melted coconut oil works well too and pops a hint of coconut-y flavour into the chocolate.
How to make a no bake caramel slice
The step-by-step guide below should help you make the recipe perfectly first time. Scroll down to the end for the full recipe including ingredient amounts.
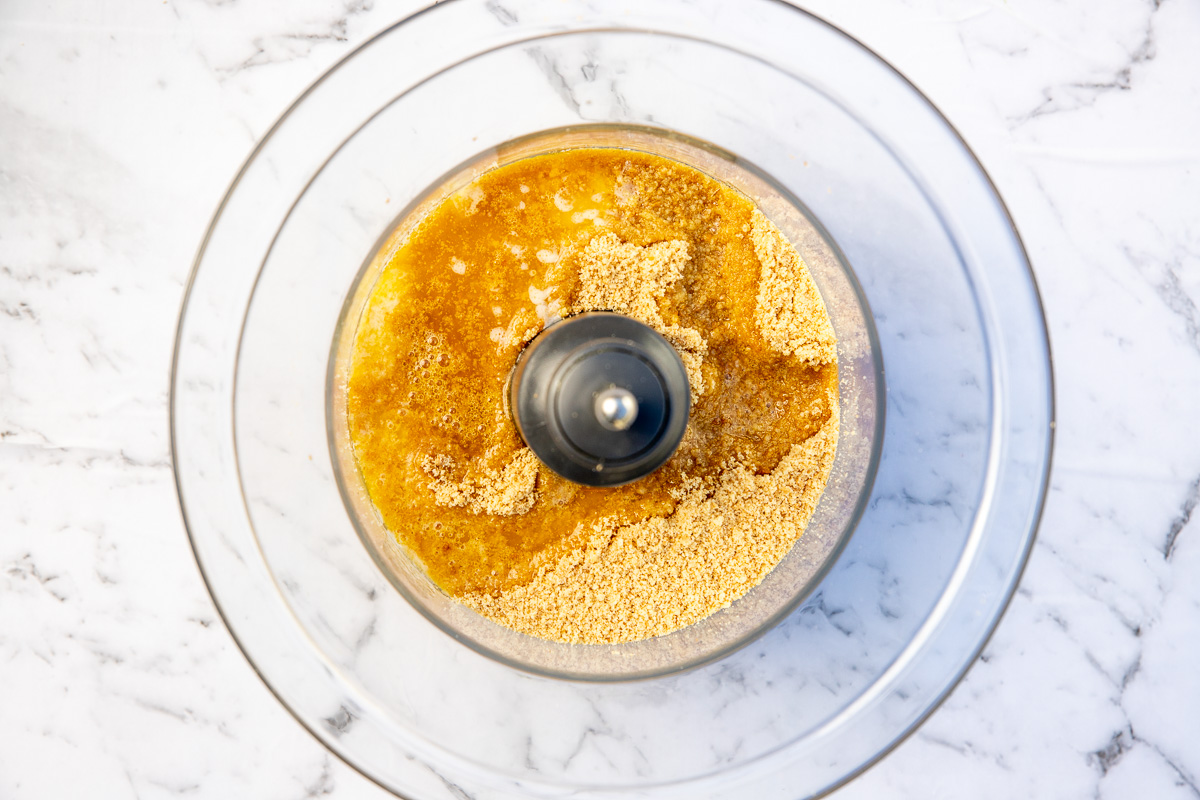
Step 1: To make the biscuit base for this cheat’s caramel slice, crush biscuits until they look like fine breadcrumbs. The easiest way is in a food processor (it takes literally seconds!). Or you can stick to the old fashioned way – throw the biscuits into a food bag and whack them with a rolling pin!
Step 2: Drizzle in melted butter and mix together.
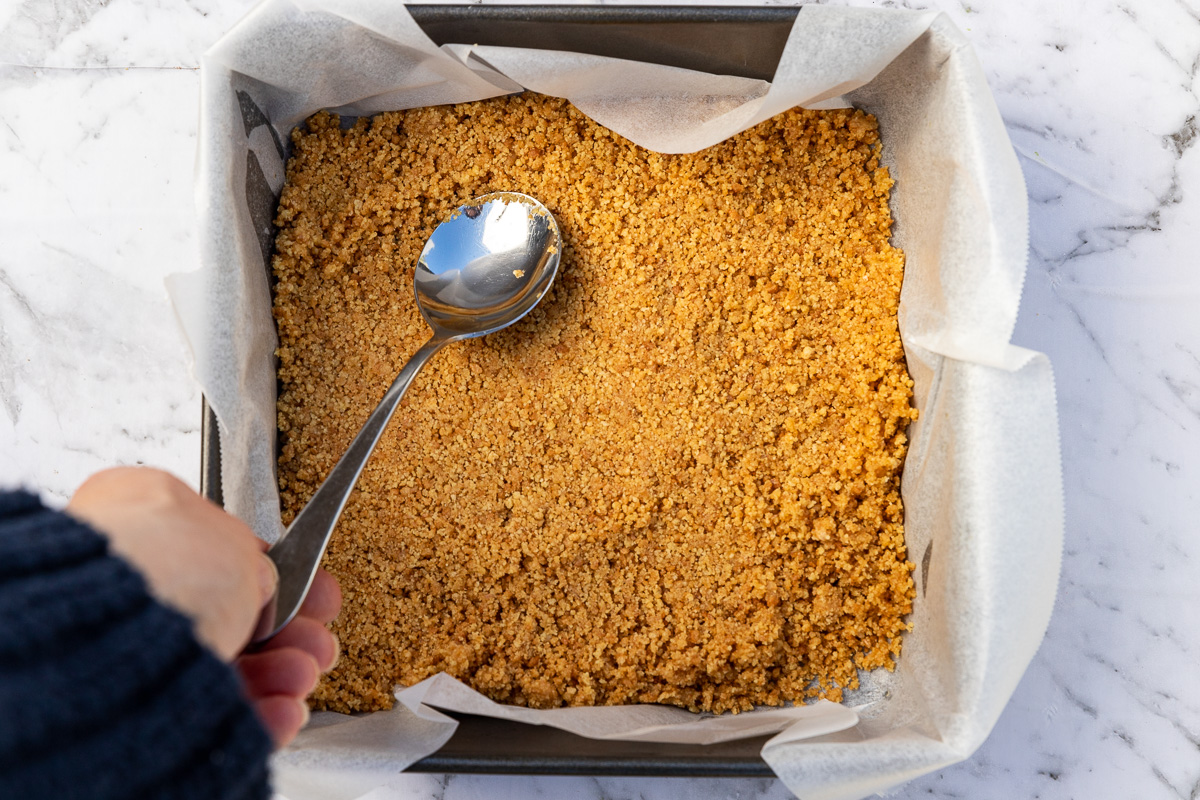
Step 3: Press the biscuit crumb base into a square baking tin. Make it nice and even with the back of a metal spoon. I usually line the tin with baking paper first.
Then put the tin in the freezer (or fridge if you don’t have space) while you make the caramel.
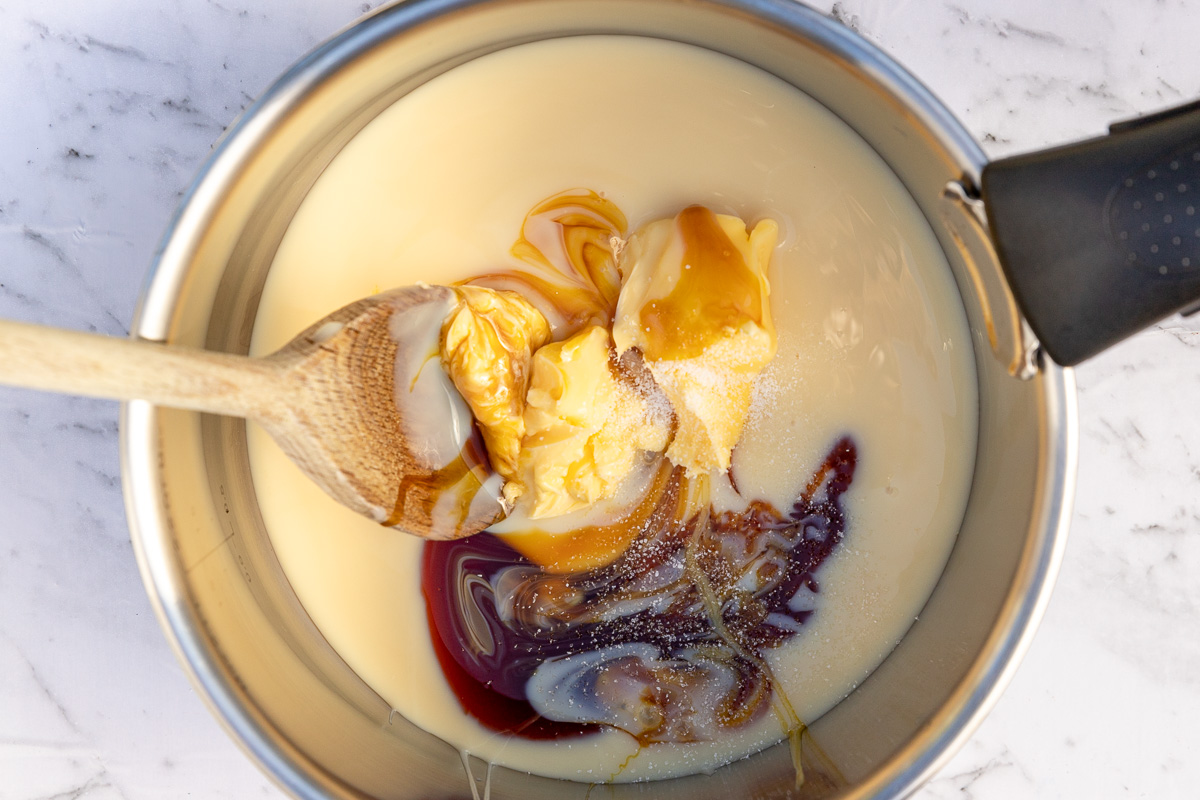
Step 4: To make the caramel layer, pour the condensed milk into a medium saucepan. Then add the butter, salt and golden syrup if using.
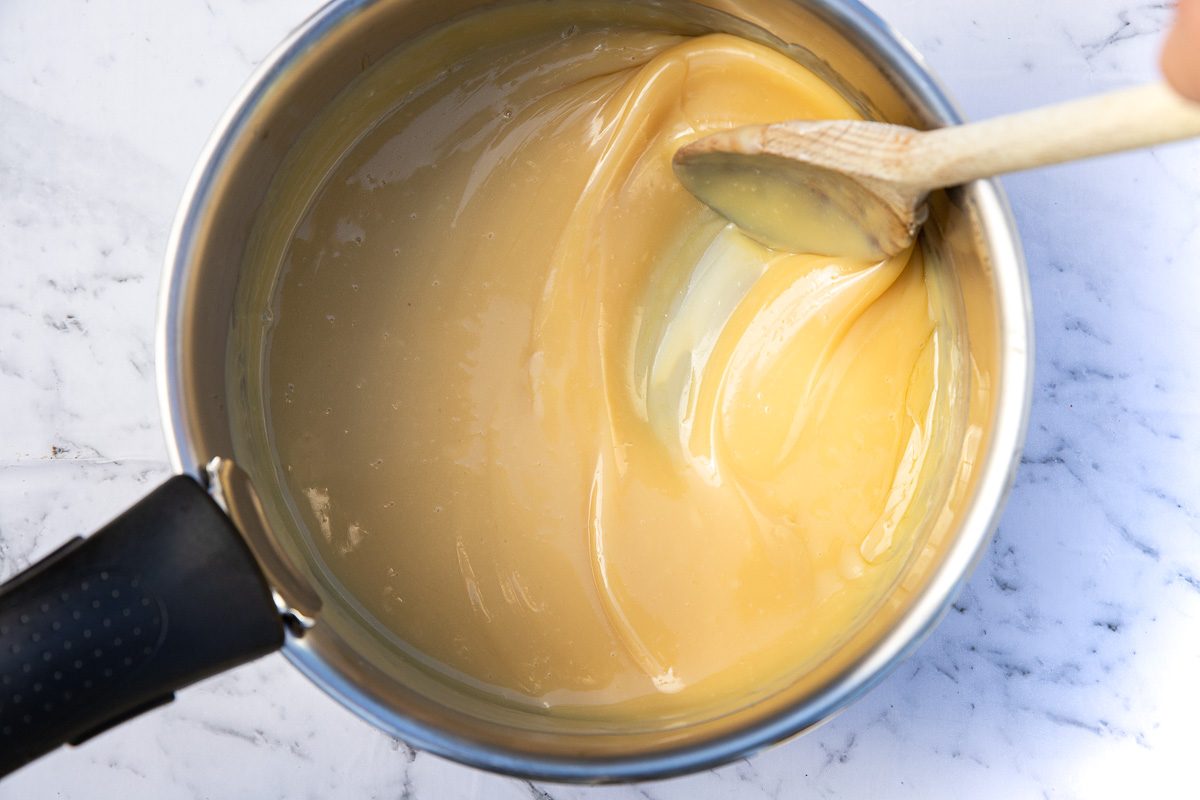
Step 5: Heat on a medium heat until everything has melted together. Then continue heating and stirring continuously for 10 minutes. The caramel will be slightly thickened at that point.
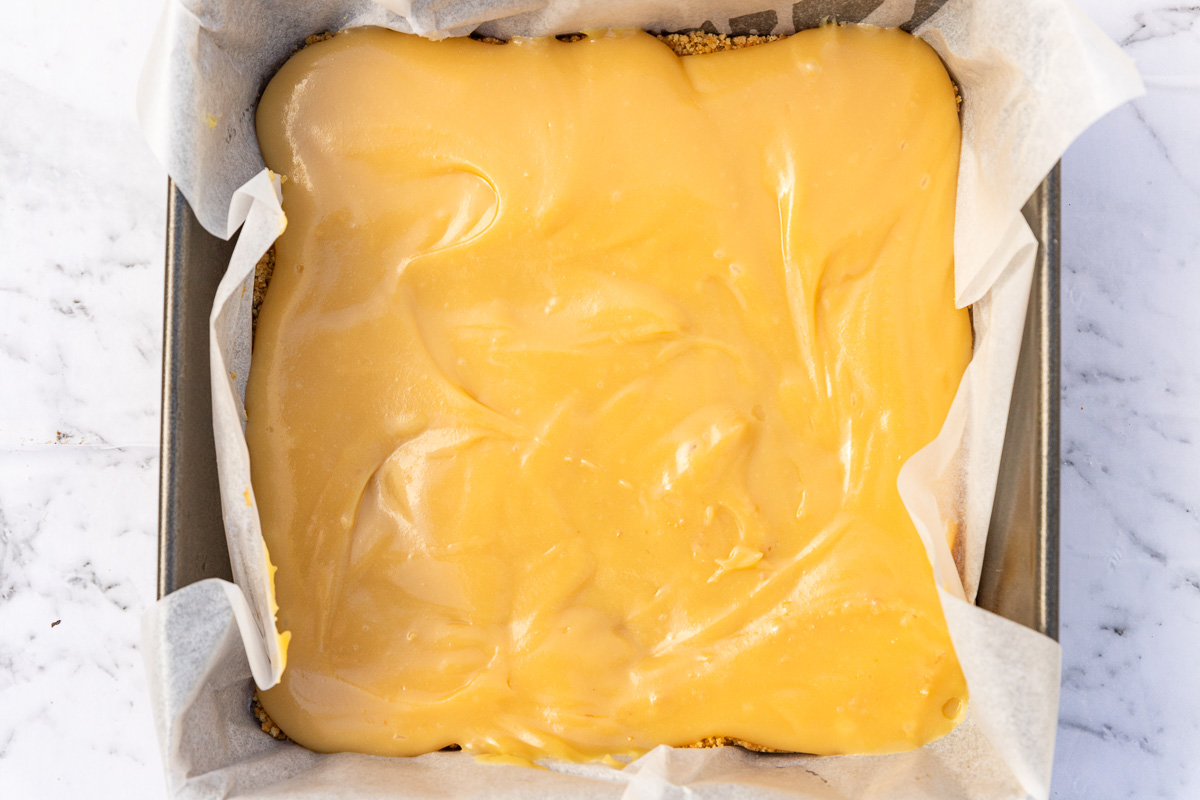
Step 6: Pour the caramel onto the biscuit base and smooth it out. Pop into the freezer or fridge just while you melt the chocolate for the top.
Step 7: Melt the chocolate in the microwave. I usually do this in 30-second bursts until it’s almost completely melted (1.5 – 2 minutes). Then I stir well to finish melting. At this point you can add the drizzle of oil.
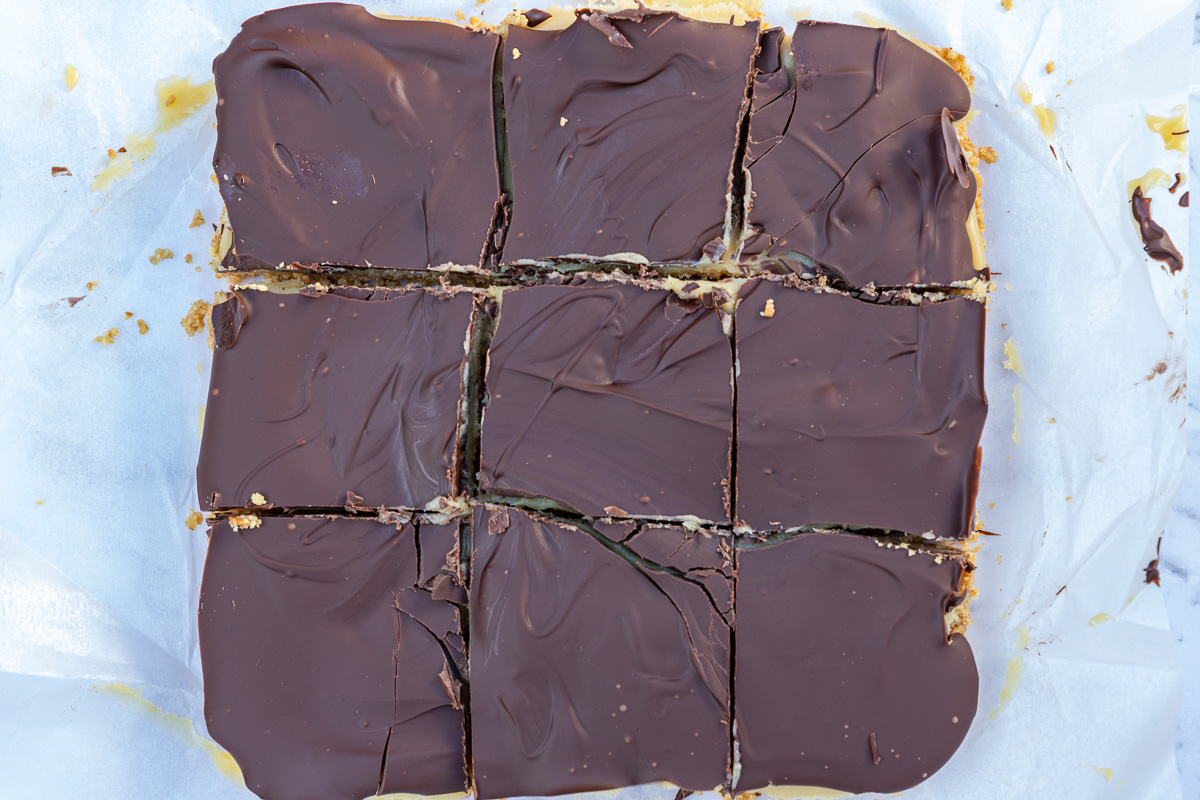
Step 8: Spread the chocolate evenly over the top of the caramel shortbread. Then cover and pop into the fridge until set.
Then cut into squares and enjoy! I usually go for 9 large squares or 16 smaller.
Helen’s Top Tips
- Set a timer for 10 minutes when you’re making the caramel. Keep it on a medium heat and stir constantly so it never gets a chance to stick or burn.
- It’s pretty easy to know when the caramel is ready! It will thicken just a little and when you drag the wooden spoon along the bottom of the pan it will take a moment to run back.
- As well as adding oil to it, there are a couple more tricks to stop the chocolate cracking. Let the slice ‘rest’ for 5 to 10 minutes after taking out of the fridge. Then warm a sharp knife under running water before cutting it into neat slices. Consider it your caramel slice ‘insurance policy’!
- Make your chocolate caramel squares your own! As well as experimenting with different types of biscuits and chocolate, you can add chopped nuts or coconut to the caramel layer or on top. My wild card suggestion? Add a couple of tablespoons of peanut butter to the caramel!
More things to know (recipe FAQ)
Make sure you stir the caramel until it thickens and darkens slightly in colour – around 10 minutes. Use full fat sweetened condensed milk (NOT light or skim) and don’t grab evaporated milk by mistake (NOT the same). Lastly, let your slice set in the fridge for an hour before cutting.
At least a week in an airtight container in the fridge (if it doesn’t get gobbled up before!). I like the texture better straight from the fridge. In cooler temperatures it will also keep well for around 5 days in an airtight container on the counter or in the pantry.
The caramel may become a little softer once you defrost it, but yes caramel shortbread freezes well! Freeze it wrapped well or in an airtight container for up to 3 months.
No, don’t do this. The caramel won’t set enough. It’s so easy to make your own caramel with condensed milk for this no-bake caramel slice recipe, anyway.
More easy slice recipes
- Hedgehog slice has the cutest name, but it’s also a very easy chocolate dessert option that everyone will love.
- 7 layer bars! The dessert that you can make without a bowl and with just one hand.
- You won’t be able to stop eating these cheerio bars, and they’re unbelievably easy to make with just a few ingredients.
- One for peanut butter lovers – these no bake peanut butter crunch bars! They taste like a candy bar, but they’re actually a not-so-naughty treat.
- Classic chocolate covered rice krispie bars, made to look classy with only 4 ingredients.
Super Easy Caramel Slice (No Bake)
Equipment
Ingredients
For the biscuit base layer
- 150 grams biscuits, Any plain sweet biscuits work (Ideas in Australia: Arrowroot, Marie, Scotch Fingers, Digestives; ideas in UK: Nice, Malted Milk, Rich Tea, Digestives; ideas in USA: Graham Crackers)
- 80 grams unsalted butter
For the caramel layer
- 395 grams sweetened condensed milk, A whole tin of full fat, NOT light or reduced fat
- 50 grams unsalted butter
- 2 tablespoons golden syrup, Substitute with corn syrup, maple syrup, honey, date syrup, rice bran syrup, or just skip this altogether.
- ½ teaspoon salt
For the chocolate layer
- 200 grams dark chocolate, good quality (you can substitute with milk chocolate, caramel chocolate, white chocolate or a mixture if you like)
- 1 tablespoon oil, (vegetable, light olive or melted coconut oil) This is optional. It just stops the chocolate from cracking when you cut the slice into squares.
Instructions
- Line an 8×8 inch square baking tin with baking paper and set aside.
- Crush the biscuits until they look like fine breadcrumbs. You can do this in a food processor (it will take 10 to 20 seconds) or put the biscuits in a Ziploc style bag, seal it and hit it with a rolling pin on a hard surface.150 grams biscuits
- Melt the butter in the microwave in a medium-sized microwave-safe bowl (try 30 seconds to start with, then another 30 seconds if not fully melted).80 grams unsalted butter
- Add the biscuit crumbs to the melted butter and mix well with a spatula.
- Empty the biscuits and butter mixture into the baking tin and smooth down and right into the corners with the back of a metal spoon. Put the pan in the freezer or fridge while you make the caramel.
- To make the caramel layer, pour the whole tin of sweetened condensed milk into a medium saucepan (non-stick is best). Add the butter, golden syrup (if using) and salt.395 grams sweetened condensed milk, 50 grams unsalted butter, 2 tablespoons golden syrup, ½ teaspoon salt
- Heat on a medium heat, stirring until all the ingredients have melted together. Then continue heating and stirring continuously for 10 minutes until the caramel has darkened and thickened slightly (set a timer).
- Take the caramel off the heat. Then pour it over the biscuit base. Smooth it out into an even layer. Pop it back into the freezer/fridge while you prepare the chocolate layer.
- Break the chocolate up into a medium-sized microwave-safe bowl. Microwave for 1.5 to 2 minutes in 30-second bursts or until almost completely melted. Stir well until fully melted. Then add the tablespoon of oil and stir well again.200 grams dark chocolate, 1 tablespoon oil
- Pour the melted chocolate and oil mixture over the caramel layer. Smooth out, then cover and let set in the fridge for at least an hour (longer is better).
- To serve, let your caramel slice warm up slightly for 5 to 10 minutes at room temperature. Then run a sharp knife under the hot water tap. Cut it into 16 small squares, or 9 larger squares if you prefer. Store in an airtight container in the fridge for up to a week.


Doubled the biscuit + butter to make it thicker on the slice and it crumbled everywhere and didn’t set.
Oh hi Jessica! Doubling the biscuit and butter would be the issue. The base does sometimes crumble a tiny bit but that’s just the nature of the recipe – it’s like a cheesecake base. As for it not setting, it’s best to keep it in the fridge for at least an hour before cutting. Also, make sure you stir the caramel until it thickens and darkens slightly in colour – around 10 minutes. I hope you give it another go! 🙂
I’ve made these many times swapping out the filling or biscuits . Easy to make
Never fails . I take them to work for my colleagues they don’t last long .
Oh, so happy to hear this, Pippa! I love helping to make people more popular with their friends, and in your case colleagues! 🙂
Such an easy recipe and so tasty. I took them to work for my colleagues eaten before I could get one . Thank you
Well, this is the biggest compliment, Pippa! I’m so glad everyone enjoyed them so much (even if you didn’t get one yourself!). Maybe next time you should make a whole batch just for yourself! Thank you so much for letting me know! 🙂
lovely
Very happy you liked it, Trish! Thank you so much for taking the time to review 🙂
perfect!
Great to hear this, Nat! Thank you for your kind review! 🙂
Today I decided to make the peanut butter crunch bars. Not only is having a no bake dessert wonderful. They are delicious!! Just the right amount of peanut butter flavor, not over powering at all.
Peanut butter is my husband’s favorite… so needless to say there isn’t much left to freeze😃
Oh, this is so wonderful to hear, Vicky! Thank you so much for letting me know how much you enjoyed them. I don’t make these too often because I keep popping back to the freezer to grab more. Whoops. Sounds like hubby had the same problem at your house. So happy to hear this, though – thank you again! 🙂
Excellent fool proof recipe. Thanks for sharing.
Made loads of time, my granddaughter loves them and takes them to school to share with her friends.
Hello Julie! I’m thrilled you’ve already made this many times and you and your granddaughter and friends are enjoying it so much! Thank you so much for letting me know. This really makes my day 🙂
Hello, how can I make the caramel in the middle, more firm? Thank you
Hi, Daisy! It can take a bit of practice to get it just right. Make sure you cook the caramel until it has slightly thickened and when you run the wooden spoon through it it takes a moment to run back. Make sure you’re using full fat sweetened condensed milk and not light. Also, let it set for a few hours (or even overnight) before cutting and serving – that should make it a bit thicker too. You can even pop it into the freezer for a while if you want it to set faster. Let me know how you get on!
You didn’t add the amount of butter?
Hello! Are you looking at the recipe card at the bottom of the post? Just click ‘jump to recipe’ at the top, or scroll down. You’ll need a quarter cup/4 tablespoons, 50 grams of butter. Good luck and I hope you enjoy it!