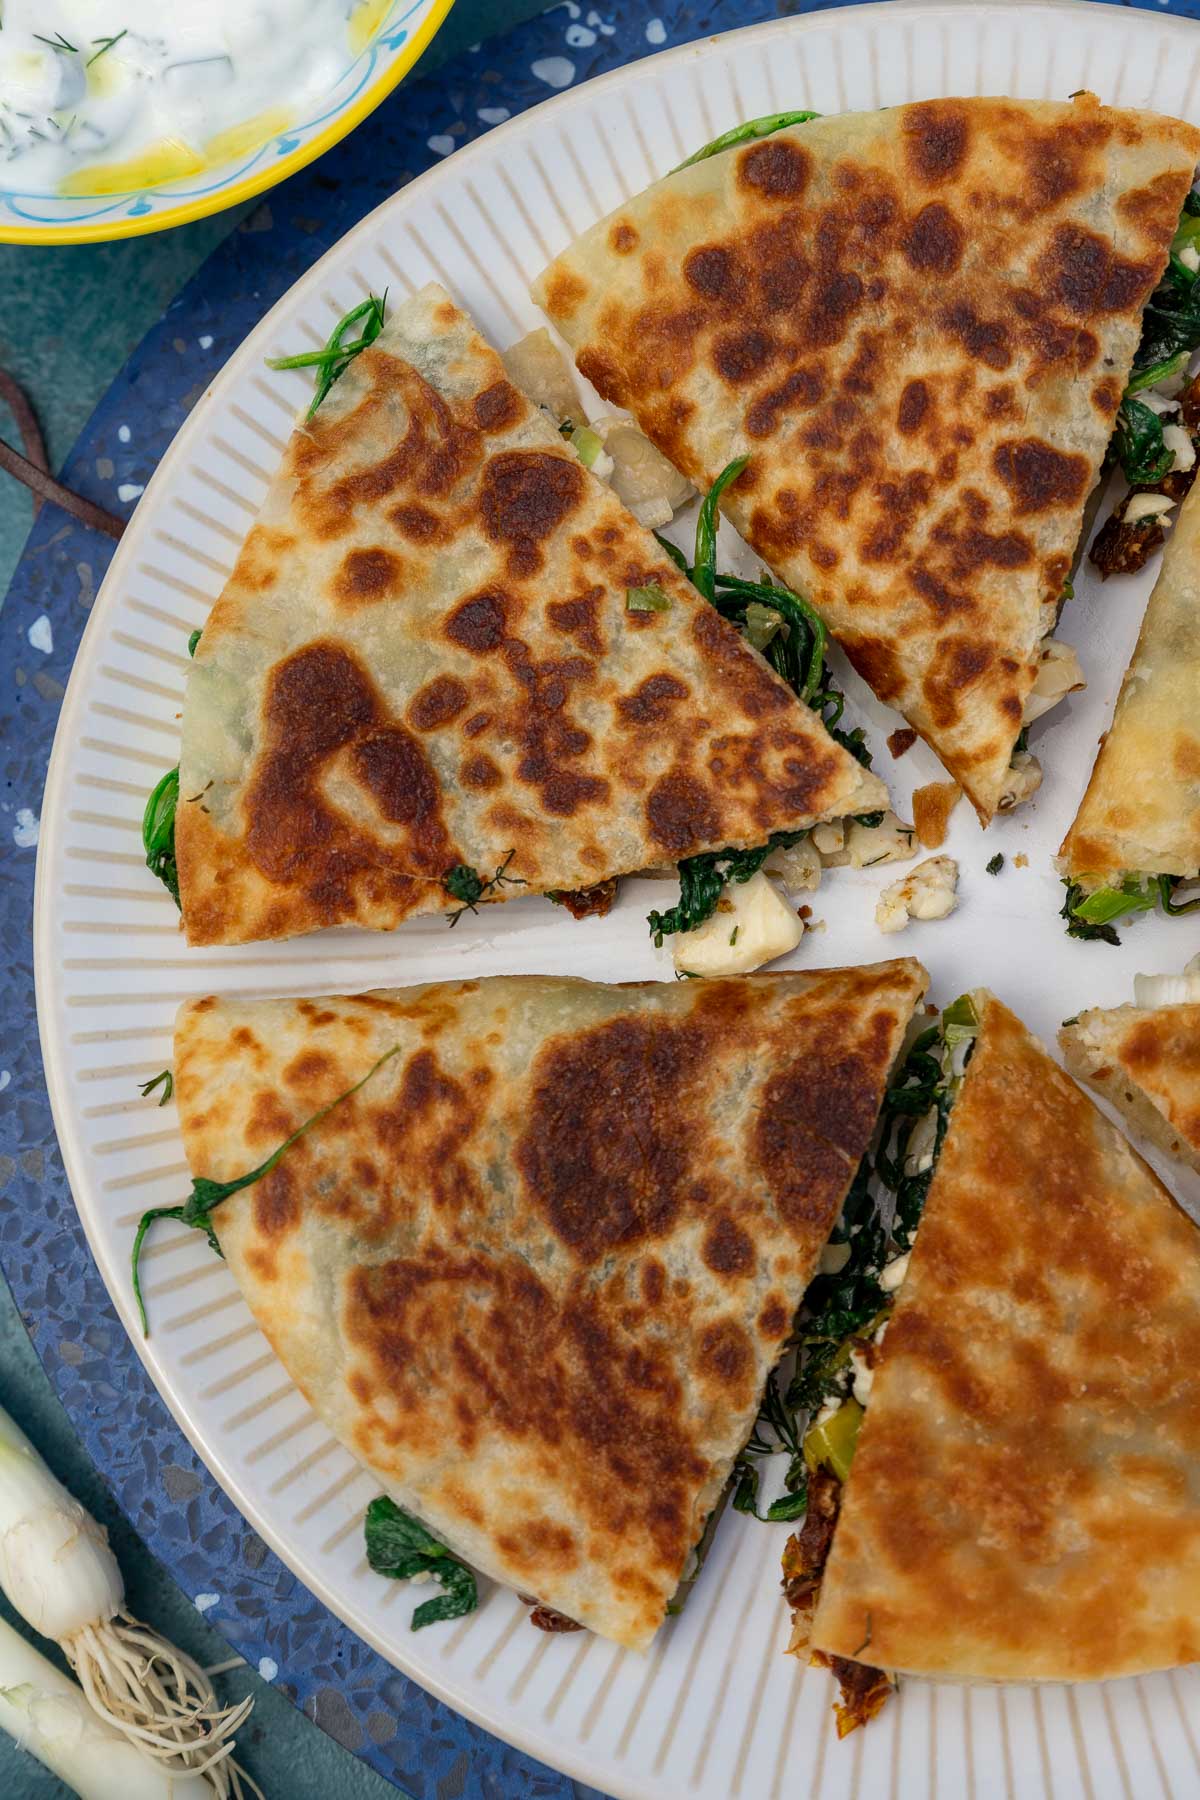
Greek Quesadillas With Tsatziki (Easiest Spanakopita!)
on Feb 26, 2024
This post may contain affiliate links. Please read my disclosure for more info.
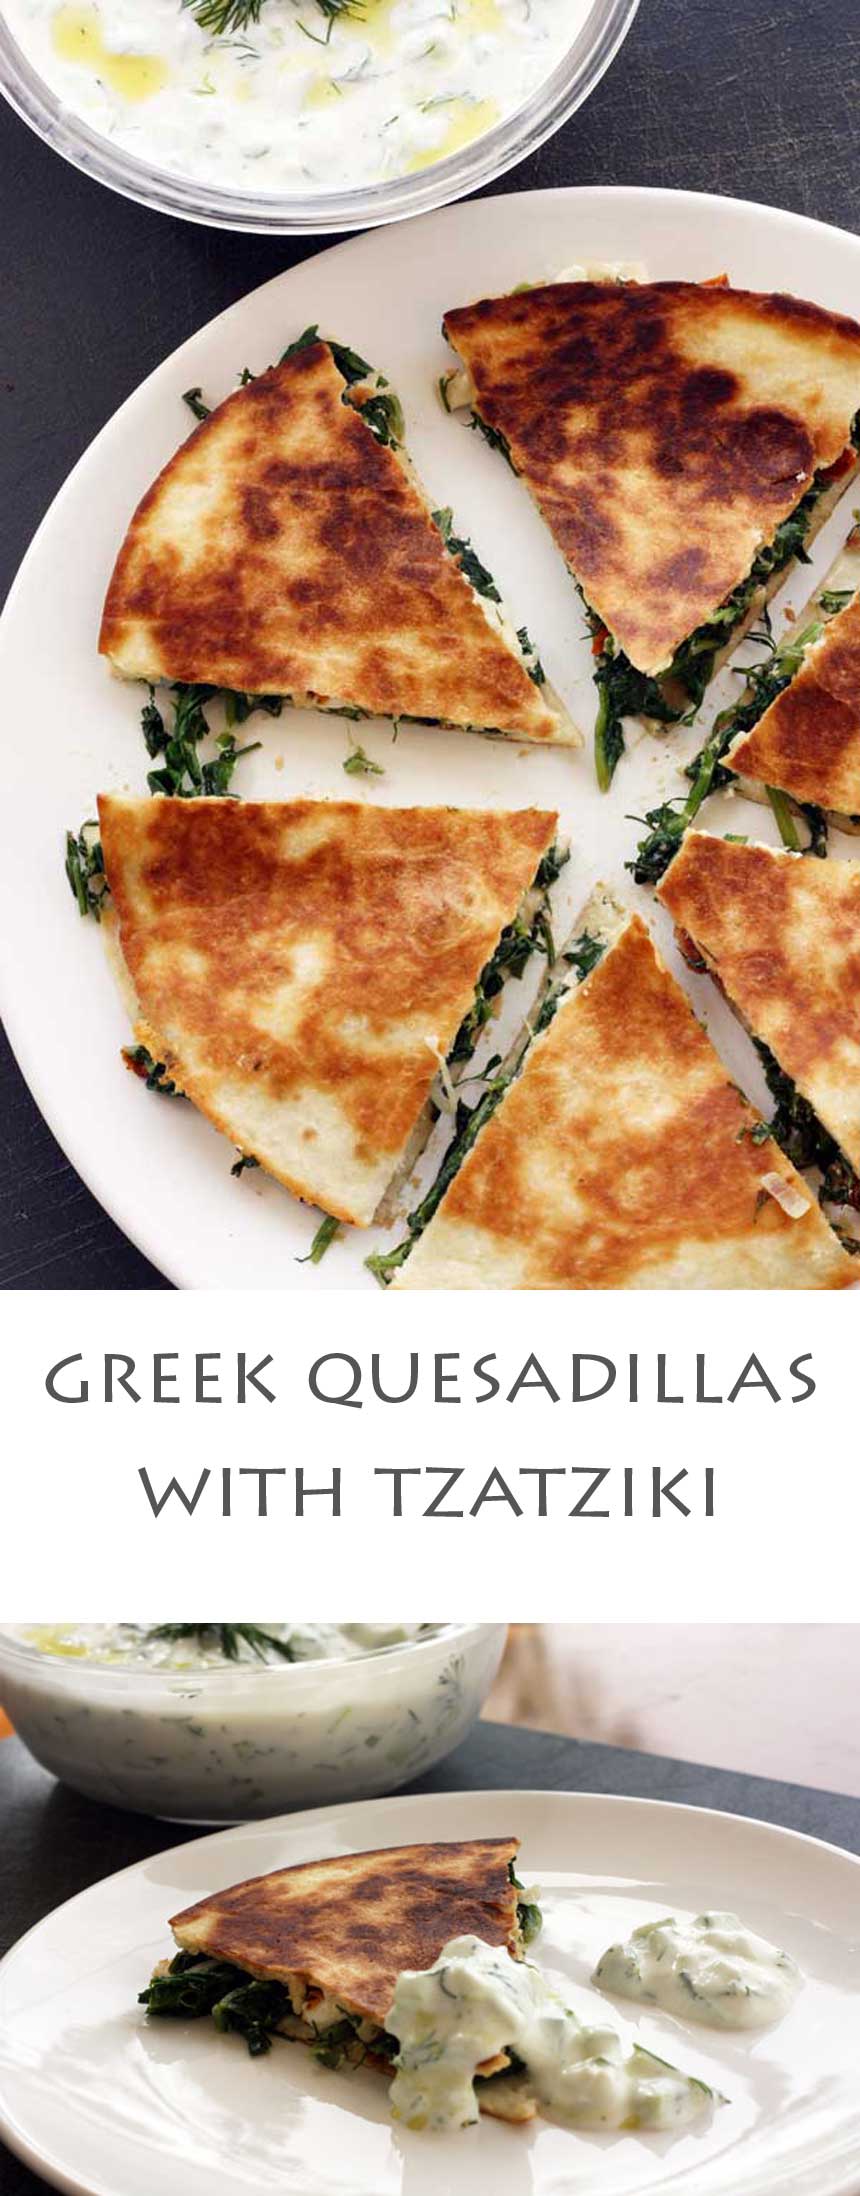
Ever heard of Greek-Mex? You could say these Greek quesadillas are the easiest homemade spanakopita, without the fuss of using pastry. All you need is a simple spinach and feta mixture, a few tortilllas, and some easy tsatziki sauce to serve!
What are Greek quesadillas?
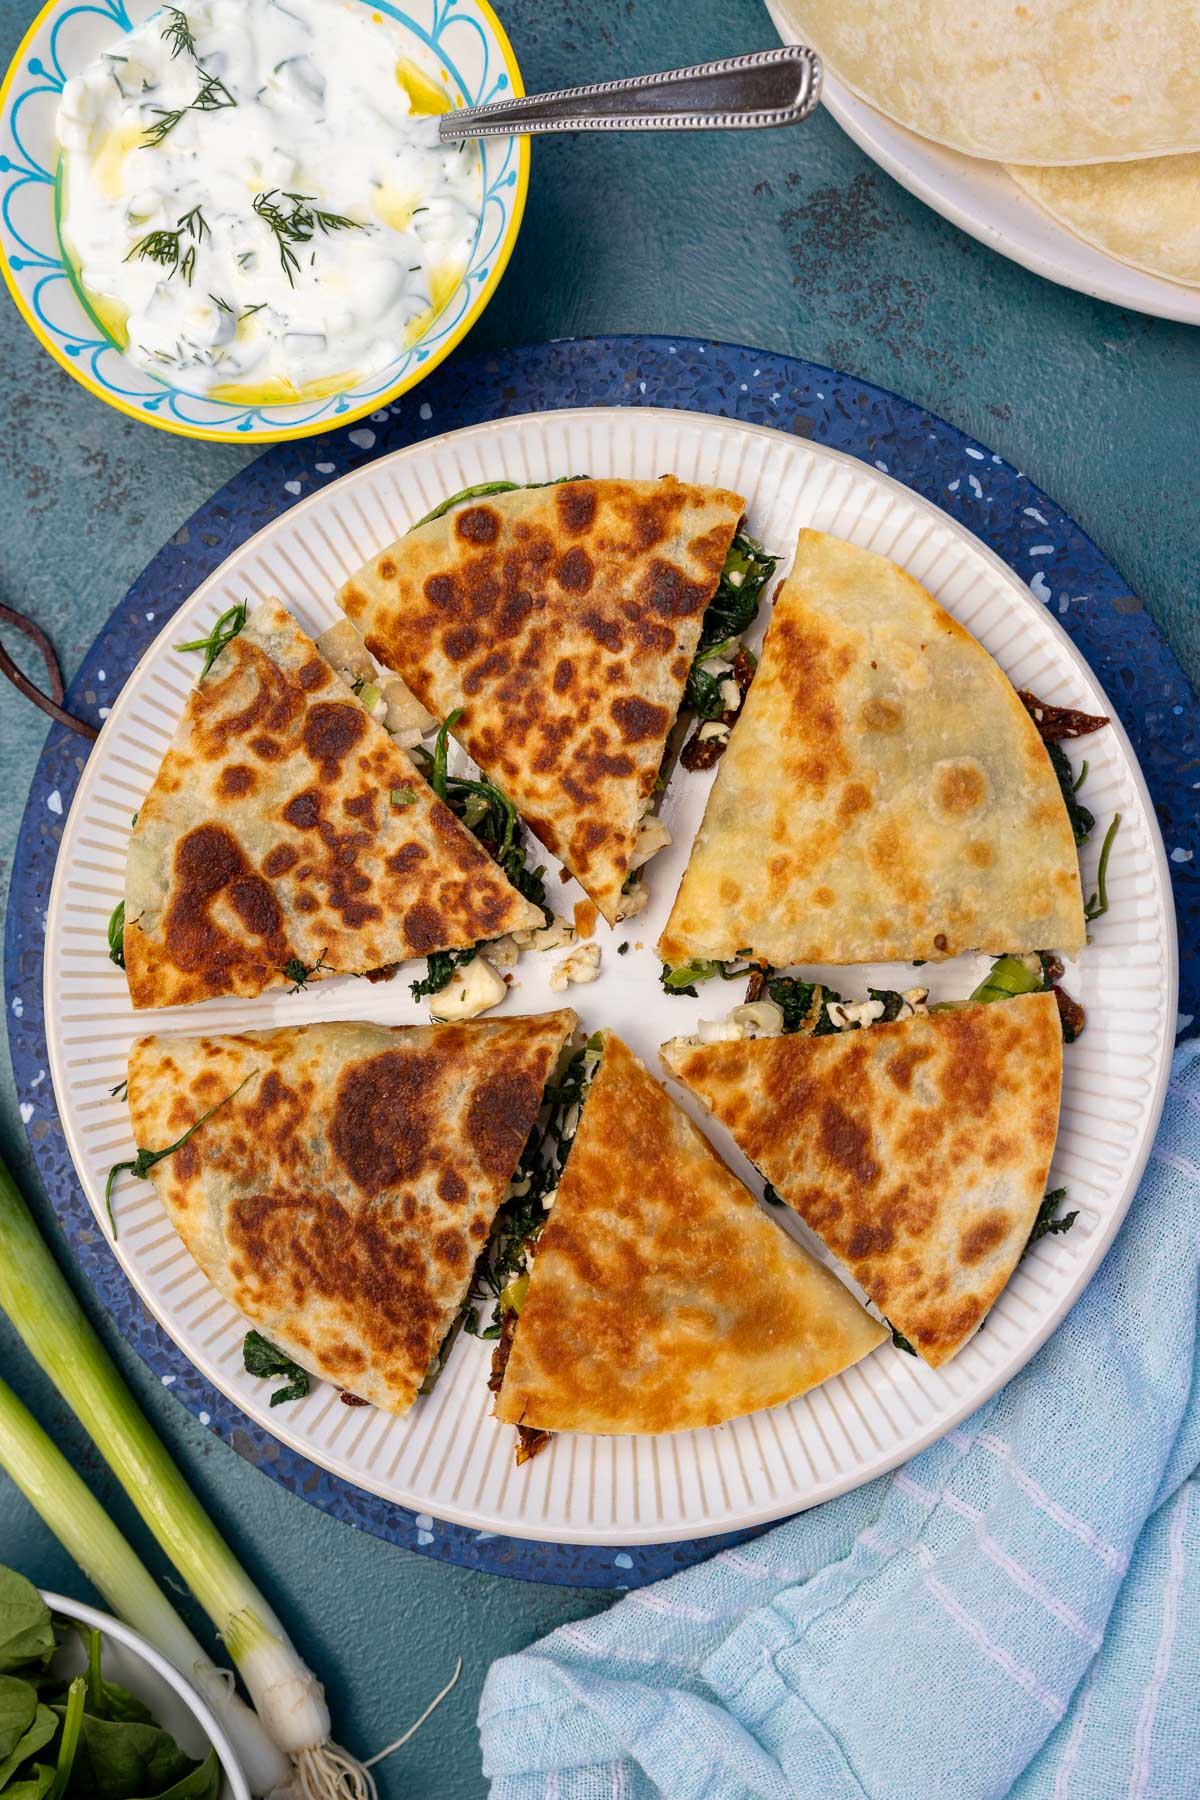
If you’re a fan of anything ‘spinach and feta’ (two hands up over here), you’re going to be impressed by these. Greek quesadillas are simply tortillas briefly cooked in a frying pan and then stuffed with a simple spinach and feta mixture.
If you’re thinking they sound a bit like a Greek spanakopita – or spinach and feta pie – you’d be absolutely right! Except these quesadillas are the easiest version of spanakopita that you can imagine since you don’t need any fiddly pastry.
If you’ve ever tried a Turkish stuffed flatbread called a gozleme, you might think a Greek quesadilla is similar to that, too. Except, once again, you don’t need to make any dough!
Why you’ll love them
- Perfectly paired classic Greek flavors. Spinach, feta cheese, dill, and sundried tomatoes are a mix of flavors that are just meant to be.
- Make a perfect treat of a lunch! Since there’s no homemade pastry or dough involved, these are quick and easy enough to make for yourself for lunch.
- They’re also a great easy appetizer for guests. Serve with a bowl of tsatziki for dipping and you won’t hear any complaints.
- Crispy, golden, cheesy and delicious. But with lots of spinach to make you feel smug, too.
- Lighter than classic spanakopita! Again, it’s all about the pastry (or lack of!).
- Kid-friendly. These cheesy quesadillas are mildly flavored and perfect finger food for little hands!
About the ingredients
You’ll find a full list of ingredients with amounts in the recipe card below. But here’s a summary of what you need to know.
Tortillas: Use flour or corn tortillas – your choice (use corn if you’d like the quesadillas to be gluten free). You’ll need tortillas that are about 8in/20cm in diameter – so that they fit in an average sized frying pan!
For the spinach and feta filling
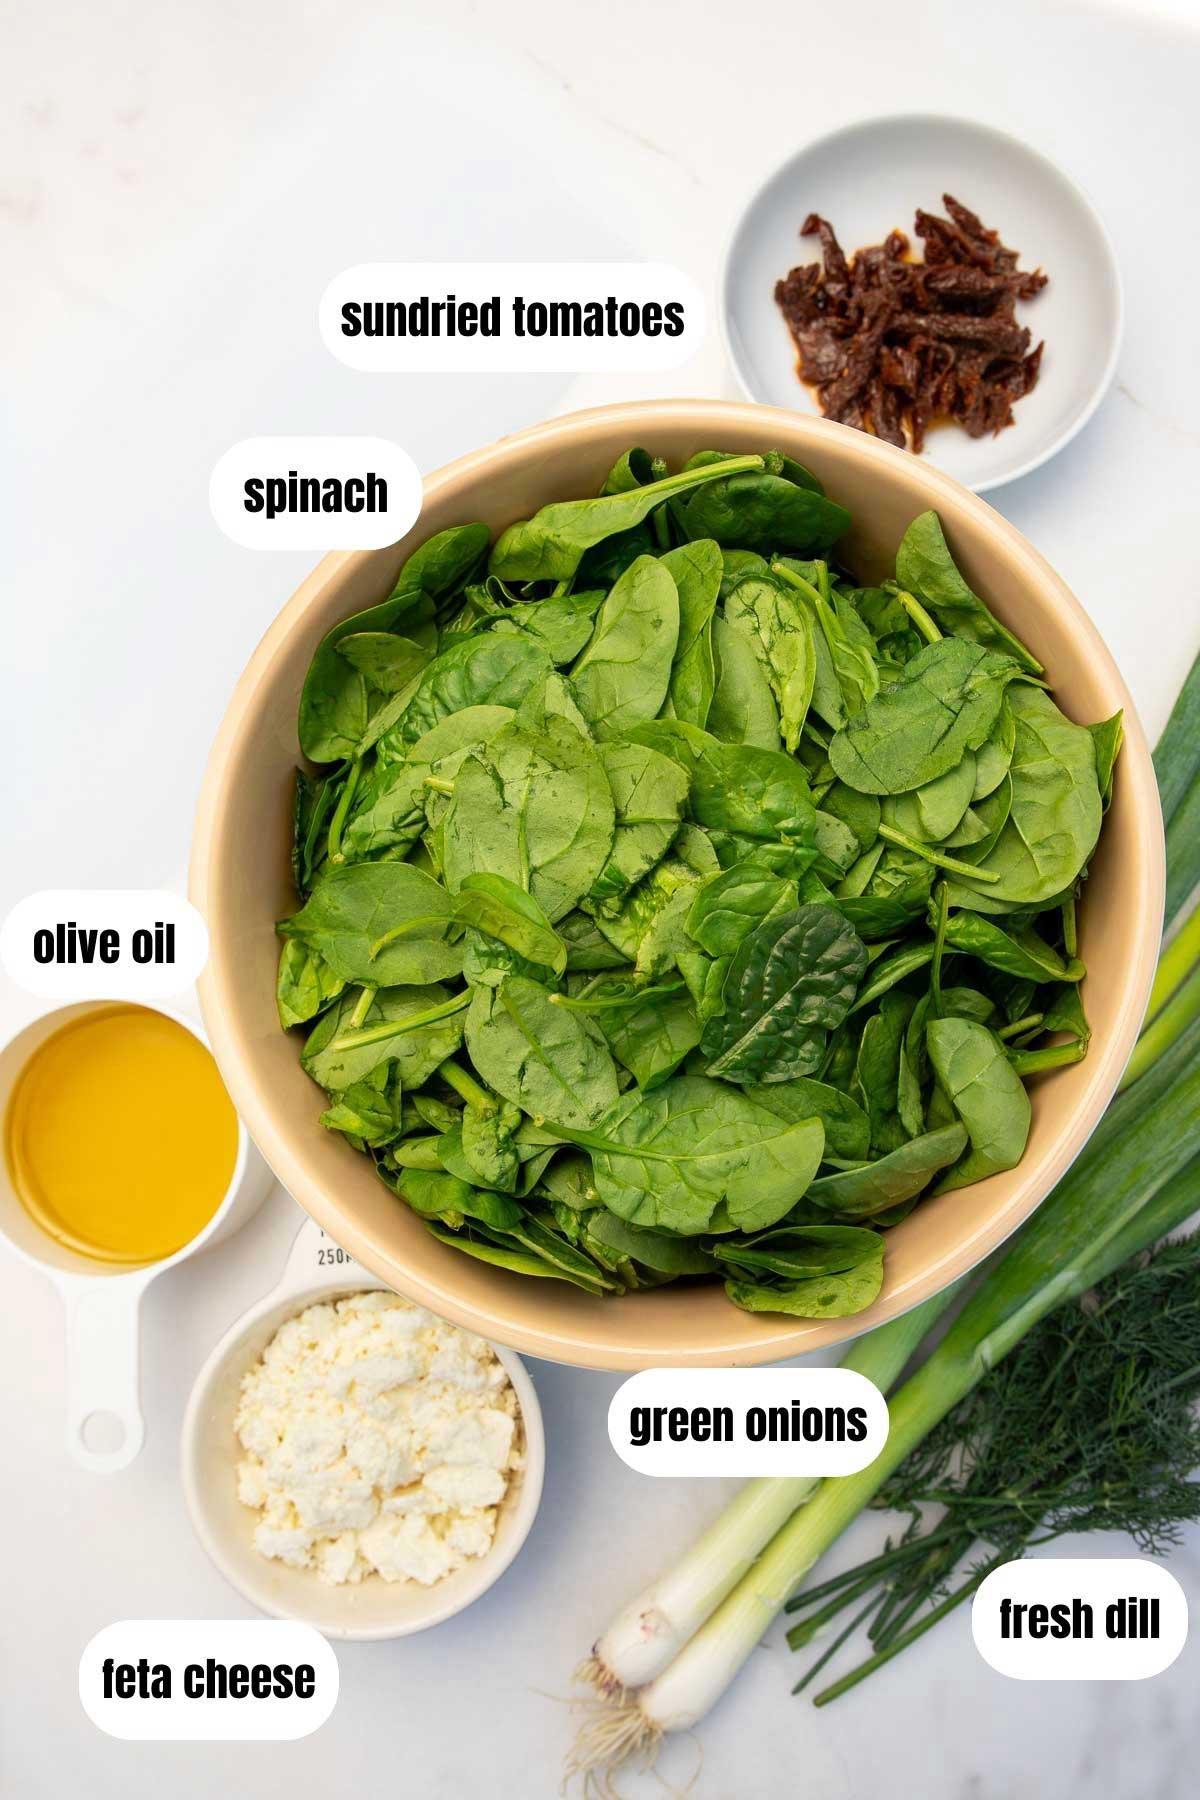
Spinach: I usually grab a large bag of ready-washed fresh baby spinach for convenience. Chopped regular spinach is fine, too. It’s also possible to use a package of frozen spinach. You’ll need around half a 10-ounce frozen package to get the equivalent amount.
Green onions. Also known as salad onion, scallions, or spring onions. You’ll only need a couple of large ones (use more if they’re on the smaller side).
Dill. For a characteristic Greek flavor. Feel free to substitute with parsley, or another fresh herb. For more ideas, here is an article about the best dill substitutes.
Sundried tomatoes. These add a delicious extra burst of contrasting flavor. I usually have a jar of marinated sundried tomato strips already in the fridge. These are perfect. Of course, you can also chop up a few yourself if you can only get whole sundried tomatoes.
Haven’t got any sundried tomatoes? Of course, you can use chopped fresh tomatoes instead!
Feta cheese. I prefer using an authentic Greek style feta. However, you can use any type. I occasionally use Danish or French style feta instead, which is creamier in texture.
Olive oil. You’ll just need a little drizzle of this for the pan. However… you can actually get away with not adding any oil to the pan at all. I just like the extra crisp that cooking in oil gives the finished quesadillas! (like a Greek crunchwrap… mmm!)
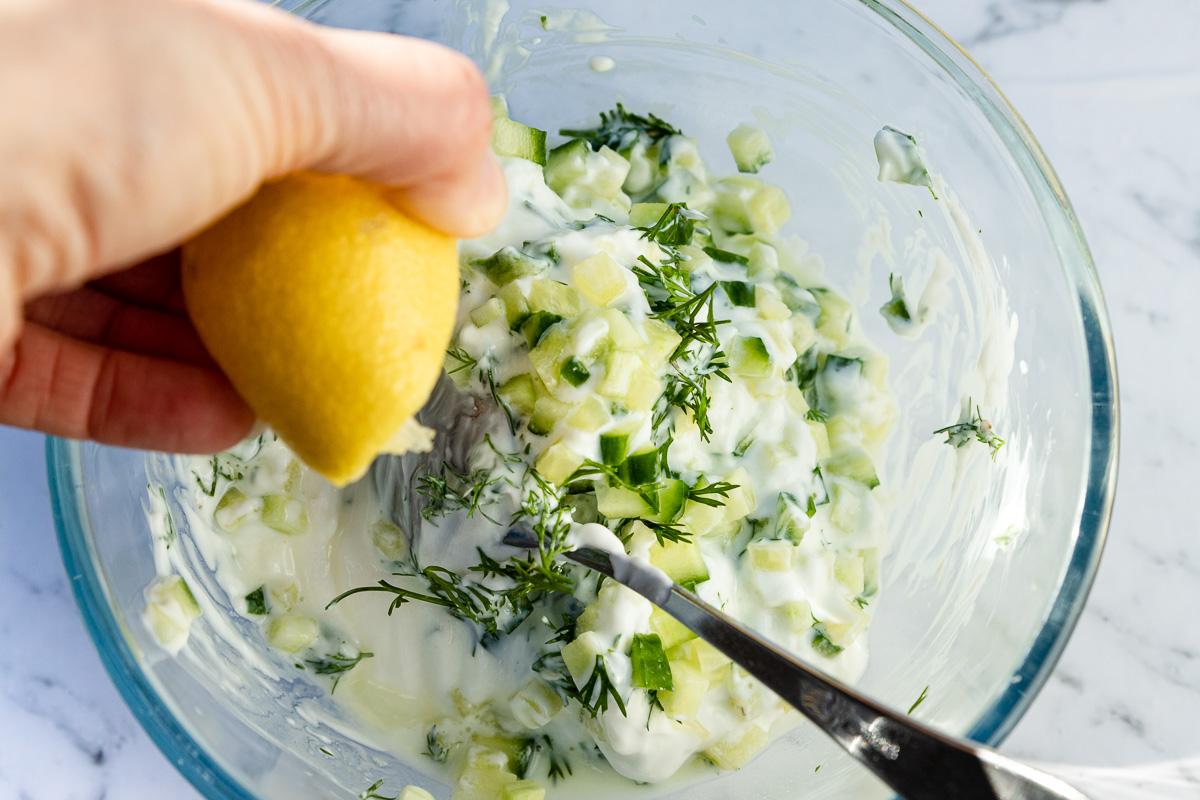
For the tsatziki sauce
While not absolutely essential, I love to serve my delicious cheesy spinach quesadillas with a big bowl of tsatziki for dipping!
Here’s what you’ll need for that:
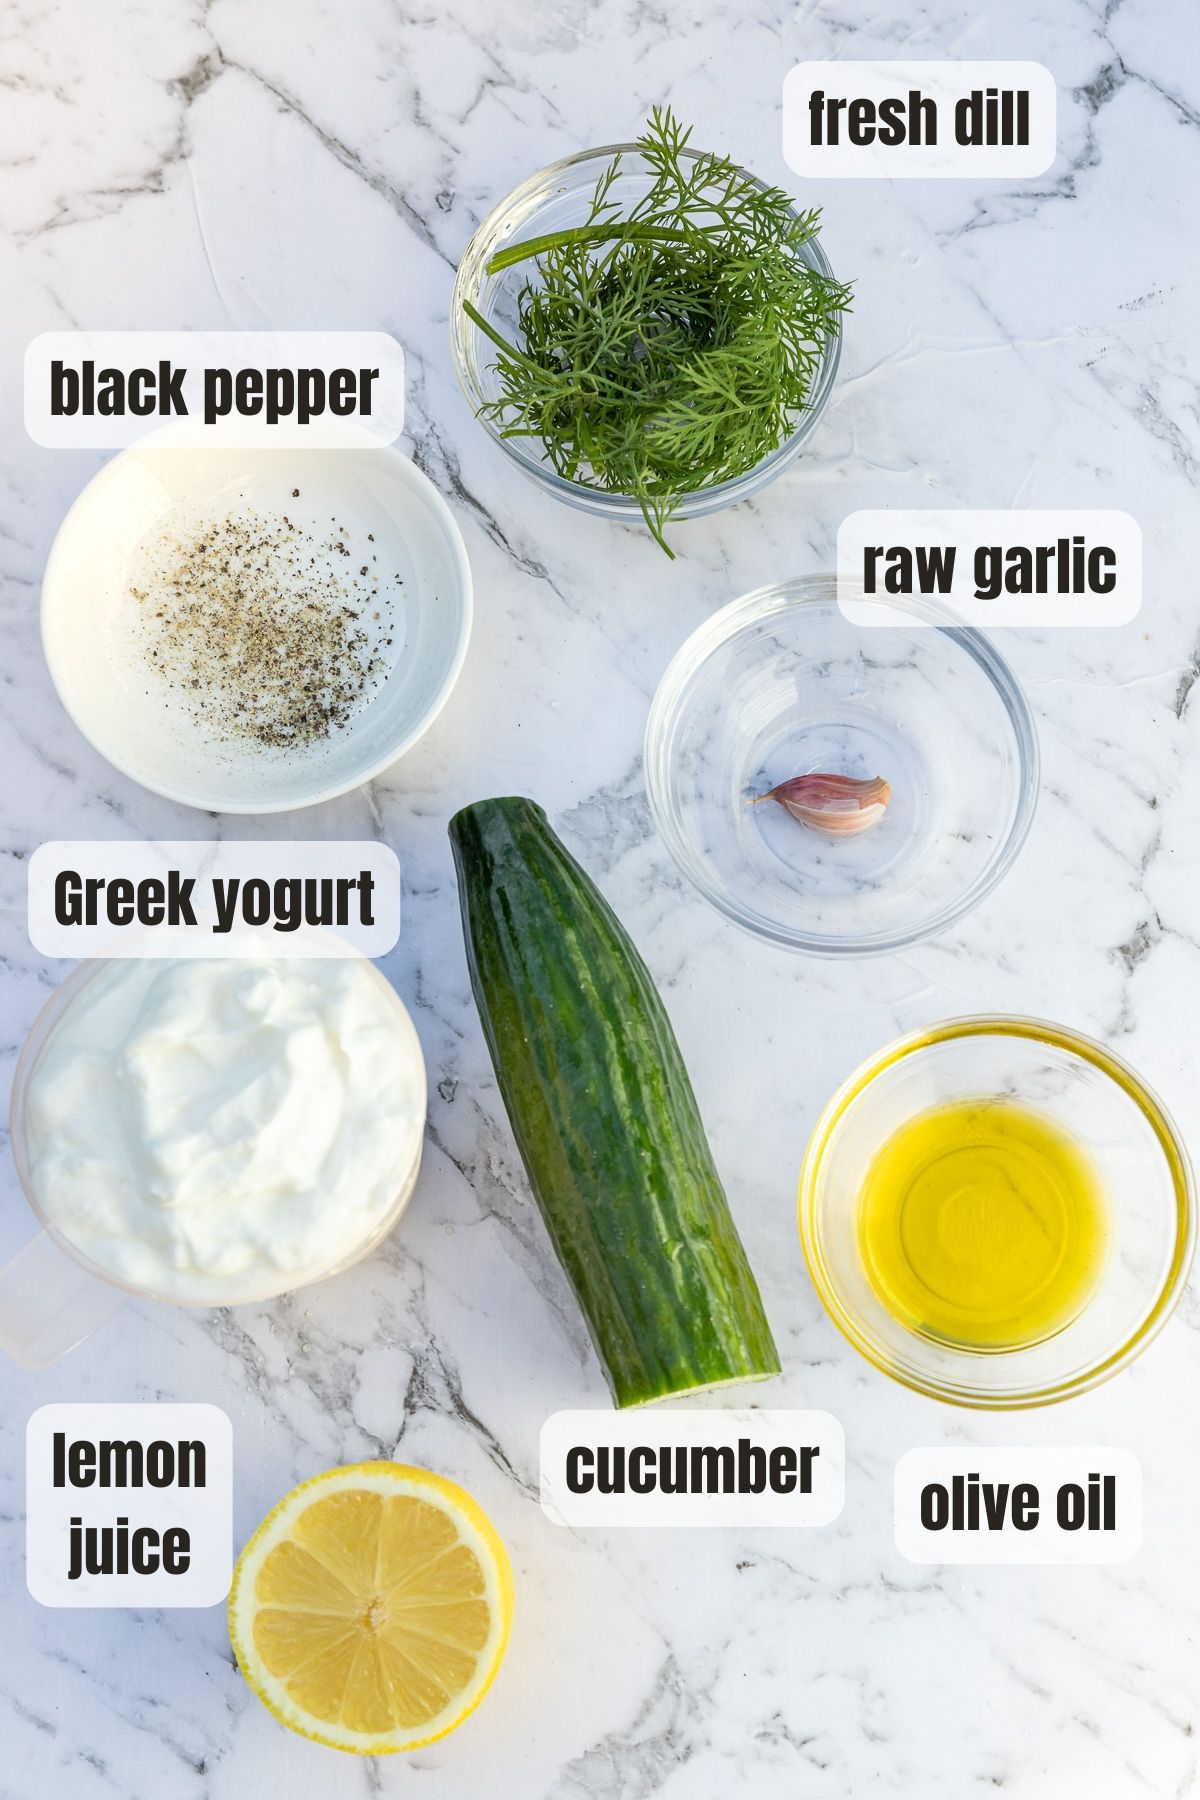
Greek yogurt: If you can, pick an authentic Greek yogurt brand that’s just milk and yogurt cultures. I like Chobani.
Garlic: Since you’re using it raw, just half to one clove, crushed.
Dill: Add a little to the tsatziki as well, since you bought it anyway to use in the quesadilla mixture.
Cucumber: Just regular cucumber, diced finely.
Lemon juice, black pepper and a drizzle of olive oil: The finishing touches!
Top Tip
Make extra tsatziki! There are so many other ways to use it. In fact, I wrote a whole post with 50+ ways to eat tzatziki! I also wrote another recipe post just about tsatziki if you’d like to take a read!
How to make Greek quesadillas
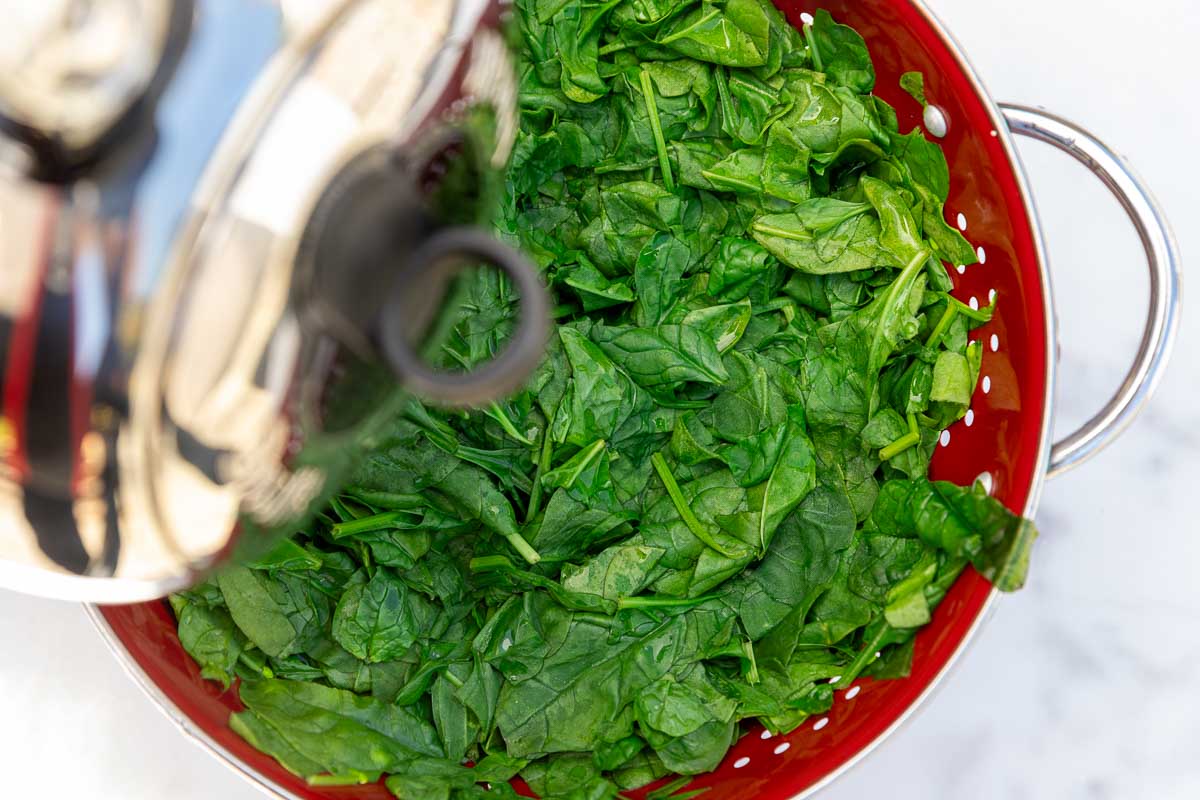
Step 1. Wilt the spinach. There are two ways to do this. You can either heat it gently in a pan until it wilts down (it won’t take long). Or you can pile it into a colander and pour boiling water all over it (my favorite because it’s so quick and easy!).
Whichever method you choose, you’ll then squeeze out as much water as you can with your hands (I usually rinse in cold water first to cool). Alternatively, squeeze it in a clean tea towel.
Step 2. Mix all the filling ingredients together in a bowl.

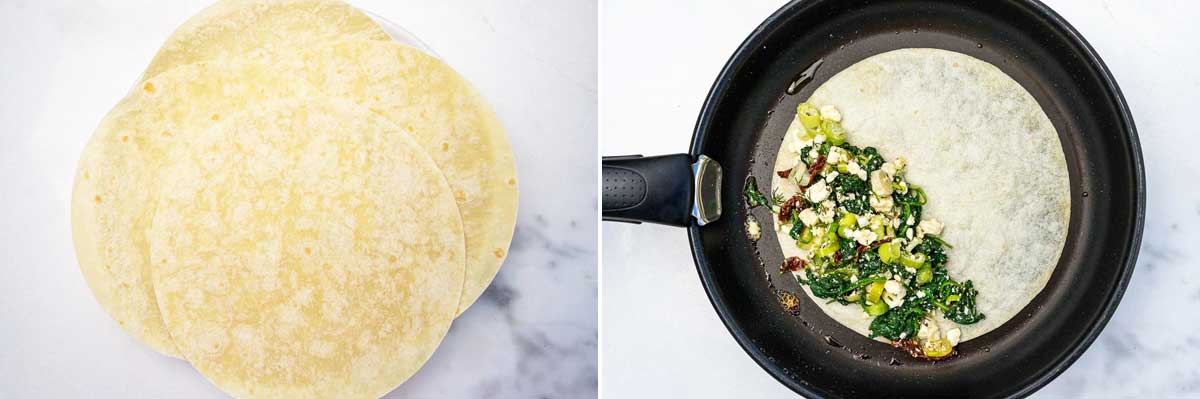
Step 3. Cook the quesadillas! I usually drizzle a little olive oil into a frying pan first for extra crispy quesadillas. Then simply add the tortilla and pile around a third of the spinach feta mixture onto one half of it.
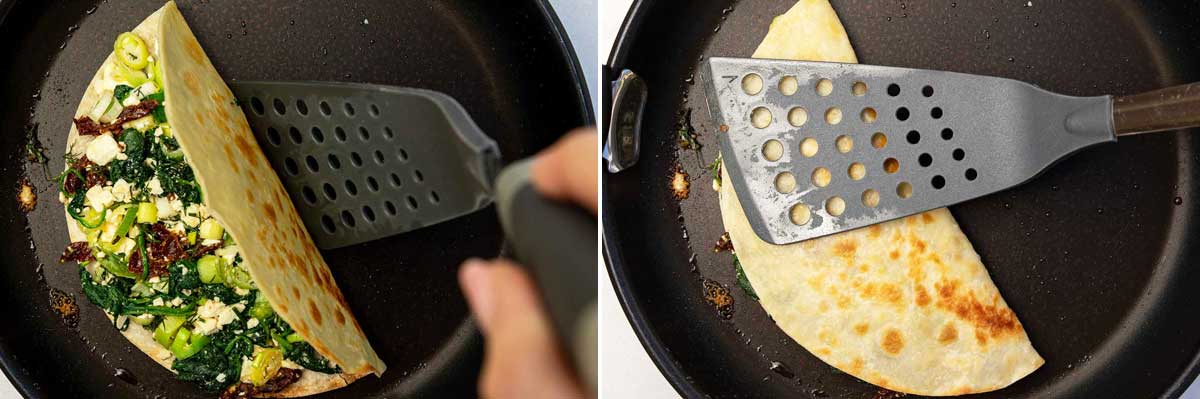
Step 4. Use a fish slice to check if the tortilla is golden and crisp. When it is, simply fold the tortilla over the half with the mixture on it and press down to seal.
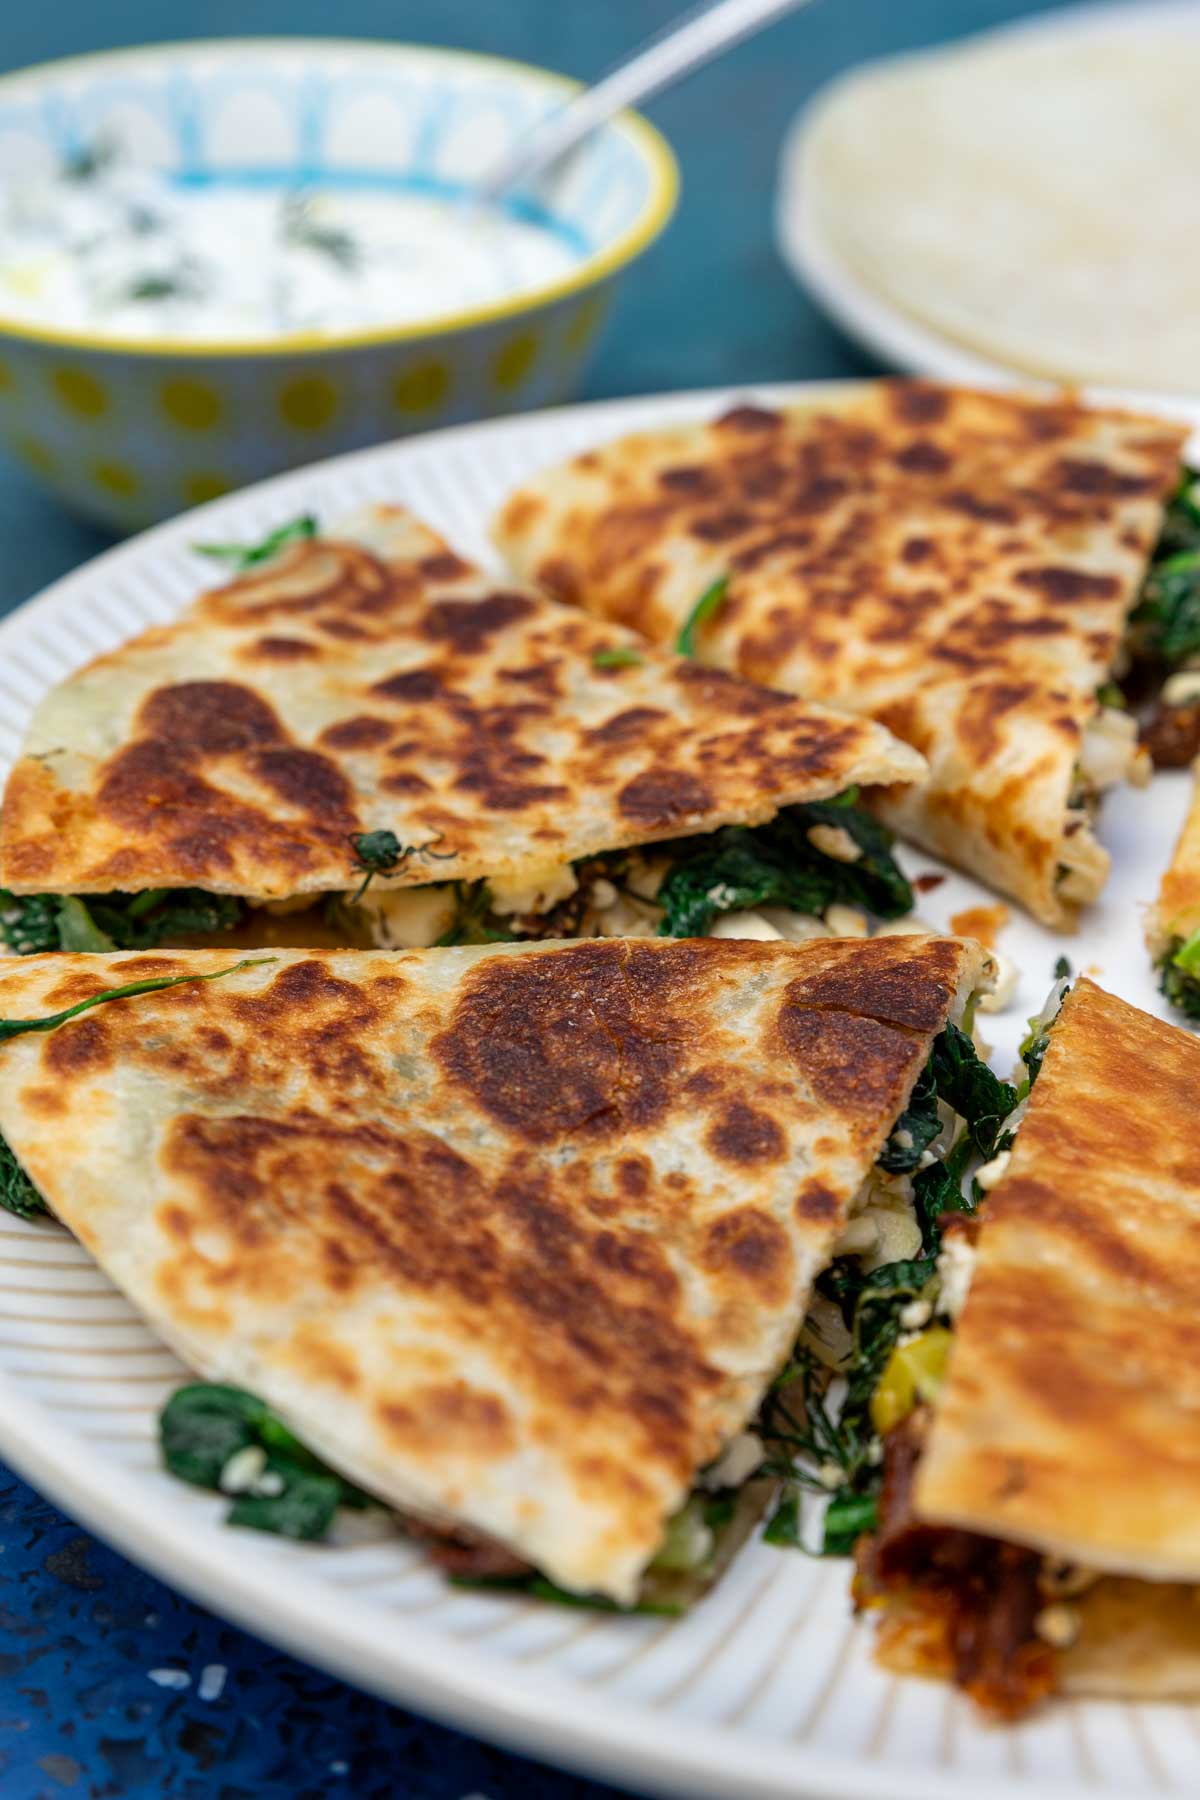
Step 5. With a sharp knife, slice the delicious Mediterranean quesadillas into 3 equal triangles.
Step 6: To make the optional (but highly recommended) tsatziki sauce, simply mix everything together and pop into a bowl!

How To Serve
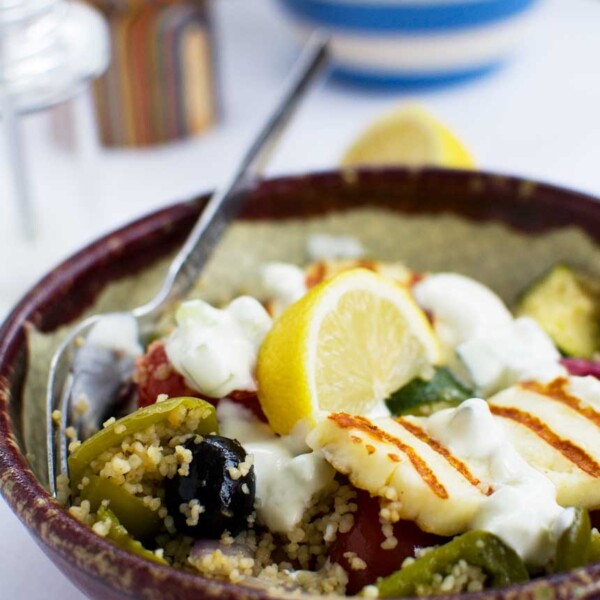
Slice into triangles (like a pizza!). Serve as an appetizer or light lunch with a bowl of tsatziki sauce for dipping. Not a fan of tsatziki? How about sweet chili sauce instead? It goes surprisingly well!
Recipe variations
- Try a different cheese instead of feta. Mozzarella, grated Greek kefalotyri, cream cheese such as Boursin cheese or even cheddar cheese will all work well.
- Add chopped olives to the mixture for even more classic Mediterranean flavor.
- Add leftover chicken or another leftover meat such as shredded beef or lamb.
- Add some spice! How about finely sliced fresh chili, a pinch of red pepper flakes, or even some jalapenos?
Recipe FAQs
You can make the filling 1 to 2 days ahead of time. Simply cover the bowl and keep in the fridge until you’re ready to eat. This is perfect for when you want to serve the quesadillas as an appetizer for guests! You can also make the tsatziki ahead of time and keep it in the fridge for 3 to 4 days!
Leftover Greek quesadilla triangles reheat really well either in a hot pan again for a minute or two, or in an air fryer for about 4 minutes at 350F/175C.
More delicious spinach and feta recipes
- Having a party? Don’t miss these Greek filo parcels. They’re always so popular, and they’re easy to make ahead!
- Spinach and feta filo pie is classy, but so easy to make. It’s perfect for a lunch for the family, or for serving to guests.
- Spinach and feta stuffed chicken breasts are surprisingly easy to make. This is a stovetop recipe, so no need to turn on the oven.
- This Greek mac and cheese bake takes just 30 minutes to make and is on the lighter side. No flour and roux sauce needed!
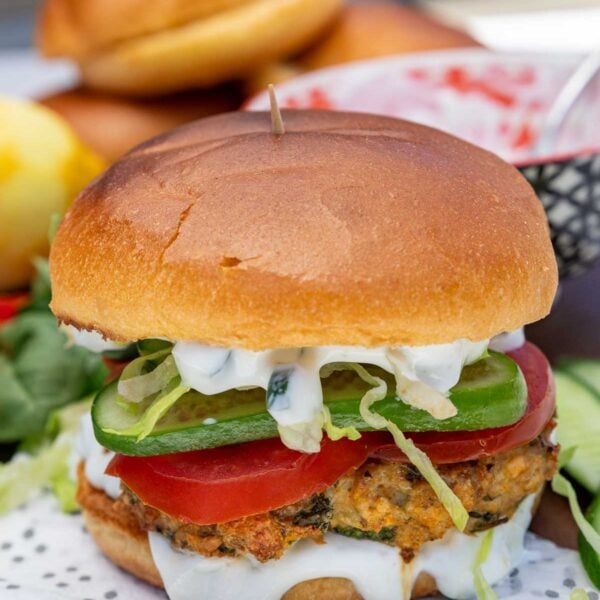
- Try these spinach feta chicken burgers for a delicious Greek twist on a classic burger.
Love Greek recipes?
Check out this list of easy Greek appetizers, or browse all Greek recipes.

Greek Quesadillas With Tsatziki (Easiest Spanakopita!)
Ingredients
For the quesadillas
- 7 ounces spinach, (fresh) Or use half a 10-ounce pack frozen
- 2 green onions, (scallions/spring onions) large ones, chopped finely (use more if they're on the smaller side)
- 2 tablespoons dill, (fresh) chopped finely (substitute with 1 teaspoon of dried dill, or a teaspoon of another Mediterranean herb such as dried oregano)
- 2.5 ounces feta cheese, crumbled
- ¼ cup sun-dried tomatoes, (sun-dried tomato strips or chopped marinated sun-dried tomatoes work well for convenience, or chop whole ones into pieces)
- olive oil, for cooking
- 4 flour tortillas, 8-inch (20cm) in diameter are best, or similar (medium-sized)
- salt and pepper, to taste
For the tsatziki sauce
- 1 cup Greek yogurt, (don’t use regular yogurt – it’s too thin)
- 1 clove garlic, small, crushed
- ½ cucumber, (medium) diced finely, or grated with excess moisture squeezed out
- 2 tablespoons fresh dill, chopped finely
- ½ lemon, (about 3 big squeezes, juice only)
- pinch of black pepper and a drizzle of olive oil
Instructions
- Wash the spinach, then wilt it down in a pan for a few minutes. Alternatively, pour boiling water over it in a colander. Afterwards, squeeze out as much of the water as you can by squeezing it with your hands or in a clean tea towel. Put it into a large bowl.
- Add the chopped green onions, dill, sun-dried tomatoes and feta cheese to the spinach in the bowl. Grind in salt and pepper to taste. Mix together well, then set aside while you make the tsatziki.
- For the tsatziki, put the yogurt into another smaller bowl and add the garlic, cucumber, dill and lemon juice. Mix it all together well. Empty into a serving dish (if you like), then grind some black pepper onto the top and drizzle over a little olive oil.
- Now heat up a frying pan/skillet on a medium high heat and drizzle in a little olive oil (around half a tablespoon). When, hot, put a tortilla into the pan.
- Spread a quarter of the spinach and feta mixture over one half of the tortilla. When the underside is golden and crisp, use a fish slice or similar to fold the other half of the tortilla over the filling. Press down to seal.
- Use the fish slice to remove the quesadilla to a board, let cool for a minute then slice into 3 triangles. Repeat with the rest of the tortillas and filling. Serve with the tsatziki sauce for scooping/dipping.


Really tasty and spanakopita flavour but with just feta, it doesn’t adhere that well to make a finger food as advertised. Need a fork and knife but the flavours were delish. Make a second time with feta but also some mozzarella and that helped the tortillas stick together. Love the idea and flavour but may need to tweak to your preferences. 🙂
Hello Sarah! I so appreciate this honest feedback. I’m really glad you enjoyed them but that’s a good point if you want them to be fingerfood. Mozzarella is a great tweak, but also I think a softer feta variety would work such as Danish or French feta, or you could add a little whisked egg (I think there would be sufficient heat as you press the quesadillas into the hot pan to cook it). I’ll add your observation to the recipe notes – thank you so much!
Love this creative take on spanikopita, delicious! Recipe was perfect, thank you!
Thank you so much for the feedback, Rose – I’m so happy you’re enjoying it! 🙂
This was delicious! I omitted the sun dried tomatoes and added some mozzarella! We used hummus and tzatziki sauce as a dip!
Hello Crissy! I’m so happy you enjoyed these. I love the sound of your changes. A little mozzarella for extra ooze, and hummus would work great as a dip! May I suggest that you also try my spinach and feta filo pie some time? The filling is very similar to the filling for the quesadillas, and the pie makes a lovely meal with a salad or potatoes on the side.
What is the serving size?
Hello Laurie! I’d say 3 to 4 of the triangles per person is about right for a light(ish) lunch, or a larger lunch if you’re serving them with something on the side. This is based on cutting each folded tortilla into 3 triangles. I find them surprisingly filling!
What a delicious meal! I love the combination of flavors!
Thanks, Madi!
These are tasty. I added Left over diced baby new potatoes , used FRESH spinach, FRESH dill And diced chicken. Added a pkg of boursin instead of mozza. Delish. The potatoes really add to it I also brushed the tortillas with garlic butter and sprinkled parmesan on just before baking
Hi Brenda! Wow, your description is making my mouth water. I love the substitutions you made. Thank you so much for the feedback! If you get a moment would you mind giving the recipe a star rating? Thank you so much! Also, may I suggest you try my Greek spinach and feta filo pie next? It’s got a very similar filling but makes a fabulous lunch for guests or easy midweek meal.
I love this Greek Mexican combination! I love quesadillas and I love Greek food, so I know I would love these!!
Hope you give them a try some time, Pam!
I love spanakopita. But you’re right, you can’t have it as an entire meal (unless you’re really treating yourself). This alternative looks a bit healthier, but still delicious!
Hey thanks Nick! I love that this reminds me of spanakopita but isn’t as time consuming to make.
This is delicious! Instant hit which will join the staple recipes for my family. Hubby wolfed it down. These are so light and herby fresh. I used Persian feta, and whole-wheat wraps in place of tortillas. They remind me of Turkish gözleme but lighter. Excellent recipe – thank you! Fiona from Melbourne
Hello Fiona – delighted to hear that this was such a hit! It’s one of my favourite recipes around here too and actually I should make it again soon. It’s been a while! Thank you so much for taking the time to leave your feedback!
Hi Helen,
Lots of comments on here about your location! Haha! Nice and can’t wait to visit it. I am wondering if these would work in the oven? Ever tried that? I have a family of 6 so doing these for supper I would end up eating alone by the time I got to cooking mine and they eating theirs while warm lol! Any thoughts?
Hello Roxanne! Really happy that you want to give these a go! I’m afraid I’ve never tried making them in the oven, but I’m wondering if you could make one ’round’, then put them in a warm oven to keep warm while you make the second ’round’. I’m sure that would work just fine. Let me know how you get on! 🙂
Ok, I tried it for lunch today and just for myself. Delicious! But… my tortilla’s didn’t bind together so I could not pick up and eat. Did I do something wrong or is it meant to be eaten with a fork and knife? I know I know, it all tastes the same, I just wanted to make sure I was not missing something 🙂
Hello Roxanne! I don’t remember having that problem, but to be honest it’s a while now since I’ve made these. If my memory is serving me correctly though I think I usually do use a knife and fork. What you could try if you prefer to eat them like ‘regular’ quesadillas is using just one tortilla, piling the filling on one half, and then folding over into the middle. Flip on the closed side in the pan, then when your quesadilla is done on both sides, slide out of the pan and cut into 3. Then repeat with another tortilla (so you don’t miss out on the amount!). I find this method of making quesadillas helps to keep everything together. I guess this problem is possible as feta doesn’t melt like most cheeses.
Anyway, glad you enjoyed the taste! 🙂
You are so awesome at responding, thank you so much! You are a special lady and a great cook! Thank you again 🙂
Oh Roxanne, it’s an absolute pleasure. That’s what it’s all about! Thank you so much for the compliments… and for being so lovely! 🙂
Hi Roxanne,
I’m not sure if you’re still intrigued with this recipe, but if you Google or search Pinterest for sheet pan quesadillas, you’ll never go back to making individual quesadillas for a family! 😊
Carole
Ah, will check that out, Carole – thanks! This recipe is due for a revamp so will think about adding that info to the post 🙂
Oh my gosh! Since last making these I HAVE done the sheet pan but forgot to share it here as my original comments are from years ago and I had forgotten to share. Thank you for pointing this hack out! 🙂
Nice to hear from you again, Roxanne! Hopefully I’ll get around to updating this post soon and I’ll include the sheet pan hack 🙂
I have a couple guys that I work with and we made these for our cooking group last week. They turned out great! They were super easy to make and were delicious! Thanks for sharing them with us. : )..
Hi Jan – thanks so much for popping back here to report back. I so appreciate that! Really happy that you ended up with something you liked, too. This is one of the most popular recipes on my blog, thanks to those classic Greek flavours!
The whole family is goint o be in greece later this year. I love that country. These look amazing, am going to try this one day.
Are you going too, Pamela? I hope you get the chance to go too! And I really do hope you try these some time. They’re lovely!
This looks so delicious! I can’t wait to try this out on my 8 year old taste tester! Thanks for sharing.
Thank you, Staci! Hope your 8-year-old taste-tester enjoys/enjoyed this. I think it would go down well with children, actually, as the flavours are quite simple 🙂
I am going to make these tonight with a greek salad. I am going to add chicken to mine. It looks so good. Thanks for sharing
Hi Nicole! These would be perfect with a Greek salad! And what a great idea to add chicken too. I’m going to try that! (thanks for the idea!) 🙂
Hi Helen! Saw your this in a Good Housekeeping round up and trying to think how I missed it before! Love how this includes a yummy and easy tzatziki recipe too. Looks so good and I would’ve never thought to mix the two. Need to try this!
Hi Melissa! I didn’t know this was in a Good Housekeeping roundup … that’s exciting! I’m thrilled that you like it. This is truly one of my favourite recipes – it’s always so good. And yes, if you try this, you really must make the tzatziki as well. Thanks so much for passing by!
My quesadilla recipe was in the same roundup and I had no idea either! Figured you might’ve also been in the same boat. Still can’t get over how refreshing a nice bowl of tzatziki sounds right about now! YUM
Well thanks so much for letting me know then, Melissa. You wouldn’t happen to have the link to that, would you? Would love to take a look! I did wonder why this recipe was getting so much attention. Would love to check out your recipe in the round-up too!
Helen, sorry for the last paragraph of my previous “comment” but feelings are a little overwhelming lately. Browsed through your recipes, especially the desserts and pinned them, can’t wait to try them.
Hey Helen, the quesadillas look scrumptious.I like the way you”ve changed the spanakopita (tortillas for filo pastry), will definately try as I don’t like the oiliness too.Try adding carrots(grated or diced),leeks & a few brocoli flowerets to your recipe, with or without feta.
After reading all the reviews you got, its nice to know our country is liked, hope you met some good greek people as well during your long stay here.Its a pleasant change reading good “stuff” from all the irony, sarcasm and unpleasantries we’ve had for the past four months, so depressing!!!. Politicians suck wherever they come from. Sorry for the change of subject! Have a good and happy life wherever you set roots, regards from Rodos.
Hello, Maria! Thank you SO much for passing by and taking the time to comment. It means a lot to me that a Greek would say that they like this recipe! I absolutely love your beautiful country and have spent many happy years there. Please don’t apologise for ‘talking politics’. I know how hard things have been (and are still) over there and so am really happy to be able to present Greece in a good way … and what better way than through the fabulous food!
I’ve never been to Rodos but have heard really good things about it – one day I’ll visit! All the best and … kalo kalokairi! 🙂 (oooh, how I miss the Greek sunshine!!)
Hi Helen, thanks, you’ve lifted the spirits sky high, as I thought I’d made a fool of myself.Made your “marshmellow & swirly choc. crispy” this afternoon ..y u m m y and crispy,hubby and younger daughter gave thumbs up.Only had dark choc. on hand though, yours looked more impressive with the swirly choc…next time! Rest of the family must try next.
If you ever come to Rodos email me, just have to warn you though…I’m a 61 year old aussie-greek granny to 3 beautiful kids…b u t ….young at heart……..!
kalo kalokairi to you too !!!
Absolutely not, Maria … I am very down-to-earth and you can say anything you like here!! I have plenty of opinions of my own about Greece and they aren’t all positive! And … you’re Australian! My husband is Australian (from Perth) and we are probably going to go back and live there some time next year (we’ve lived there for a few months several times over the last couple of years).
I’m VERY happy that you tried the marshmallow crispy squares and enjoyed them! I love sharing my recipes but am always a bit nervous to hear that someone made one of them (eek! what if they don’t work?!)
Lastly, thank you SO much for the extremely kind offer to email you if I pass by Rodos. Some day I hope to visit Rodos and it would be wonderful to meet for a long frappe!
Thanks again for passing by and commenting … and good luck with the swirly choc versions of the marshmallow squares! 🙂
Oh, and by the way I love your ideas for things to add to the filling for the quesadillas – leeks and broccoli would be great!
I’m definitely craving all of the Greek food now! YUM!
Good! Then the post had the desired effect! 🙂
Oh my goodness this recipe looks FANTASTIC. I have to make this now. I’ll let you know how it turns out!
Hello Natalia! Thanks so much for passing by – your blog name sounds intriguing so I’ll definitely be paying you a visit, too! We Greece-loving-bloggers need to stick together!
Please do let me know what you think of this. It was a busy week throw-together really, but I did enjoy it.
I’d love to borrow that balcony 🙂
I lol’d about your basil plant… I just bought one today, fully knowing it will be a bare wreck in 2 days. I think everyone should own two pots of basil – one to be pretty, one to rip all the leaves from!!
Best of luck with your move, hope it goes quickly and smoothly.
Hey, great plan to buy two plants each time. I love basil but I don’t think I’ve made a plant last more than a week or so, either.
Thanks for the good wishes. Things are so crazy right now, but it’s just a few more days!
These are looking lovely. Love to discover new ways of making the quesadillas, are one of my family favorite.
Hello, Ella! Thanks so much for paying me a visit! And so glad you like these quesadillas, too. They seem to have been a bit of a surprise hit!
I pinned this straight away. I love mexican food and love a good twist on it. This looks perfect.
So glad you like this, Mariana, and thanks so much for pinning! The best thing about it is that it’s so easy!