Perfect Chocolate Orange Cake With 3-Ingredient Ganache
on Oct 05, 2021, Updated Feb 20, 2023
This post may contain affiliate links. Please read my disclosure for more info.
Impress yourself and everyone else at your next special occasion with this easy chocolate orange cake for a zesty twist on a classic chocolate fudge cake. With its delicious 3-ingredient ganache, it’ll really steal the show! It’s super rich, decadent, moist and fudgy, while not too sweet. The dark chocolate and citrus flavours complement each other well, and it’s easy to make in just one bowl (well, almost).
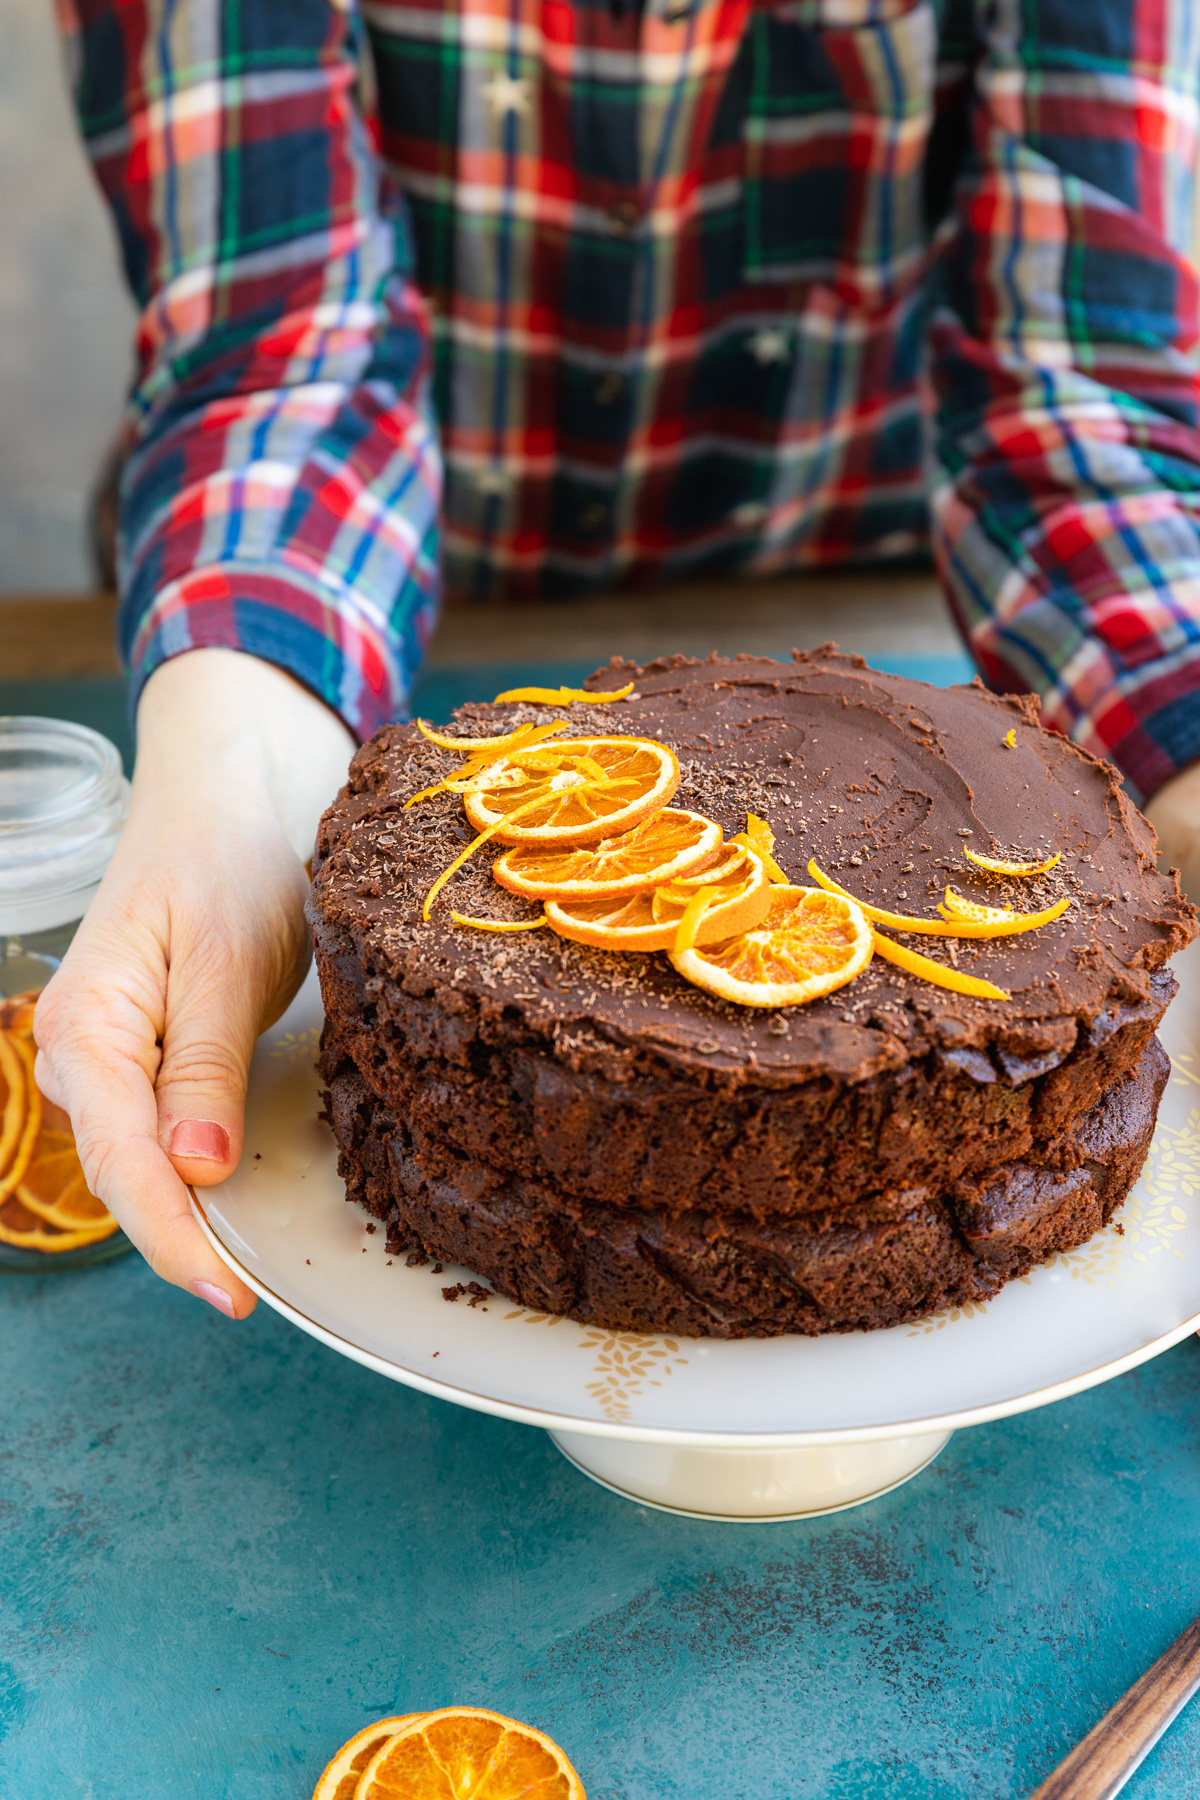
There’s no shortage of easy chocolate desserts on Scrummy Lane already. This 6-ingredient gooey Swedish chocolate cake is legendary. Make this rather classy no-bake chocolate truffle cake in just 10 minutes. There’s even a 30-minute healthy chocolate cake, but don’t worry no-one will ever know it’s a healthier cake when they taste it! 😉
But when it comes to chocolate cake, there’s always room for one more. This chocolate orange cake is a layer cake with a zesty twist – perfect for afternoon teas, birthday parties and more.
Chocolate and orange are a match made in heaven, right? So chocolate and orange lovers – this is for you.
Table of Contents
Why it’s a perfect chocolate orange cake
- Great flavour. It’s super moist, rich, and fudgy with a decadent chocolate flavor. Most fudge cakes are made with oil. This one is buttery without being overly sweet.
- You can really taste the orange with the juice and zest of 2 whole oranges (plus extra zest!) in the batter and orange ganache.
- It’s almost (but not quite!) a one bowl chocolate orange cake recipe. The butter is melted, so all you need is a wooden spoon to stir everything together. No stand or hand mixer necessary.
- Everyone loves it. This is perfect for birthdays and special events, or just an afternoon tea with family and friends.
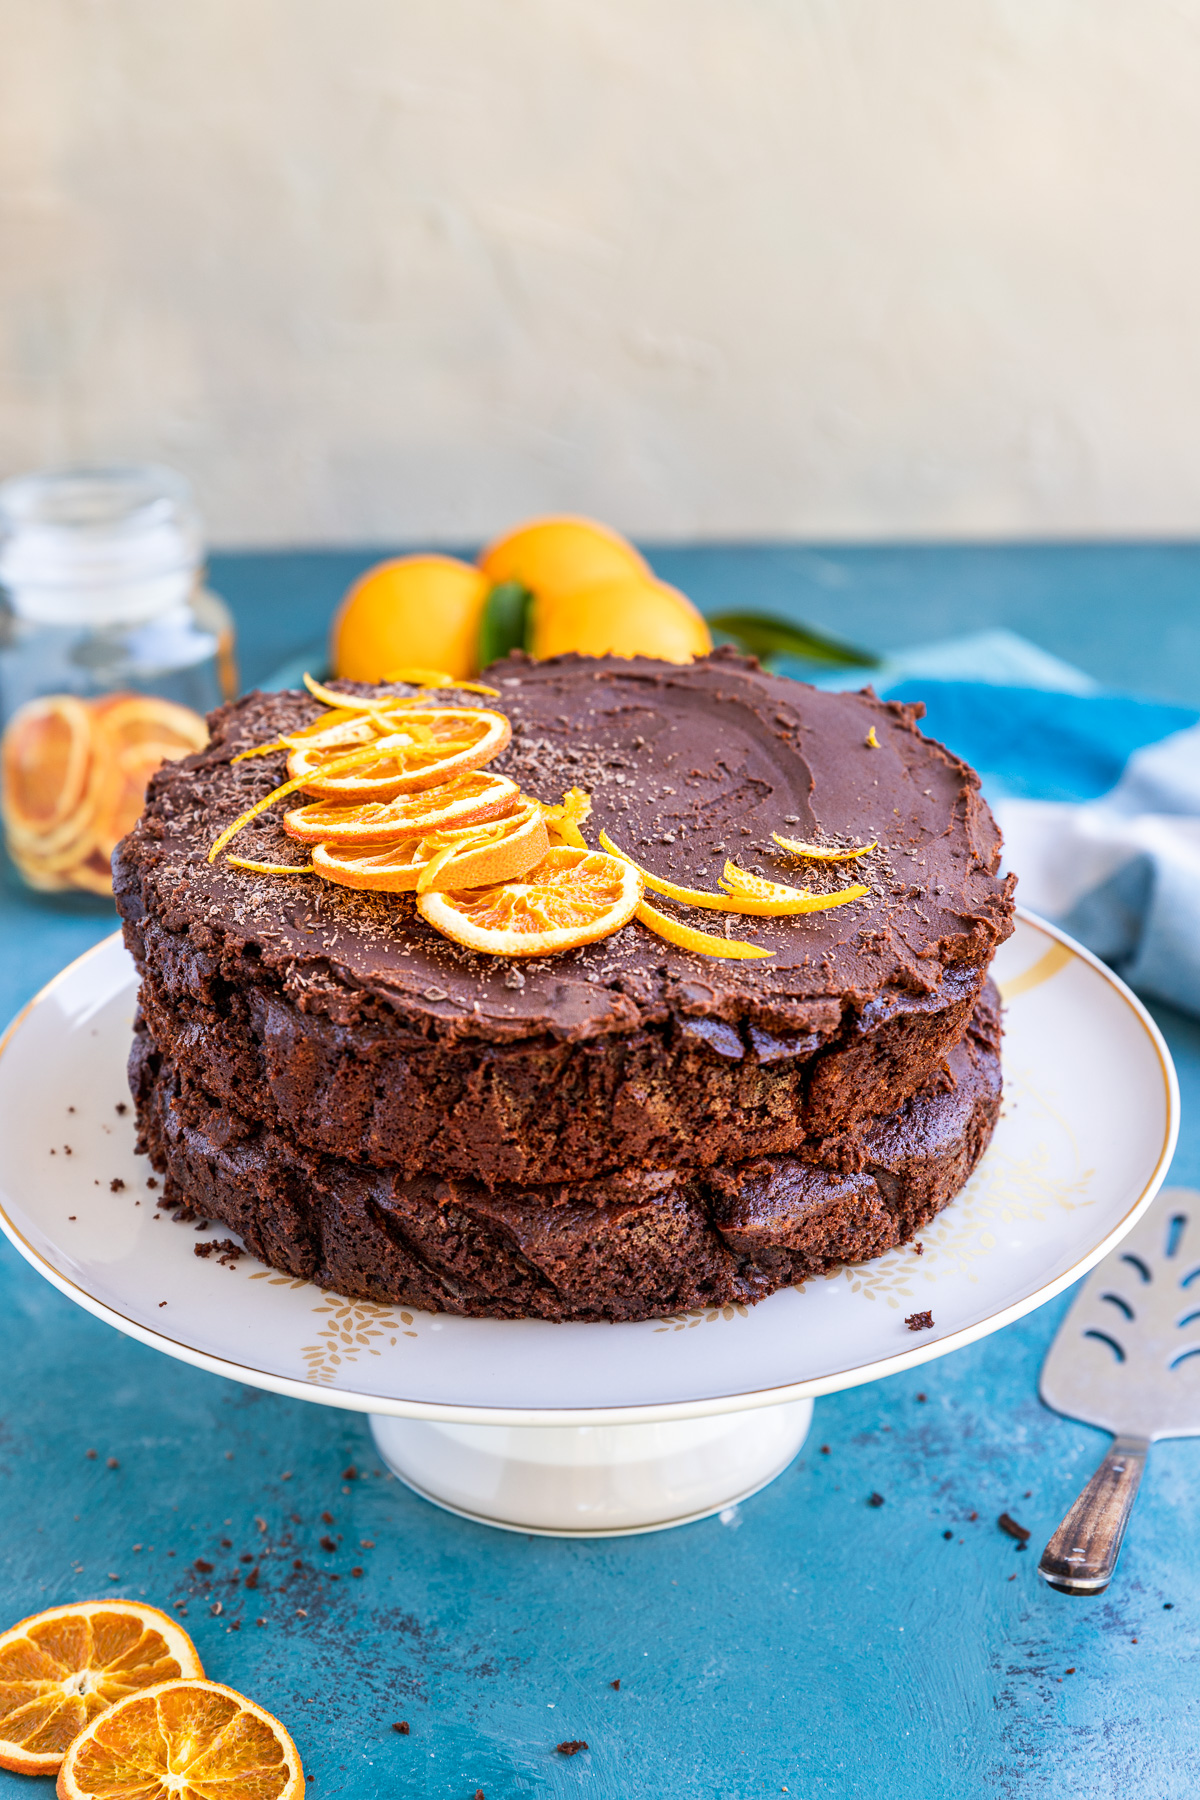
- The frosting/decoration is so easy. You need just 3 ingredients and a few minutes to make the chocolate ganache. Use half to sandwich the 2 cake layers together and the other half to spread over the top. I like to finish with a small grating of chocolate and some dried orange slices or chocolate candied orange slices if I have them. But grated chocolate and fresh orange slices works just as well.
- It keeps for 4 to 5 days in an airtight container. Great for making ahead!
- All in all… this is one of my ‘most tested’ recipes! I tried many different versions before landing on the final recipe. I feel like this chocolate and orange cake is the best it can be. Try it for yourself and see if you agree!
About the ingredients
Buttermilk: This helps to make the cake extra moist and delicious. My little trick is to make something very like ‘buttermilk’ by mixing orange juice with ordinary milk.
Butter: For richness and taste. The butter is melted, which means it’s just mixed into the other ingredients rather than having to be creamed with the sugar first.
Dark chocolate: Just a little – 50 grams or 1.75 ounces, for extra richness and moisture.
If you can get hold of some orange flavoured chocolate such as Terry’s Chocolate Orange, by all means use that for an extra hit of orange.
Cocoa: You can either use ordinary unsweetened cocoa powder or Dutch processed. Dutch processed is a little darker and richer in flavour. I usually use ordinary cocoa powder.
Sugar: Light brown sugar. I try to keep my cakes on the less sweet side these days, so I use just 1¼ cups or 225 grams in the batter.
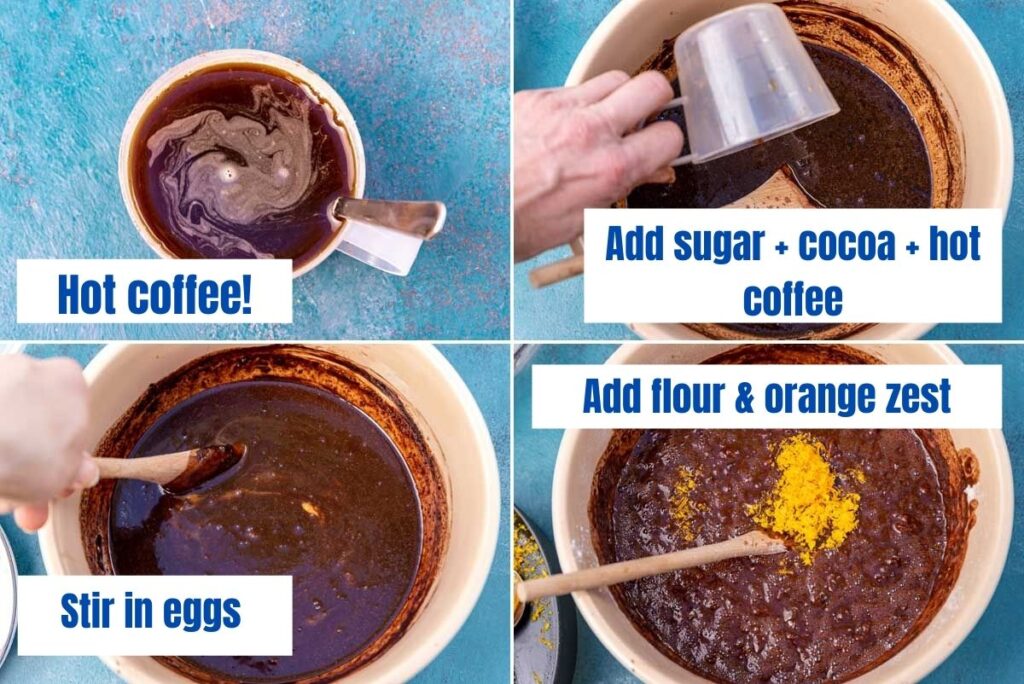
Hot coffee: This is another of the ‘secret’ ingredients! You won’t taste it – it just intensifies the chocolaty flavor. Instant/Americano/Long black all work. No coffee? No worries, just use hot water.
Eggs: 2 whole large eggs (around 60 grams or 2 ounces) plus 1 extra yolk for moisture, structure and lift. Room temperature is best.
Flour, salt, baking soda: I use self-raising flour (UK/Australia) for ease. If you’re in the USA, use plain flour and 1.5 teaspoons of baking powder (not self rising flour which isn’t exactly the same). A touch of baking soda balances out the acidity of the cocoa powder.
Generally you can replace self raising flour with gluten free self raising flour in a ratio of 1:1 in a chocolate fudge cake and the cake will still taste delicious.
If you’re using plain/all-purpose gluten free flour, add 1 teaspoon of baking powder per cup of flour, so 1.5 teaspoons for this recipe. If your flour doesn’t contain xanthan gum or another ‘elasticity’ replacement, add a quarter teaspoon of xanthan gum as well.
Let me know how you get on if you try it!
Whole oranges (3): You’ll use the zest of all 3 (Most in the cake batter and the rest in the ganache) and the fresh orange juice of 2. We want to make sure we can taste the orange in this orange chocolate cake!
For the ganache: A whole large bar of dark chocolate (200 grams or 7 ounces), ¾ cup of heavy/double or pouring cream (not thickened cream) and some orange zest.
What kind of cream to get can be a bit confusing as there are usually several types of cream to choose from in supermarkets. They can also be called different things in different countries! I usually go for simple pouring or whisking cream. Double cream also works. I generally avoid ‘thickened cream’ as the ganache will potentially set too hard.
In the USA, go for heavy or whipping cream. In the UK, double or whipping cream will work. Avoid light cream or half and half. It might be OK, but better to be on the safe side.
How to make a chocolate orange cake
If like me you only ‘do’ simple desserts, this is definitely one for you to try. You’ll impress yourself and everyone who tastes it!
Step 1: Start by making the ‘buttermilk’ by pouring the juice of 2 oranges into a cup and topping up with milk. It will curdle and look terrible, but that’s OK – it’ll add to the moisture and deliciousness of the cake.
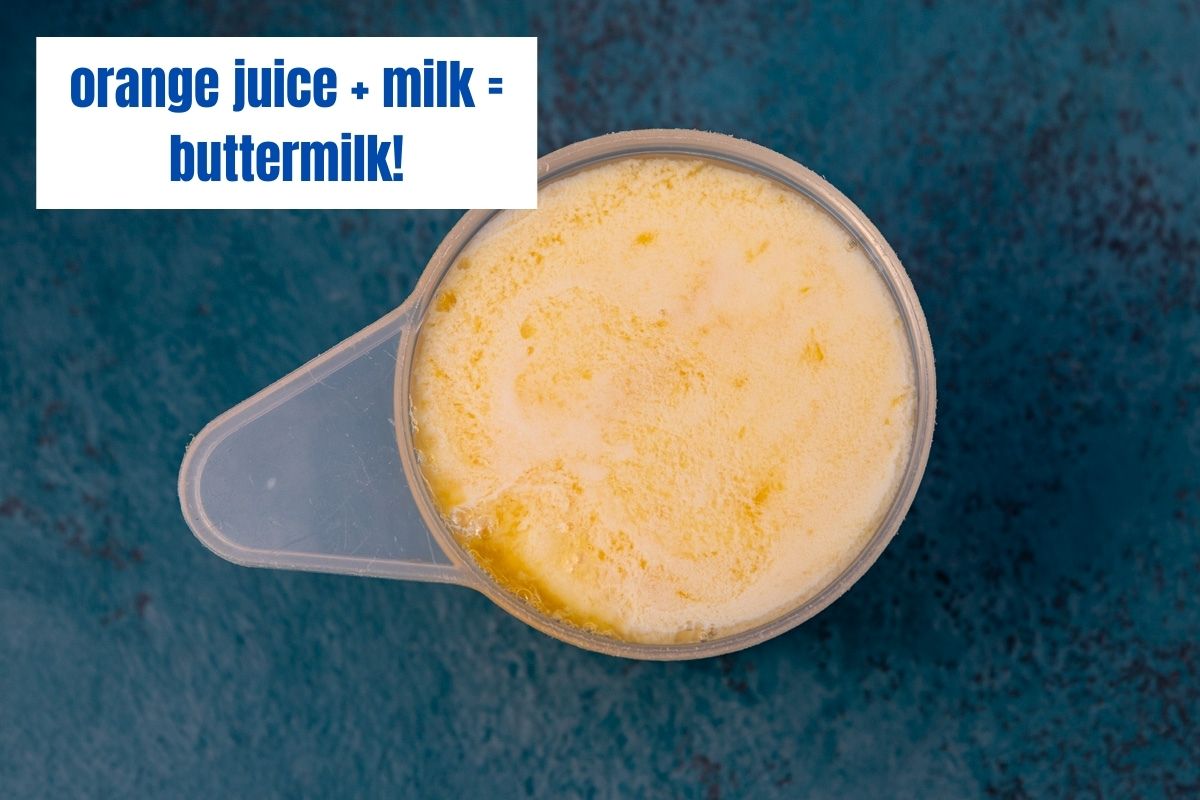
Step 2: Melt the butter and chocolate together in the microwave in 30-second bursts. I find 1.5 to 2 minutes is about right.
Step 3: When it’s melted or almost melted, pour in the buttermilk and warm everything a little more – 30 seconds should be enough. Stir together until you have a smooth mixture.

Step 4: Stir in the cocoa and sugar.
Step 5: Pour in the hot coffee. Stir. Let the mixture cool for a short while.
Step 6: Add the eggs (lightly whisked). You need 2 whole eggs plus a yolk. To get just the yolk, hold the whole egg in one hand and let the whites drip through your fingers into a bowl.
Step 7: Folding in the flour, salt, baking soda and orange zest finishes off the cake batter. It’ll be really runny. That’s fine!
Pro tip: Sift in the flour to help avoid lumps! If you don’t have a sieve, sprinkle it over little by little and mix until you can’t see any more white bits.
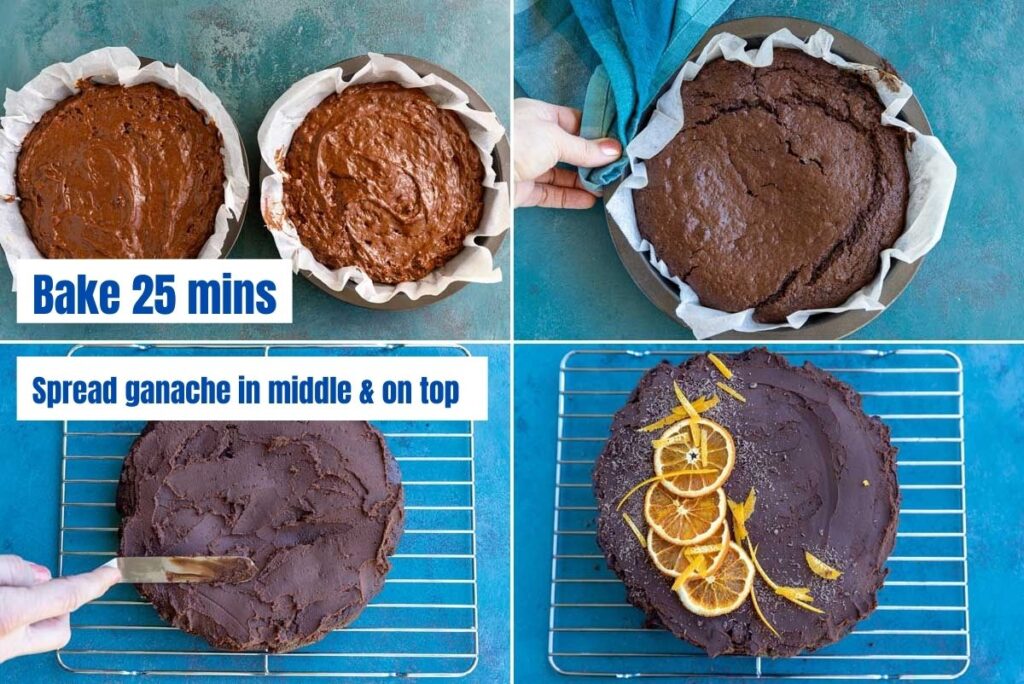
Step 8: Pour half of the batter into each lined cake pan. It will be runnier than shown in the image below (this photo is from an earlier version of the recipe).
Step 9: Bake for around 25 minutes or until a skewer inserted into the centre of the cakes comes out clean or with just a few sticky crumbs on it. Be careful not to overbake, though. I find it can go from still runny in the middle to perfectly baked in around only 5 minutes.
Step 10: Let cool completely. Then spread half of the ganache over one of the cakes. Put the other one on top. Spread the other half over the top.
How to make the ganache
I don’t know about you, but I’m not a fan of frostings or icings that have lots of ingredients or take a lot of time to make.
After my cake’s baked, I’m impatient to finish it off and get on with the very serious business of eating it!
If this is you too, you’re in luck because you only need 3 ingredients to make the very rich and yummy chocolate orange ganache. Imagine the cake covered with chocolate truffle and you get the idea.
All you need to make it is good quality dark chocolate (use orange flavoured if you can find it), double, heavy or pouring cream (all of these work) and orange zest.
You won’t believe how easy it is to make in 3 easy steps:
Step 1: Melt the chocolate in the microwave in 30-second bursts for around 1 to 1.5 minutes. Then add the cream and heat again until the chocolate is fully or very nearly melted.
Step 2: Mix really well until smooth. Then stir in the zest of an orange (you’ll have reserved this from when you made the cake batter so it’s all ready to go). Add a sneaky half teaspoon of salt as well if you like.
Step 3: Cover the bowl and chill in the fridge for 2 to 2.5 hours or until a soft spreading consistency. You don’t want it to be either running off the cake or too solid to spread. If it’s too runny pop back in the fridge for another half an hour. If it’s too hard, melt it in the microwave for just 5 to 10 seconds until a little softer again.
For future reference, this 3-ingredient mixture also makes a delicious chocolate sauce if you use it immediately after mixing in the cream! Let it set a little more and you can roll it into the most delicious chocolate orange truffles! Just saying…
How to decorate your cake
If you like, decorate your orange chocolate cake with any or all of the following:
- a bit of grated dark chocolate
- dried orange slices (Check out the recipe – there are so many uses!) or this incredibly delicious candied orange garnish.
- regular fresh orange slices (remove before storing, though, as they’ll spoil before the cake does)
- small bits of orange peel (I use a vegetable peeler)
As you can see from the photos, I usually start by sprinkling some grated chocolate over my chocolate orange cake. Then I lay 4 to 5 dried orange slices on one half of the cake. Then I sprinkle over a few small bits of orange peel. Easy but classy, don’t you think?
How to serve it
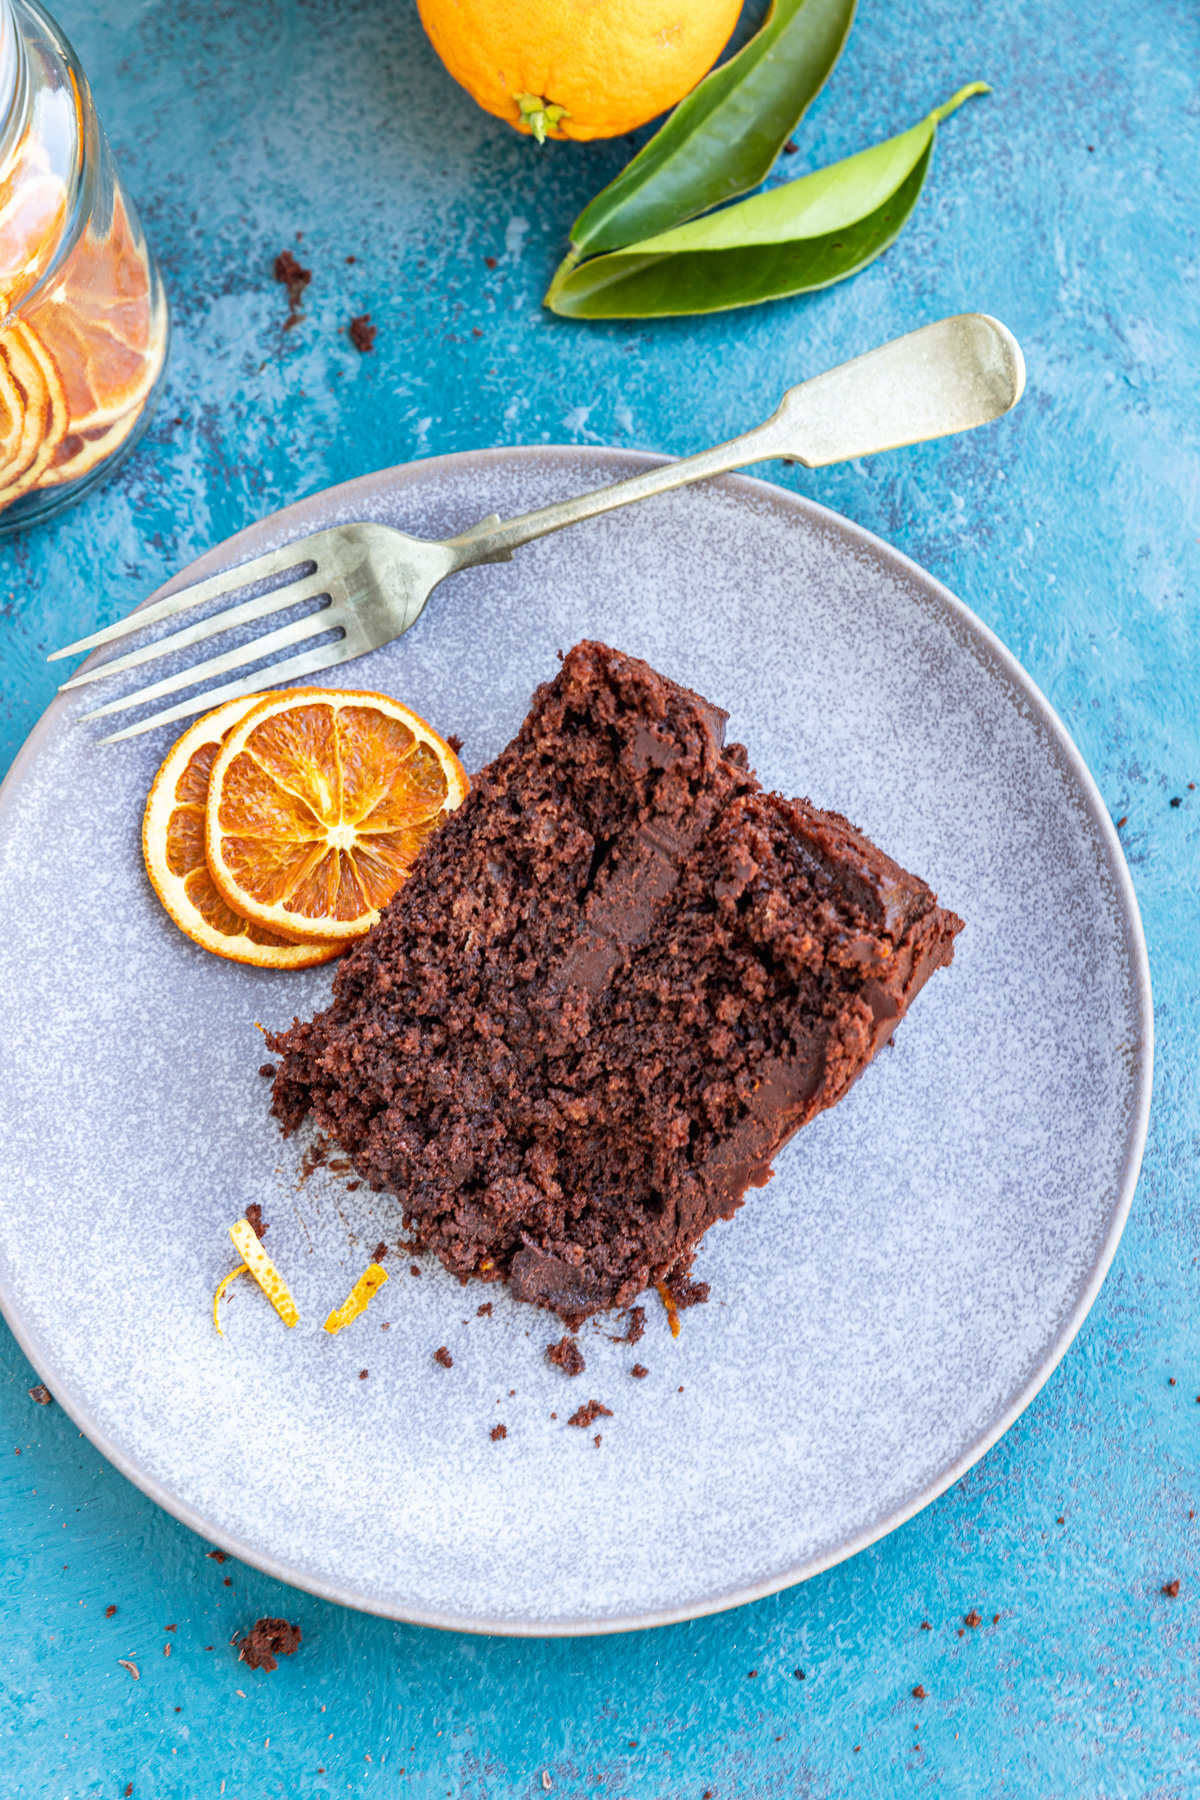
Honestly? This perfect orange chocolate cake is moist, fudgy and chocolaty enough to be served by itself. It doesn’t ‘need’ anything else at all.
Like most fudge cakes, it’s excellent served either cold or warm. I prefer it cold. The texture is really fudgy and the ganache tastes exactly like chocolate truffles. However, to warm individual slices, start with just 20 seconds in the microwave. Top with cream, ice cream or even custard, or serve it as it is.
Start with smaller slices than you might think. It’s not overly sweet but it is quite rich and dense, and even more so when you factor in the ganache.
Am I making you hungry yet? 😉
More things to know (FAQs)
I usually sift the flour into the batter to reduce the chance of lumps. Stir until the flour is all combined and you can’t see any white bits. Then stop mixing – you don’t want to overmix and risk getting tough cake. It may still look like there are some lumps, but that’s OK. You won’t see or taste them when the cake is baked.
If you don’t have a sieve, just sprinkle the flour over and stir in little by little.
I usually go for a supermarket own brand (so not too expensive) dark chocolate with about 45 to 55% cocoa solids. Nice and dark, but not too bitter to eat on its own.
I find that in general it takes 2 to 2.5 hours for the ganache to set to the desired consistency. This may vary however depending on the exact type of chocolate and cream you use.
I recommend checking after around 2 hours. You’re looking for a spreading consistency, a little similar to Nutella or peanut butter. If it’s still too runny leave it for a while longer. If on the other hand it’s set too much, just microwave for 5 to 10 seconds until slightly softened again.
If you like, you can pour all the batter into a lined rectangular 9 x 13 inch baking pan and make a sheet cake instead of a layer cake. Make the same amount of ganache and spread it all over the top and sides in one thick layer. Mmm!
The cooking temperature will be the same (160C or 320F) but the cooking time might be slightly different depending on the type of pan. Check at 20 minutes and every 5 minutes after to see if it’s done.
No, it doesn’t. If you have leftovers (a big ‘if’), store it in an airtight container (a traditional round cake tin is perfect) in a cool place for 4 to 5 days.
If the weather is especially hot, keep it in the fridge. Cover loosely with aluminium foil and store in an airtight container. It will keep well for up to a week like this.
Yes. absolutely. If you’d like to freeze the whole cake, freeze the 2 layers separately. Wrap well in several layers of plastic wrap and/or foil for up to 6 months. I’d make the ganache fresh when you want to serve the cake.
If you’re freezing leftovers, simply store in airtight plastic or glass containers for up to 6 months. Around 2 hours should be enough time for it to defrost or let it defrost slowly in the fridge overnight.
These two flavors pair very well together. The taste of orange is bright and refreshing which is a perfect contrast to the richness and bitterness of chocolate and especially dark chocolate.
Love the sound of this layer cake but rather make something even simpler? Try this simple and moist ricotta orange cake. Just want chocolate? This 6-ingredient gooey Swedish chocolate cake is the one for you!
More easy cakes (great for entertaining!)
FOLLOW ME ON FACEBOOK, INSTAGRAM, PINTEREST AND YOUTUBE.
IF YOU MAKE THIS RECIPE, LET ME KNOW HOW YOU GET ON BY LEAVING A COMMENT AND RATING BELOW… AND DON’T FORGET TO SIGN UP TO RECEIVE ALL MY NEW RECIPES BY EMAIL!
Perfect Chocolate Orange Cake With 3-Ingredient Ganache
Equipment
Ingredients
For the cake layers
- 165 grams unsalted butter, ⅔ cup + a teaspoon/1.5 sticks
- 50 grams dark chocolate, 1.75 ounces
- 2 oranges, juice (½ cup) and zest
- 125 ml milk, ½ cup
- 75 grams cocoa, ¾ cup
- 225 grams brown sugar, 1¼ cups
- 250 ml hot coffee, 1 cup (instant/Americano/long black)
- 2 large eggs
- 1 large egg yolk
- 240 grams self-raising flour, 1½ cups (US: Use all purpose flour + 1.5 teaspoons baking powder)
- 1 teaspoon salt
- ½ teaspoon baking soda
For the orange ganache
- 200 grams dark chocolate, 7 ounces
- 170 ml cream, ¾ cup (double, heavy or pouring cream (NOT thickened)
- 1 orange, zest only
To decorate (optional)
- thin shavings of orange peel (use a vegetable peeler), a little grated dark chocolate
- thin orange slices, either fresh or dried if you have them/can find them
Instructions
For the cake layers
- Preheat the oven to 180C/355F (160C/320F fan oven). Line the bottom and sides of two 8-inch cake tins with baking paper (I use loose-bottomed ones).
- Pour the orange juice into a measuring cup or jug. Top up with the milk so you have a full cup of liquid. Set aside. The liquid will curdle and turn to a kind of buttermilk.2 oranges, 125 ml milk
- In a large bowl, heat the chocolate and butter together in the microwave in 30-second bursts until melted or almost melted (1.5 to 2 minutes).50 grams dark chocolate, 165 grams unsalted butter
- Add the 'buttermilk' you just made to the bowl of chocolate/butter and heat again for 30 seconds. Stir everything together until smooth.2 oranges, 125 ml milk
- Stir in the cocoa and sugar. Then pour in the hot coffee and stir again.75 grams cocoa, 225 grams brown sugar, 250 ml hot coffee
- Whisk the eggs and egg yolk together lightly. Stir into the chocolate mixture until well combined.2 large eggs, 1 large egg yolk
- Finally, sift in the flour, salt, baking soda, and the zest of 2 oranges. Stir just until no white bits are visible any more.240 grams self-raising flour, 1 teaspoon salt, ½ teaspoon baking soda
- Divide the mixture between the two cake pans. Bake for about twenty-five minutes or until a skewer inserted into the centre comes out clean or with just a few sticky crumbs on.
- Let the cakes rest for 10 minutes in the pan. Then let cool completely on a wire cooling rack.
For the ganache
- Meanwhile, to make the ganache, heat the chocolate in a medium jug or bowl in the microwave in 30-second bursts until almost melted (1.5 to 2 minutes).200 grams dark chocolate
- Pour in the cream and heat again for 30 seconds. Add the remaining zest (1 orange) and stir until smooth.170 ml cream, 1 orange
- Cover and let cool in the fridge until set but still easy to spread – like peanut butter (around 2 to 2.5 hours). Use half of the ganache to sandwich the two cakes together, then spread the rest over the top.
- To decorate (optional), grate a little extra chocolate over the top of one side of the cake and sprinkle over thin shavings of orange peel (use a vegetable peeler). If you like, also place 4 to 5 overlapping orange slices on top.thin shavings of orange peel (use a vegetable peeler), a little grated dark chocolate, thin orange slices, either fresh or dried if you have them/can find them


HI Helen,
You don’t use a beater…the recipe says to stir in everything. Is that correct?
Hello! Yes, that’s correct. Just stir everything together with a wooden spoon. I hope you enjoy it! 🙂
Thanks. Delicious recipe.
Thank you so much, Anupama!